Group 7 Data/Programming Page 100
Release R1.03e LEIBINGER JET3
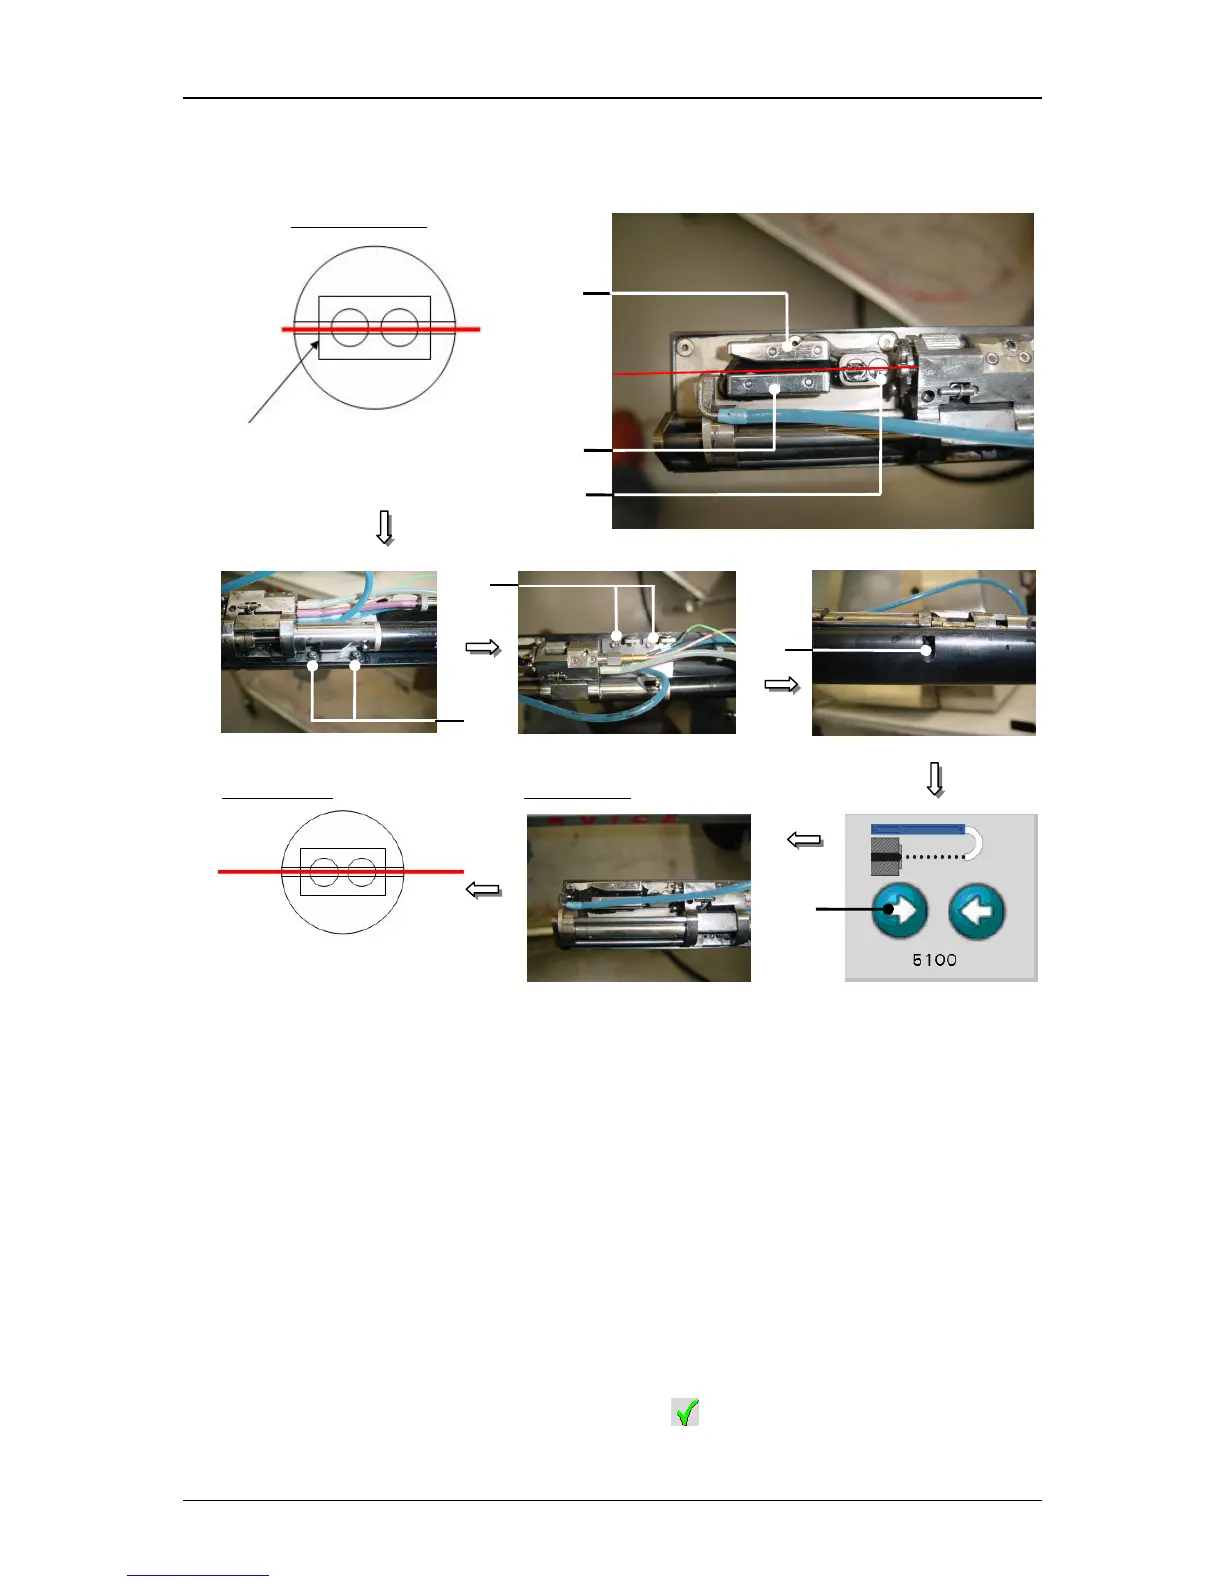
Figure 51
Jet adjustment (Step 3)
15 – Charging tunnel 17 – Holding screw of the fixing plate (5x)
16 – Deflection plates 18 – Arrow button <Open nozzle>
In this position check the setting position again. The ink jet should be now in the
centre of the charging tunnel and parallel to the deflection plates. If necessary
the position has to be corrected again by moving the fixing plate.
If you have reached the correct setting you have to close the nozzle seal. For
this press on the arrow button <Close nozzle>
(19) and keep it pressed until
the nozzle seal is completely closed.
Finally activate the ink jet monitoring with the button <Ink-Flow-Sensor active>
(20).
An activated jet monitoring is marked by a … on the button.
Close the menu with the button <Close> (21).
17
Left angle of charging tunnel
17