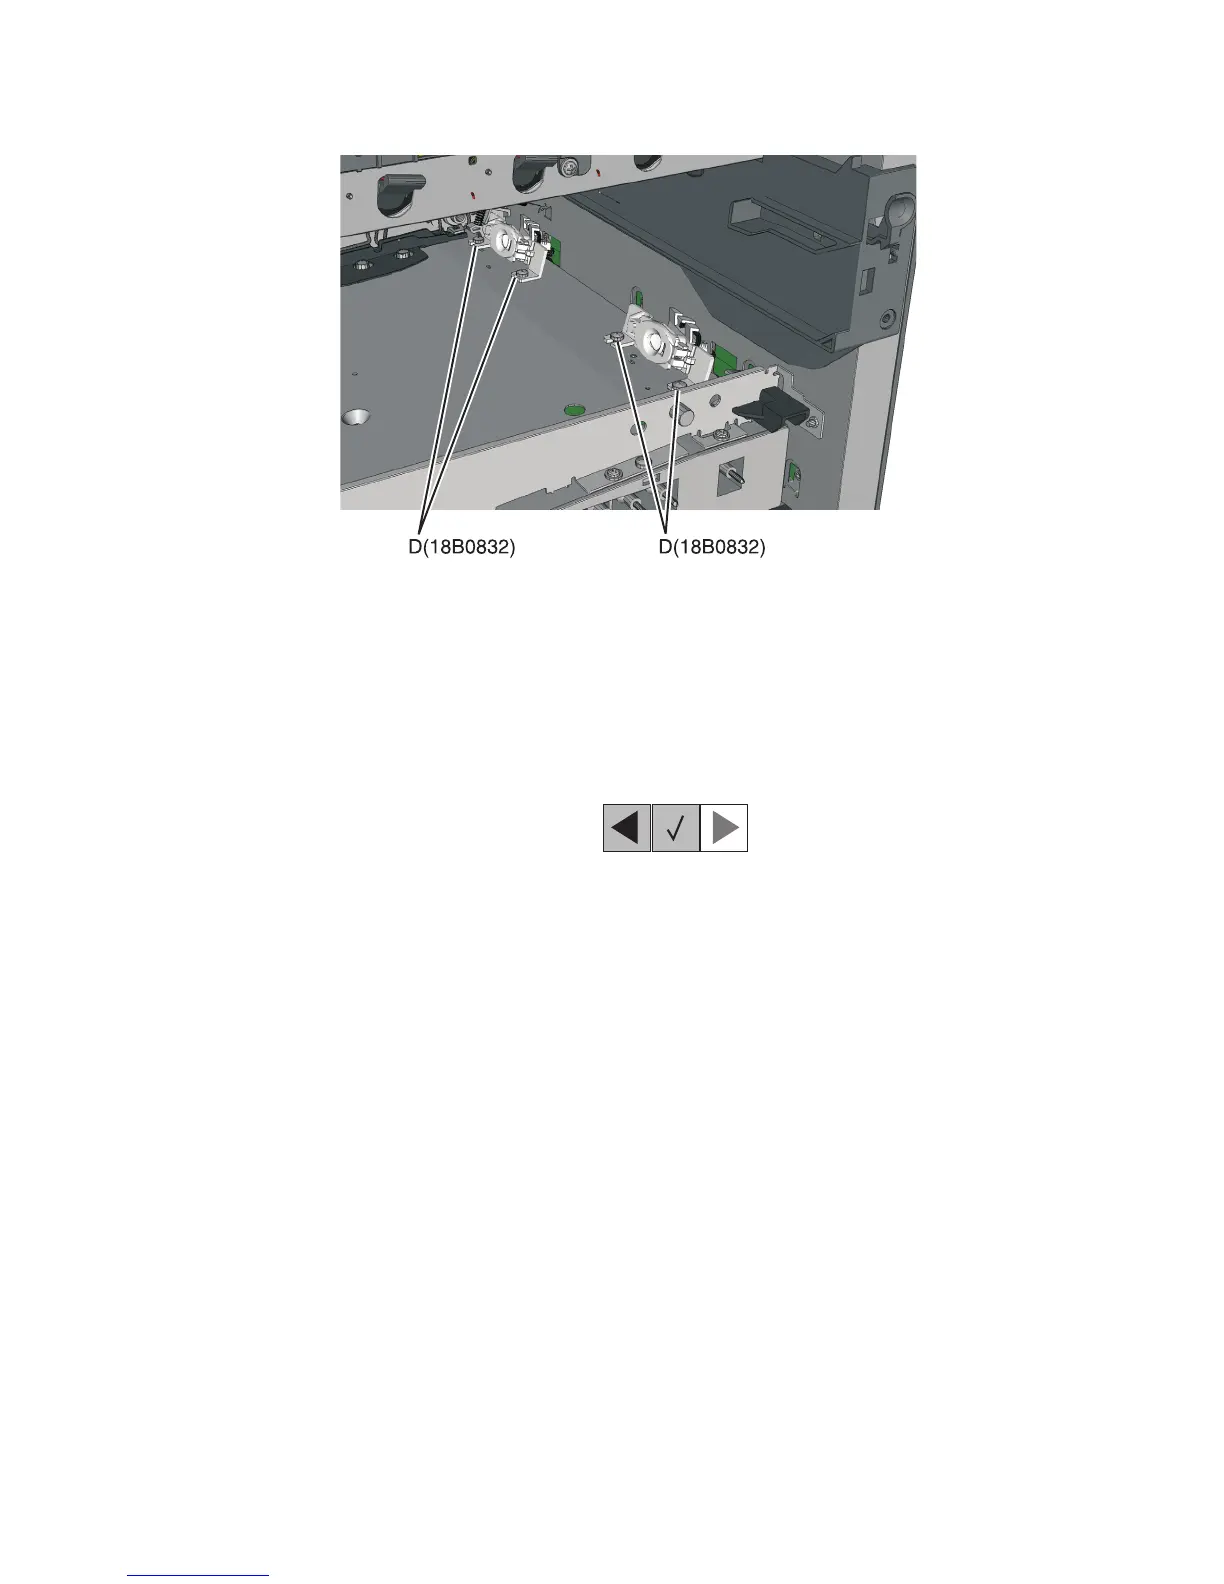
4 Remove the four screws (D) from the left and right sensors.
Installation notes:
• Before beginning the installation of the new left or right toner density sensor, note the 32-digit TPS value printed
on the barcode on the new FRU.
• After installation, perform the TPS Setup. Enter the factory preset alignment number.
a Enter the Diagnostics Menu:
1 Turn the printer off.
2 Press and hold Left and Select.
3 Turn the printer on.
4 Release the buttons when the installed memory and processor speed displays.
b Select TPS SETUP from Diag Menu, and press Select.
c Select Right or Left, and press Select.
TPS Right 1‑16 or Left 1‑16 appears above a blinking 0 in the left position.
d To enter a character or digit:
1 Press Left to decrease or Right to increase the blinking value.
2 Pause for several seconds without pushing any buttons. The blinking value becomes solid. If the value
is incorrect, then press Back to go back and reenter the number.
3 Continue until the last value is reached.
4 When the last of the 16 values is entered and becomes solid, TPS Right 17‑32 or TPS Left
17‑32 appears.
5 Continue entering and pausing.
e After the 32nd number is entered and becomes solid, the number is automatically entered.
– If the number is incorrect, then Checksum does not match appears, and the original screen
appears to reenter the value.
– If the number is correct, then Saving changes to NVRAM appears.
5027
Repair information
237