23 Swing the left lower frame away from the printer, and remove.
Lower right frame removal
1 Remove the waste toner bottle. See “Waste toner bottle removal” on page 250.
2 Remove the imaging unit. See “Imaging unit (IU) removal” on page 246.
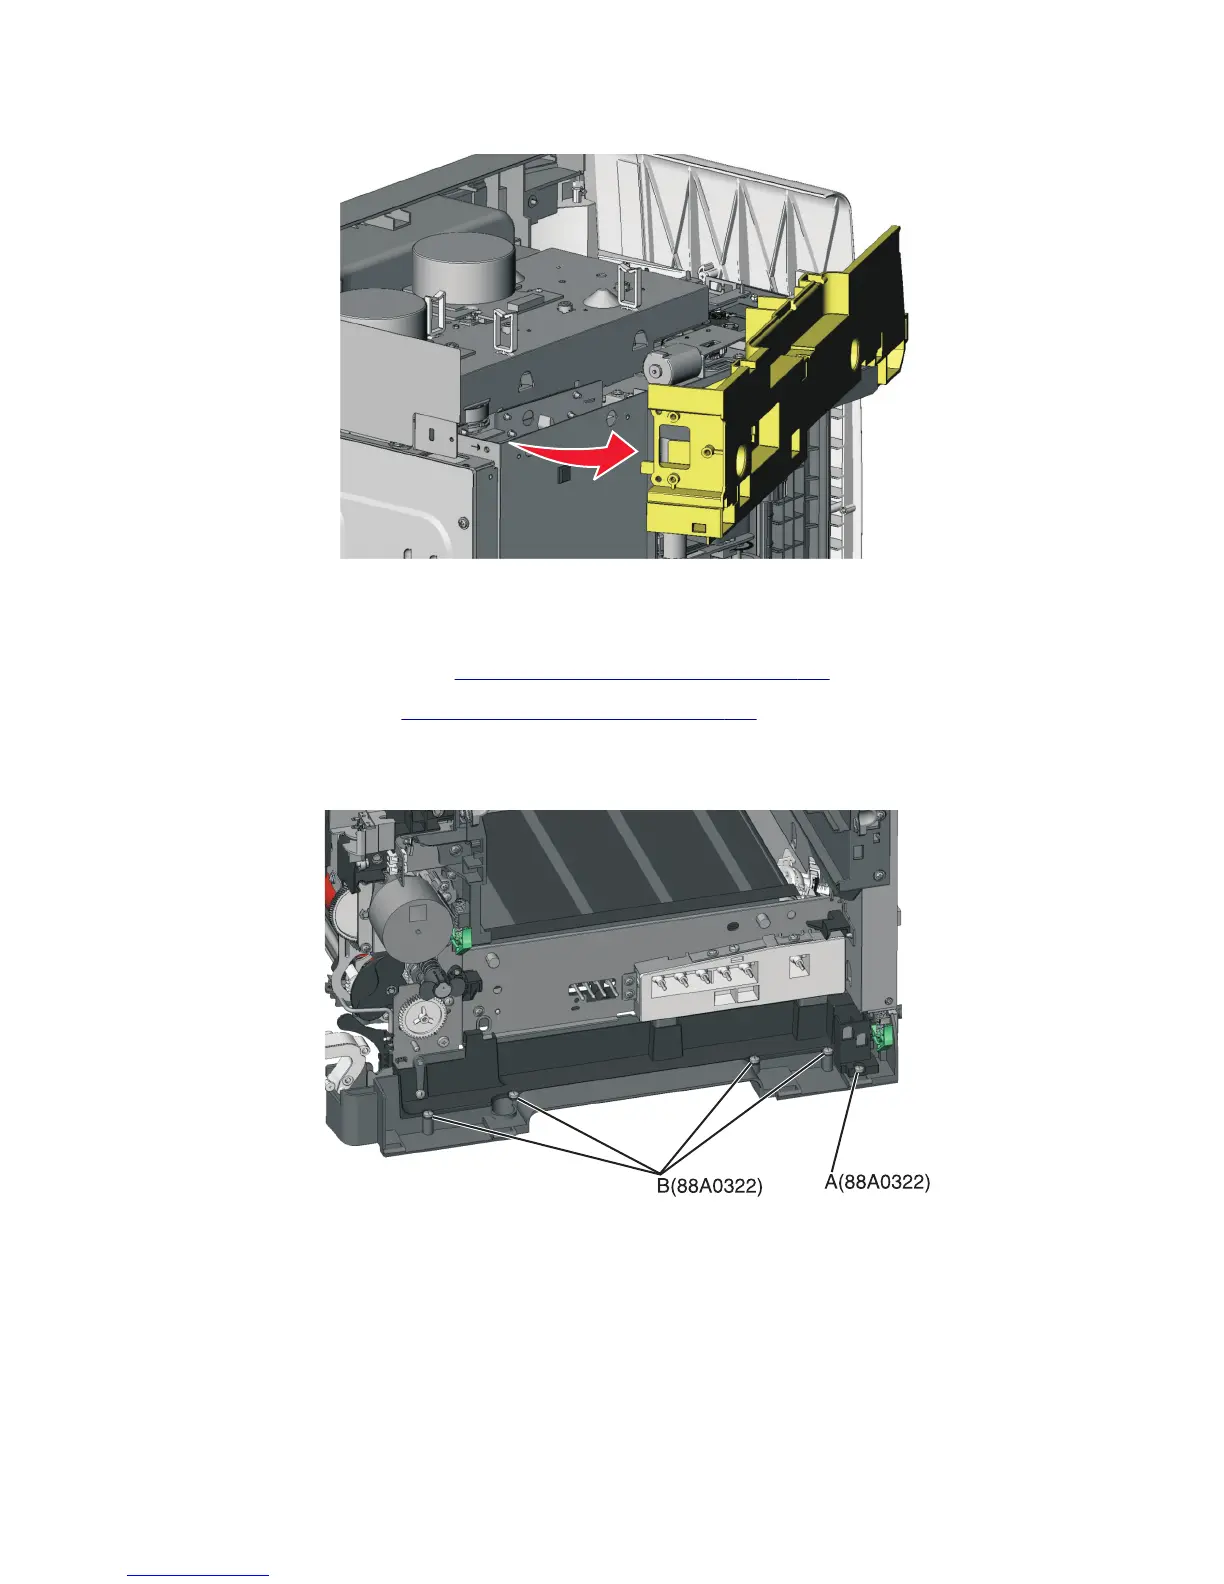
3 Remove the screw (A) in the waste toner bottle sensor contact to allow access to the cable cover, and remove the
four screws (B) securing the cable cover.
Notes:
• The waste toner bottle sensor contact does not need to be unplugged.
• The cable cover is part of the right lower frame FRU.
4 Carefully place the printer on its left side.
5 Remove the three screws (D) securing the lower right frame to the printer.
5027
Repair information
280