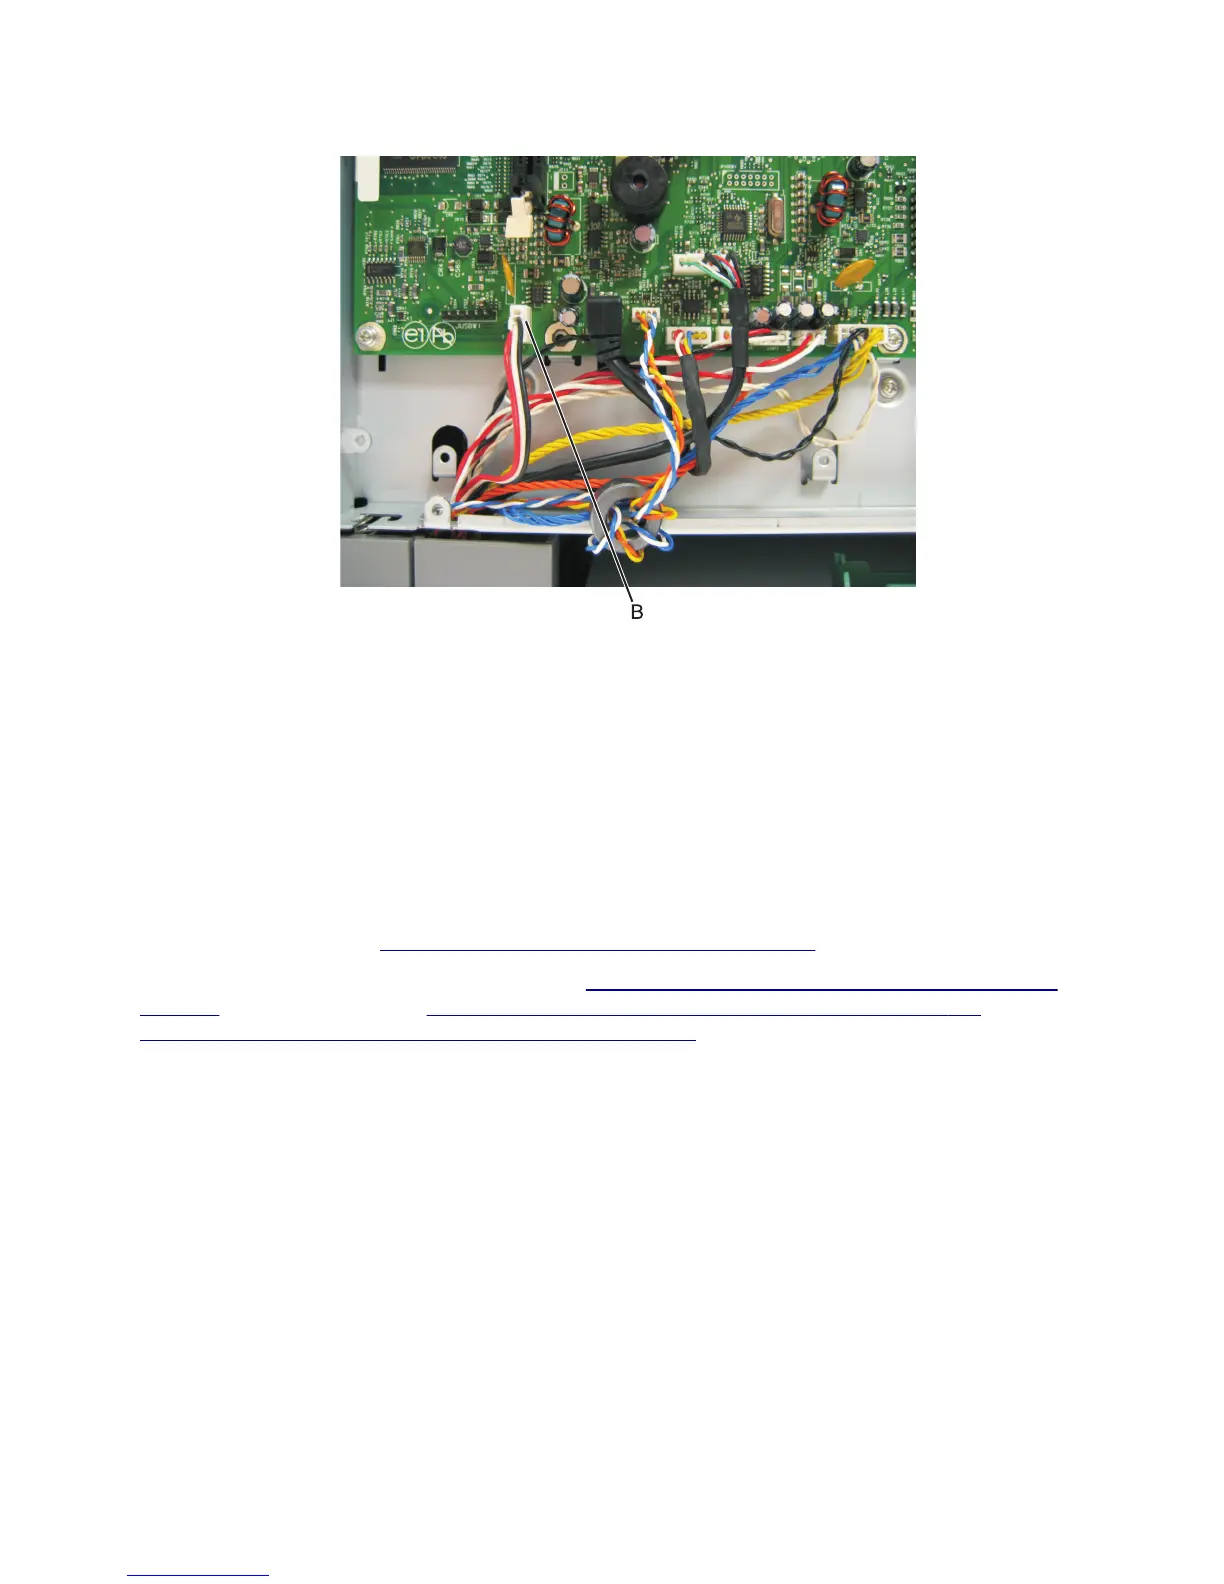
4 Disconnect the waste toner bottle contact block (B) from the controller board.
5 Remove the waste toner bottle contact block.
Front removals
Front cover assembly removal
1 Position the printer with the front at the edge of the table.
2 Remove the media tray.
3 Remove the logo plate. See “Operator panel logo plate removal” on page 262.
4 Remove the operator panel. For CS310 models, see “Operator panel removal (for CS310 models only)” on
page 254. For CS410 models, see “Operator panel removal (for CS410 models only)” on page 256. For CS510, see
“Operator panel removal (for CS510 models only)” on page 259.
5 Remove the operator panel cable through the front upper cover.
Note: If the printer has a USB cable, then remove it from the front cover. See the picture on how to slide the
USB connector through the front upper cover.
5027
Repair information
252