Water Systems --- Section 6
The Executive 2005
287
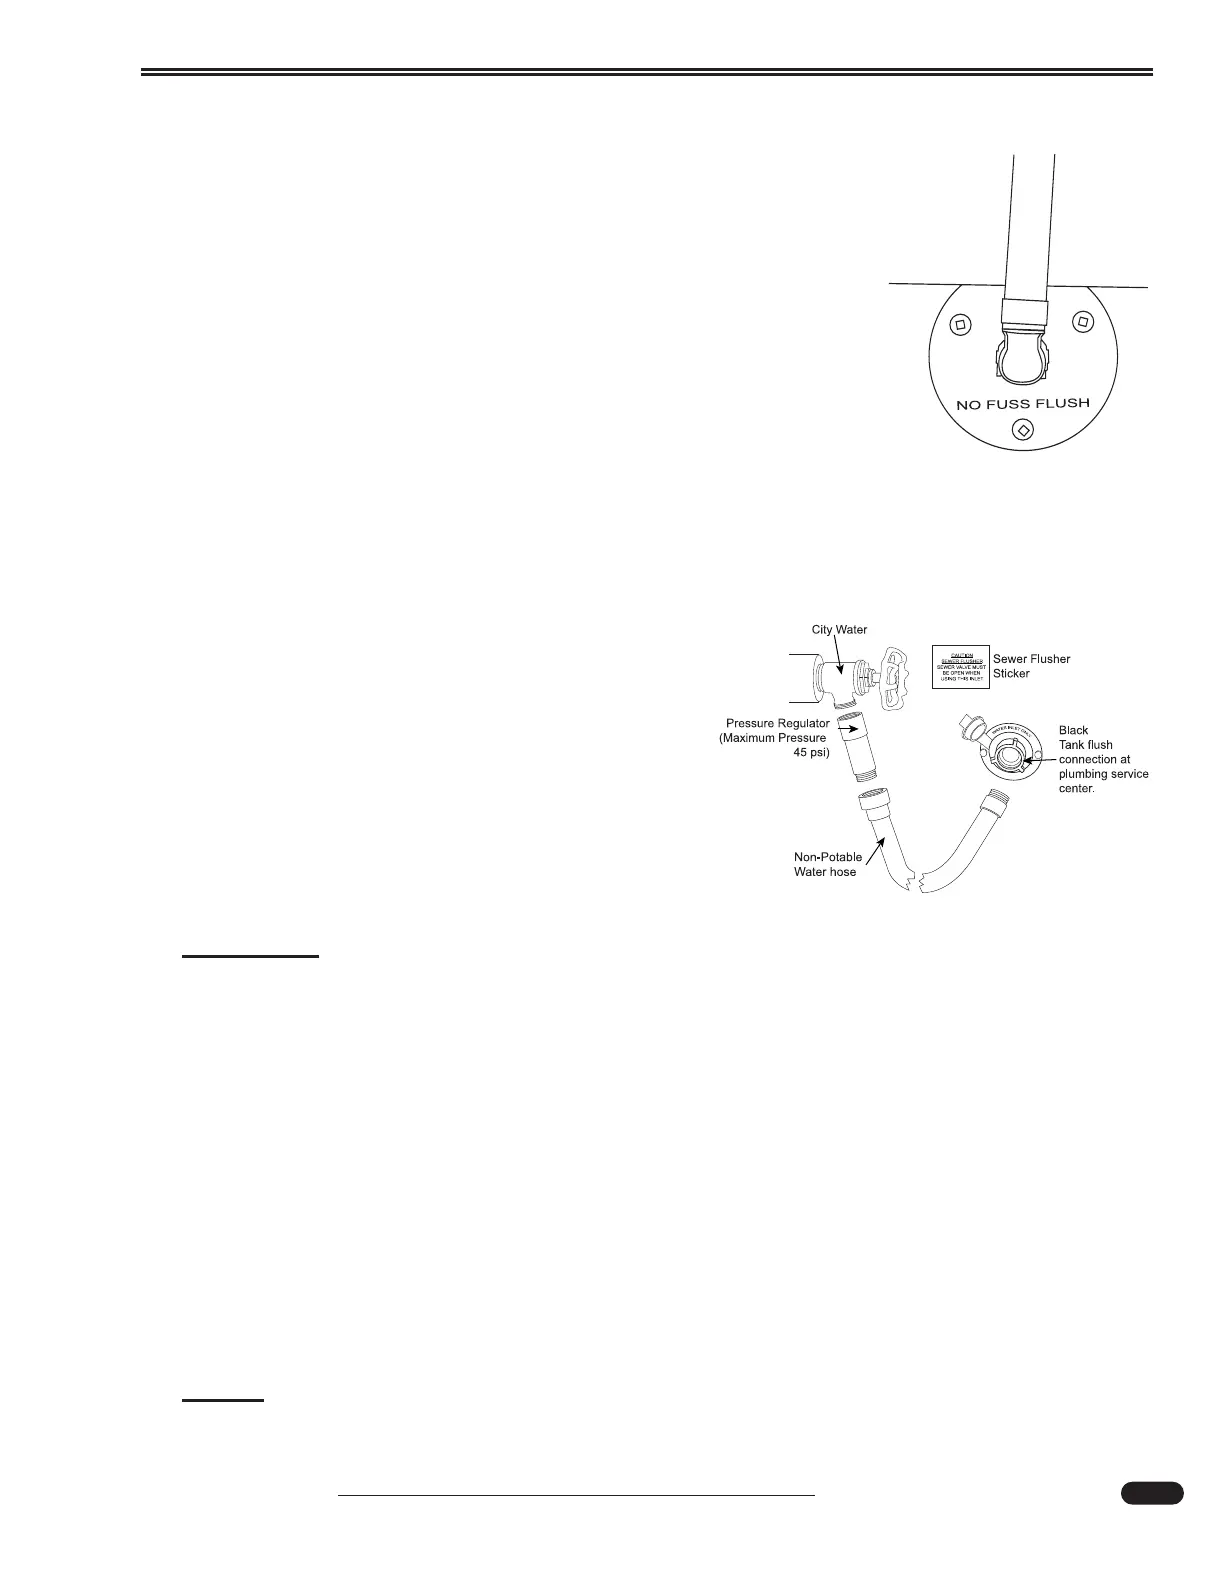
Tank Flush
The motorhome comes equipped with a power flush nozzle, located in
the black tank to help reduce solid build-up. Flush the tanks each drain
cycle. Failure to thoroughly rinse the tanks may result in accumulated
solids and clogged spray nozzles.
Dumping the Tanks:
1. When preparing to dump the black tank, first close the grey water
valve.
2. Fill the grey tank to at least 50% by running water in the shower or
sinks.
3. Use the Aladdin™ system to observe tank fluid levels. When the grey
tank is 50% full, stop filling the tank.
4. Open the black water valve. Allow the black tank to drain.
5. Connect a non-potable water hose, with pressure regulator, to the flush system fitting locat-
ed in the service center.
6. Turn on the faucet and allow water to rinse the black
tank at least three minutes. Never operate the sys-
tem unattended. Ensure the water flows freely
though the sewer hose.
7. When completed, turn off the faucet and close the
black water valve.
8. Open the grey water valve. The water in the grey
tank will flush remaining solids from the sewer
hose. The grey valve remains open until the next
drain cycle, or time of departure.
WARNING:
Never operate the flush system unattended. Flooding may occur. Use the tank flush
system each time the holding tanks are cycled. Failure to routinely use the flush sys-
tem will result in a clogged spray nozzle. Turn off the water supply when finished
flushing the tank.
9. When preparing for travel, close both black and grey valves. Undo restraining devices from
the sewer hose. Disconnect the sewer hose from the termination outlet by rotating the
fitting counterclockwise 90º.
10. Drain the sewer hose using hand over hand method working the sewer hose towards shore
fitting. Rinse the sewer hose with outside facility and repeat the hose drain process.
11. Remove the sewer hose from shore fitting. Install sewer hose in carrier and lock door.
Secure the termination cap (required by law in some states).
12. If desired, add chemicals to the tanks to control odor. Follow the directions given by
the manufacturer of the chemical.
NOTE:
Dump the black tank before driving.
040518
040460k
Connection in curbside
compartment behind
water bay