Section 10 --- Chassis Information
The Executive 2005
498
The bottom of the tank is made in a “V” configuration allowing the engine pick-up tube access to almost
all available fuel in the tank. Internal baffles slow fuel slosh. A check valve placed at the bottom of the
baffle, at the end of the tank with the pick-up tube, prevents fuel starvation through long corners
when fuel supply is low.
NOTE:
Fill the fuel tank if the motorhome is going to be stored for any length of time to
reduce the amount of potential condensation. After storage, check the vent tube for
blockage. It is not uncommon for insects to plug the vent tube. If pressure or vacu-
um exists when the fuel cap is removed, the vent tube may be blocked. The end of
the vent tube is located on the curbside of the fuel tank, near the bottom.
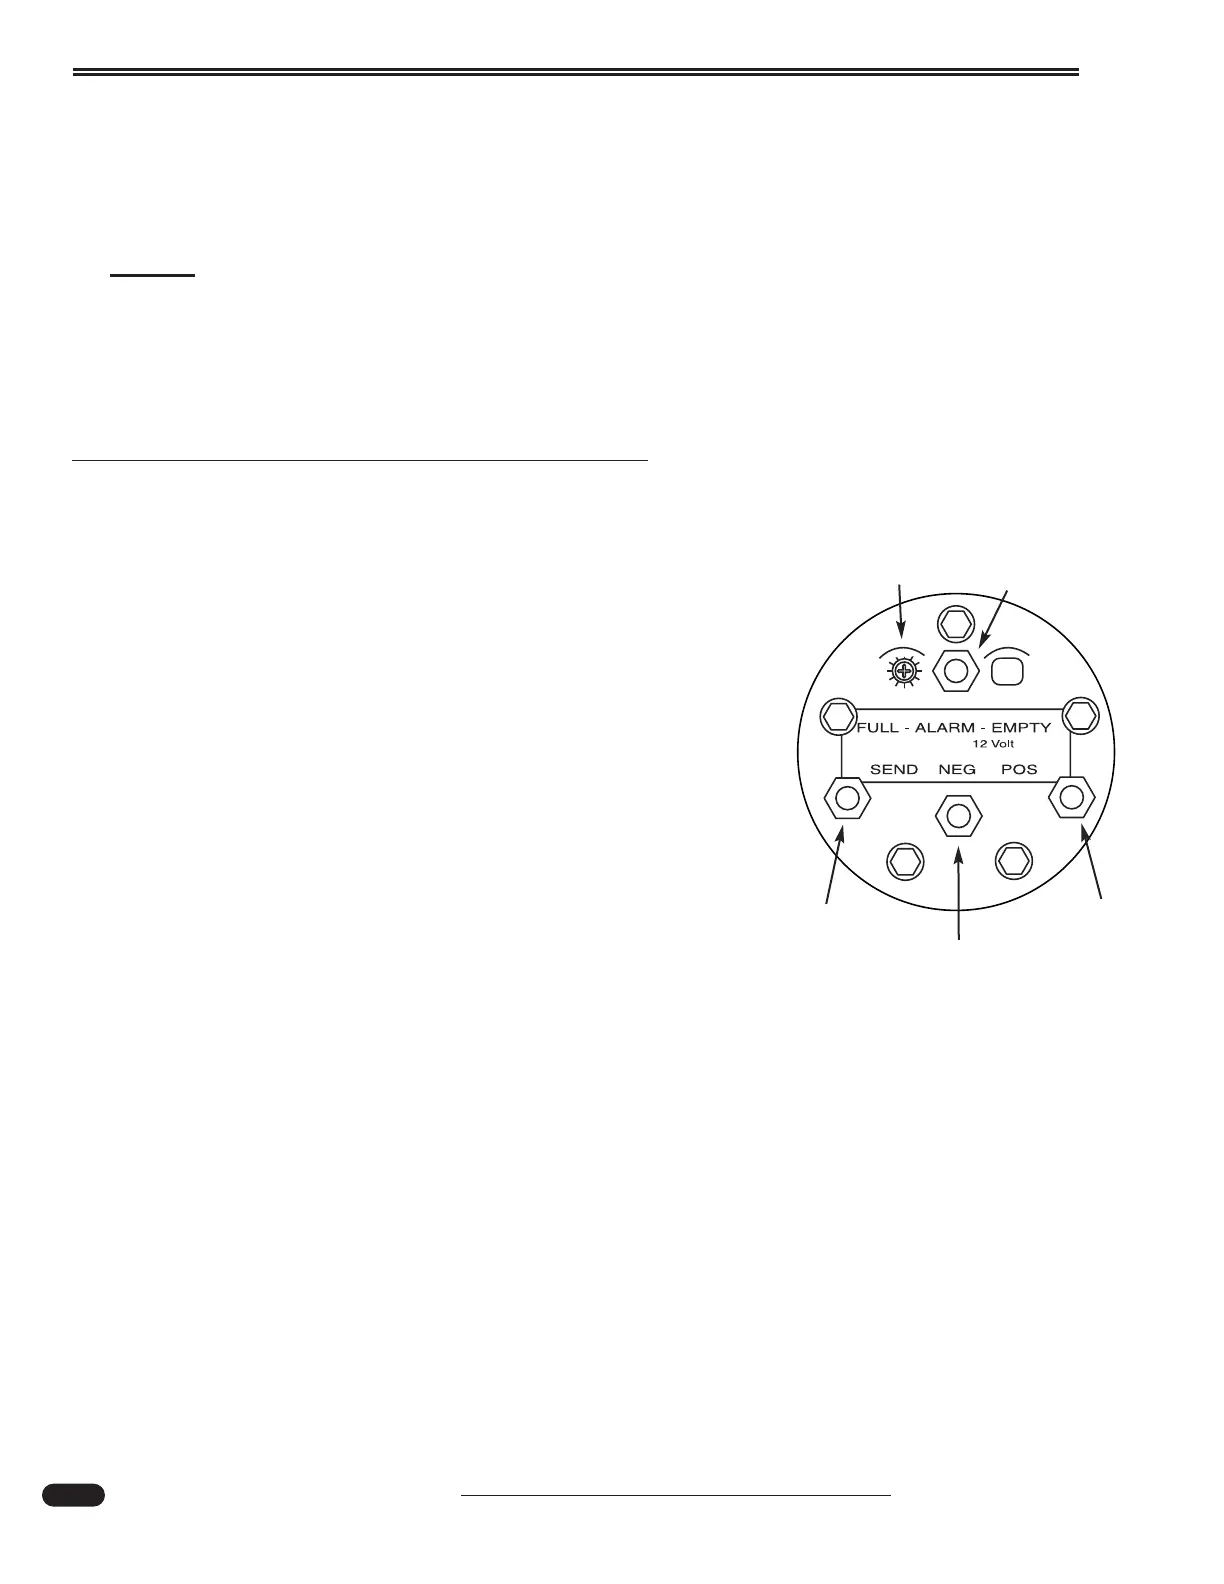
Fuel Sender
The "Centroid" fuel sender has no moving parts and works by measuring
capacitance (electrical property) between its inner and outer tubes in
the tank. The more fuel between the tubes, the higher the reading.
Electronics in the "hockey-puck" head of the sender convert the capaci-
tance to current to drive the fuel gauge.
Connections:
The "Centroid" sender has four connections:
1 & 2 - Positive (POS) and Negative (NEG): Battery voltage to
run the electronics in the sender head.
3 - SEND: Connects to the SEND terminal of the gauge on the
dash.
4 - ALARM: Makes a connection internally to the negative (NEG)
terminal when the low fuel alarm level is reached (when the fuel
gauge is reading about 1/8 tank). This turns on the fuel indicator on
the liquid crystal display on the speedometer and is not adjustable.
Adjustments:
The "Centroid" sender has two adjustments:
1 - EMPTY: Adjusts for length of sender. It has been set at the factory, covered with a
sealant and should not be changed.
2 - Full Adjustment (FULL): The full adjustment can be used to correct for slight differ-
ences between fuel meters. During installation, it has been factory calibrated and should
not need re-adjustment.
The correct adjustment technique, with a full tank of fuel, is to start with the full adjustment screw
completely clockwise. This should cause the reading to be above full. Adjust slowly, rotate counter-
clockwise, until the full mark on the gauge is reached. The intent is to always adjust downscale rather
than upscale.
Fuel Sending Unit.
090318
Full
Adjust
RED:
To Gauge
YELLOW:
Ignition
WHITE:
Ground
BLUE:
Low Fuel
Indicator