LP-Gas Systems --- Section 7
The Executive 2005
311
1. Turn off pilot lights, all appliances and the
engine. Close all vents, doors and windows
to prevent vapors from entering the
motorhome.
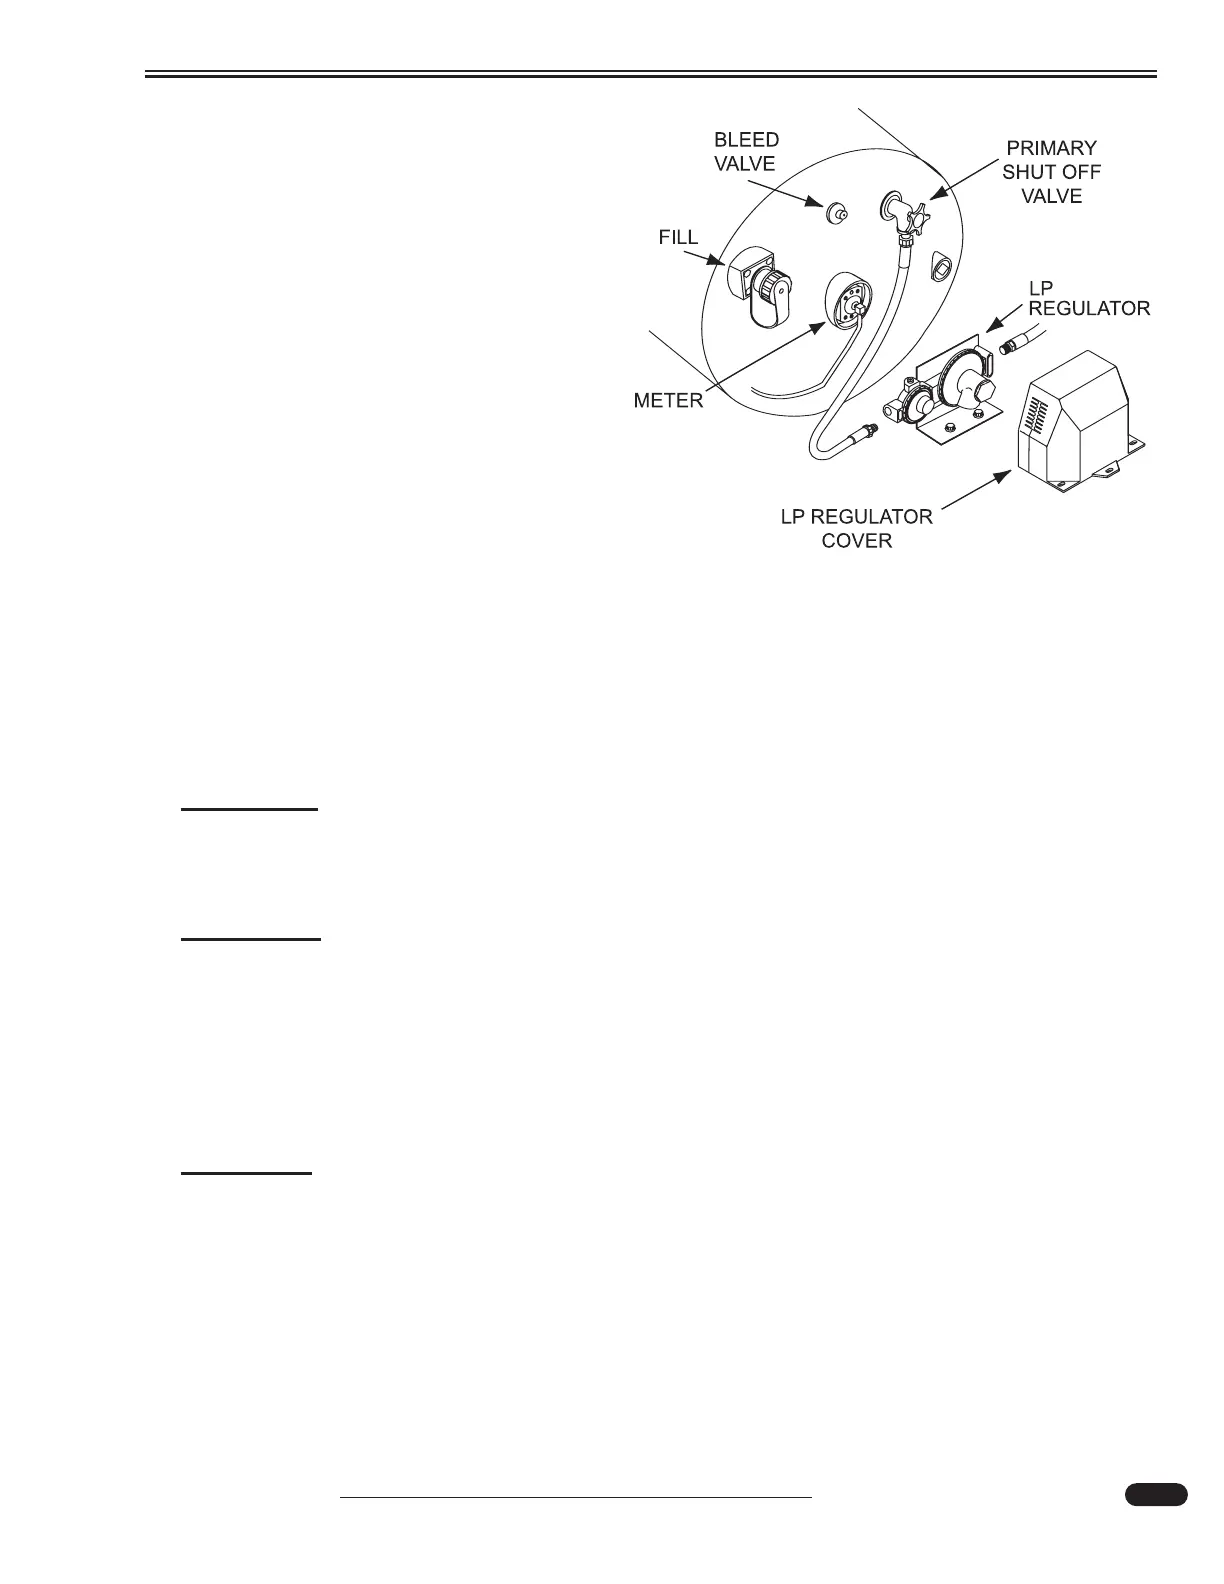
2. Remove dust cover and screw nozzle to the
fill valve.
3. Turn on dispensing pump, then open 80%
bleed valve.
4. Open valve on fill nozzle and dispense liq-
uid into the tank.
5. Close valve on fill nozzle as liquid just
begins to expel from 80% bleed valve. The
overfill protection valve prevents filling
the tank to more than 80% of the rated
capacity.
6. Close 80% valve and shut off dispensing
pump.
7. Open high-pressure bleed valve on fill nozzle to remove pressure between dispensing pump
and fill nozzle. Remove nozzle from the fill valve.
8. Install the dust cover.
9. LP-Gas appliances (especially the refrigerator) may have difficulty starting after a period of
non-use. To speed the process of supplying fresh fuel to the appliances, light the stove first.
WARNING:
It is common for small amounts of liquid propane to escape and evaporate during the
refueling process. Protect bare skin. Instant freezing will occur if exposed to liquid
propane.
W
ARNING:
When storing portable LP-Gas tanks that are not connected to an LP-Gas system,
install an approved plug in the tank outlet holes to prevent leaks. Do not store or
transport empty LP-Gas tanks, portable tanks, gasoline or other flammable liquids
inside the motorhome. Keep open flame and spark producing materials away from
the LP-Gas area. Shut off all appliances and the primary LP-Gas tank valve (located
on the LP-Gas tank Roadside End) when the motorhome is in storage. If this warning
is ignored, a fire or explosion could result.
CAUTION:
Pressure inside LP-Gas tanks can reach over 200 psi when exposed to direct sunlight.
A high-pressure safety relief valve will purge excess high pressure, if necessary. LP-
Gas will stop vaporizing as the LP-Gas tank temperature approaches -44º F.
050250