6-46 Motorola RF Switch System Reference Guide
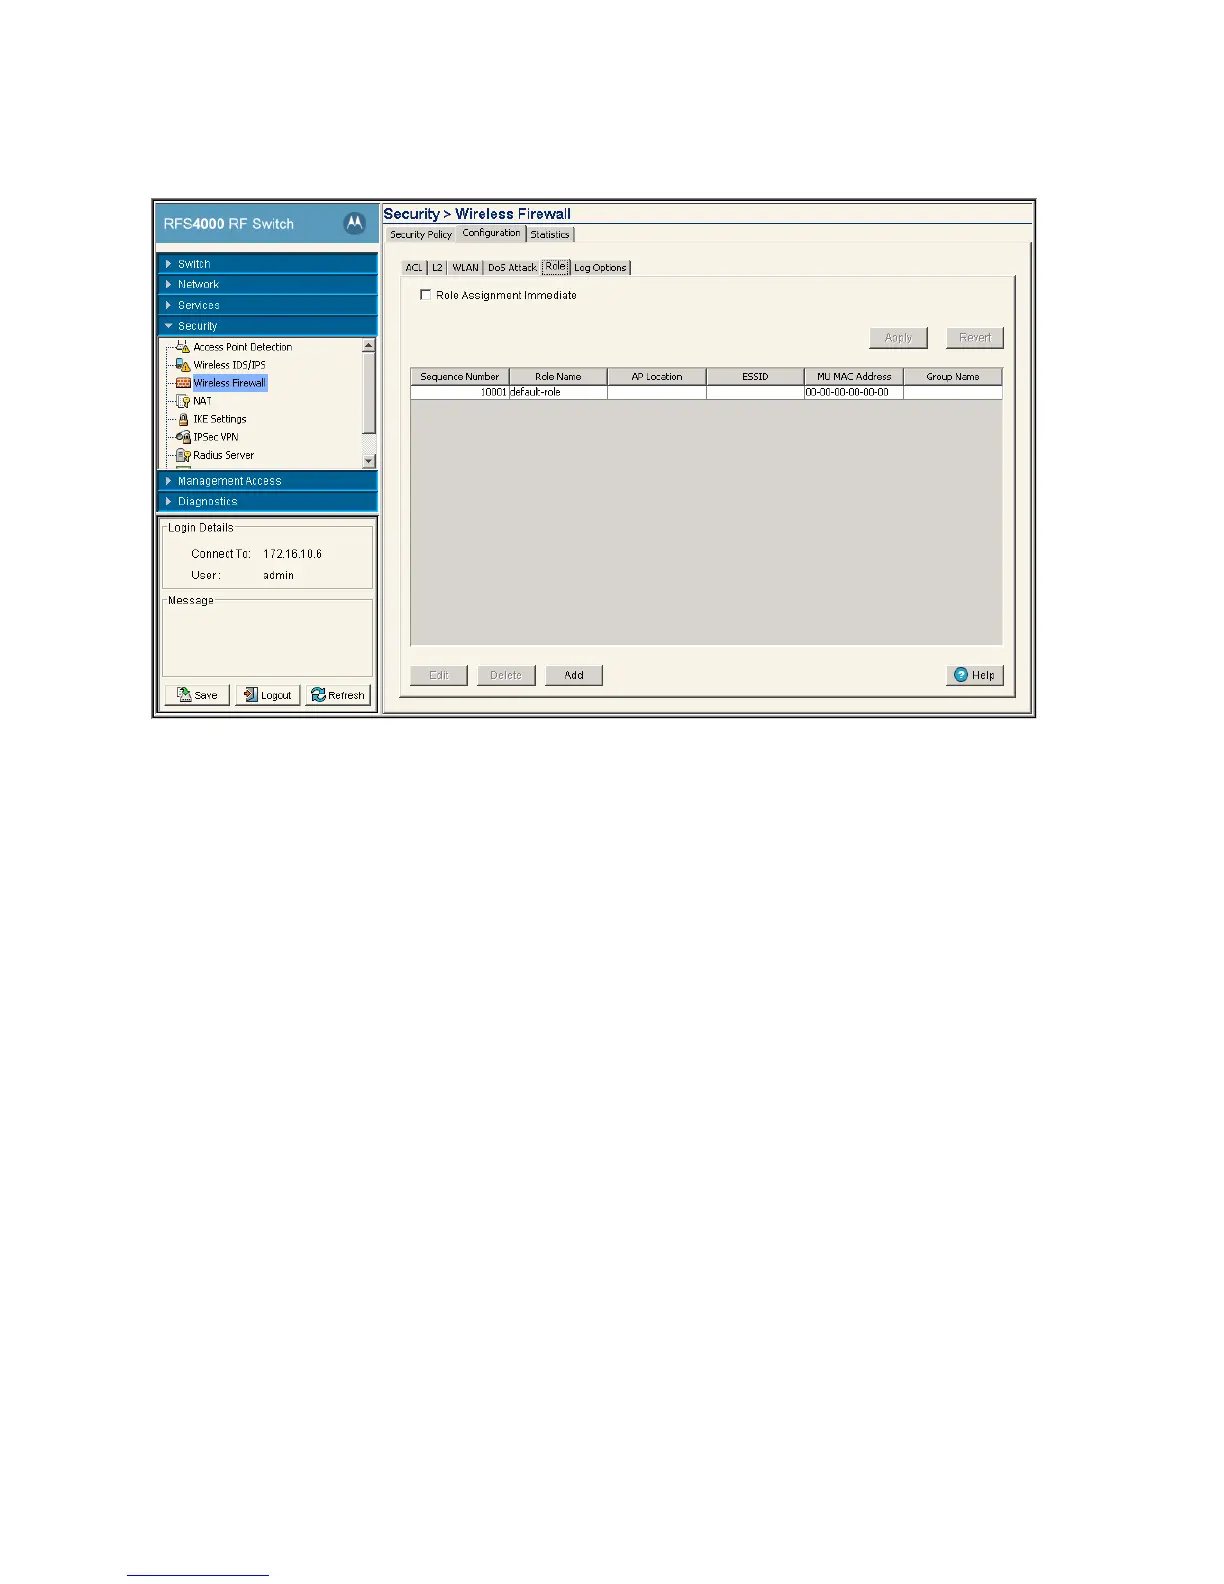
3. Click the Role tab.
4. Select the checkbox Role Assignment Immediate and click Apply to assign the role immediately.
5. Role configuration screen displays the following information:
6. To create a new role, click the Add button. For more information see Creating a new Role on page 6-47.
Sequence Number Displays the sequence number associated with each role. Sequence numbers
determine the order that role are applied. Roles with lower sequence numbers are
applied before those with higher sequence numbers. Sequence numbers are
assigned when a role is created and cannot be edited.
Role Name Displays the name of each role. The role name is configured when the role is
created and cannot be edited.
AP Location Displays the AP Location filters, if any, applied to each role. The AP location filters
can be set when the role is created or may be edited by selecting a role and
clicking the Edit button.
ESSID Displays the ESSID filters, if any, applied to each role. The ESSID location filters
can be set when the role is created or may be edited by selecting a role and
clicking the Edit button.
MU MAC Address Displays the MU MAC Address filters, if any, applied to each role. The MU MAC
Address filters can be set when the role is created or may be edited by selecting
a role and clicking the Edit button.
Group Name Displays the Radius Group name, if any, that is associated with each role.The
Group Name filters can be set when the role is created or may be edited by
selecting a role and clicking the Edit button.
 Loading...