50 Installing a Multi-Module Library
2 If the accessor assembly is not aligned correctly, do the following:
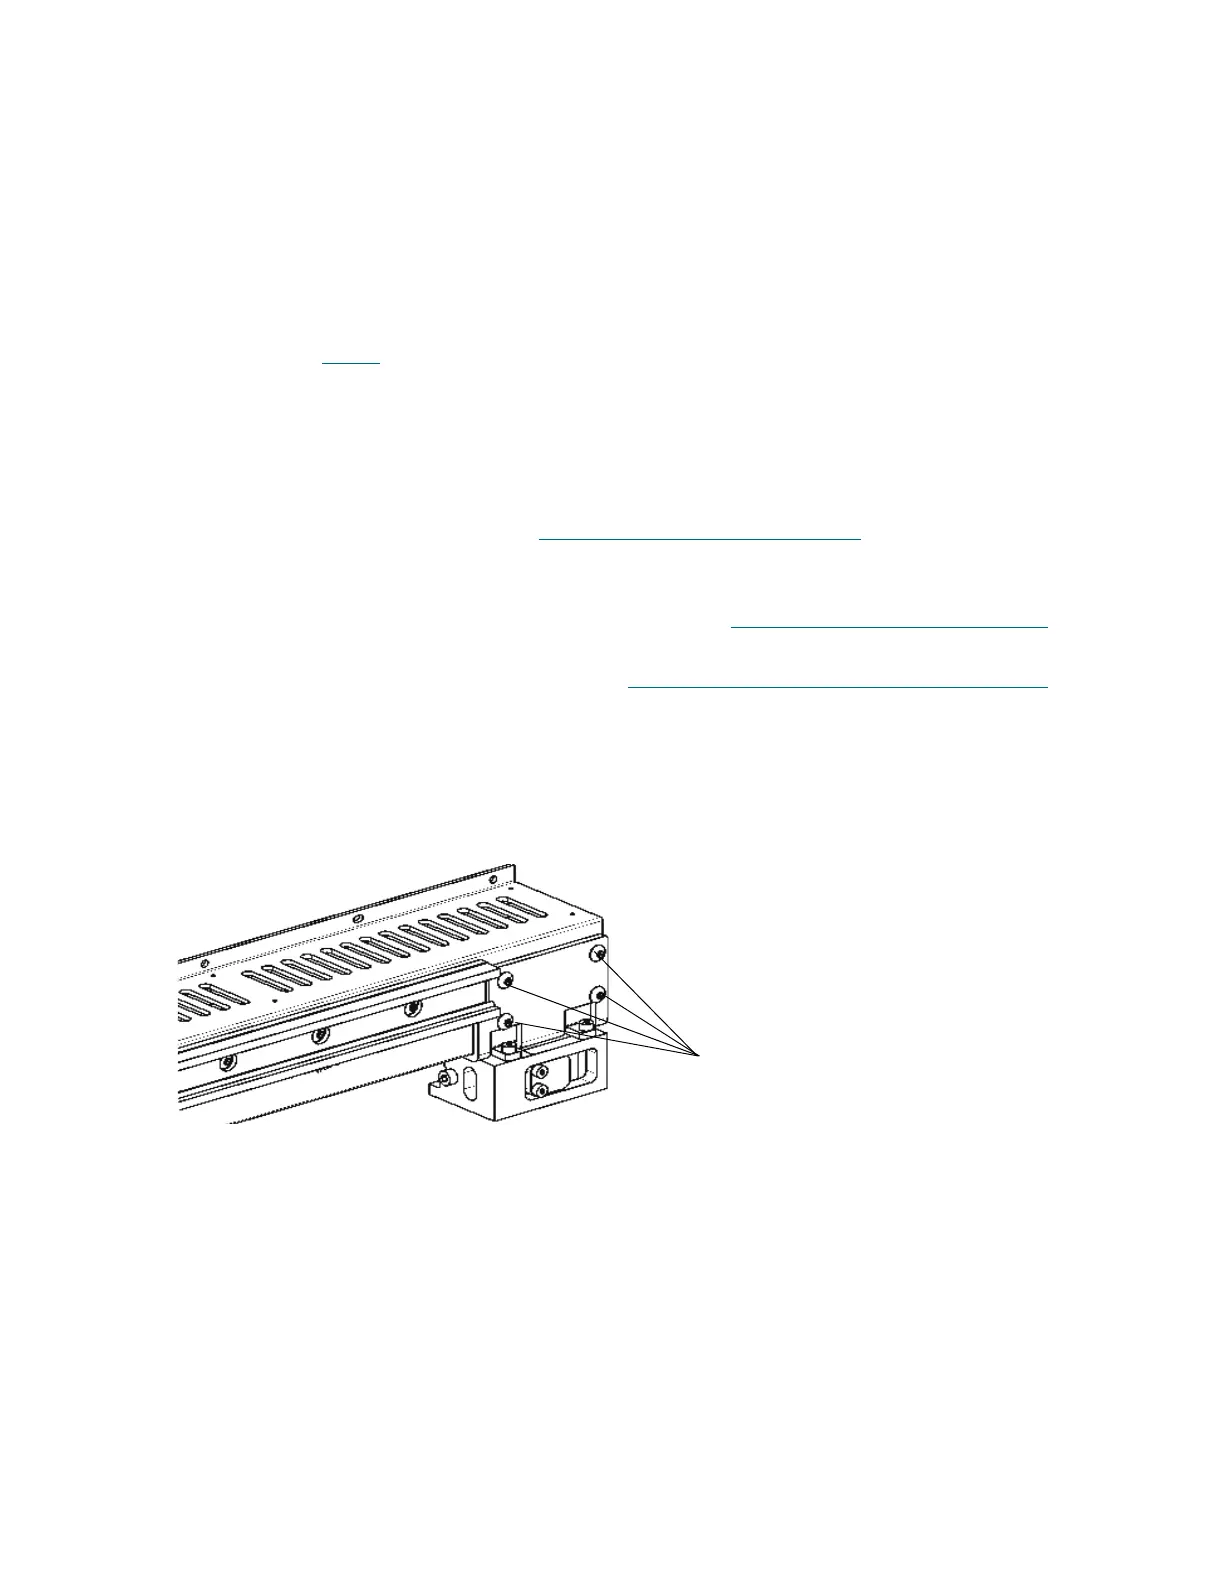
a. Loosen the five screws that hold the accessor to the X carriage.
b. Position the front edge of the Y-drive mount so that it is aligned with the scribe mark on the lower
X-axis rail.
c. Align the upper X-axis bearing with the scribe mark on the upper X-axis rail.
d. Tighten the five screws.
e. Move the accessor assembly to the right about 100 mm away from the scribe marks.
f. Repeat Step 1
above to verify alignment.
Attaching the Tensioner Bracket and Hard Stop
Determine library configuration requirements:
• If the library configuration will be less than eight modules, use the tensioner bracket and hard stop
you removed previously. Proceed to Eight Modules or Less Configuration
on page 50.
• To add expansion modules onto an existing eight module library configuration, you must use the
new tensioner bracket which is provided in the installation kit. The new tensioner bracket has a
vertical slot instead of a hole on the bottom left. Proceed to Nine Modules or More Configuration
on
page 51.
For information on removing the tensioner bracket, see Removing the Tensioner Bracket and Hard Stop
on
page 80.
Eight Modules or Less Configuration
1 On the expansion module that will be the last in the configuration, use a 3 mm hex wrench to attach the
X-axis tensioner bracket to the X-axis channel.

 Loading...


