Scalar i6000 Installation Guide 43
Attaching the Middle X-Axis Rail
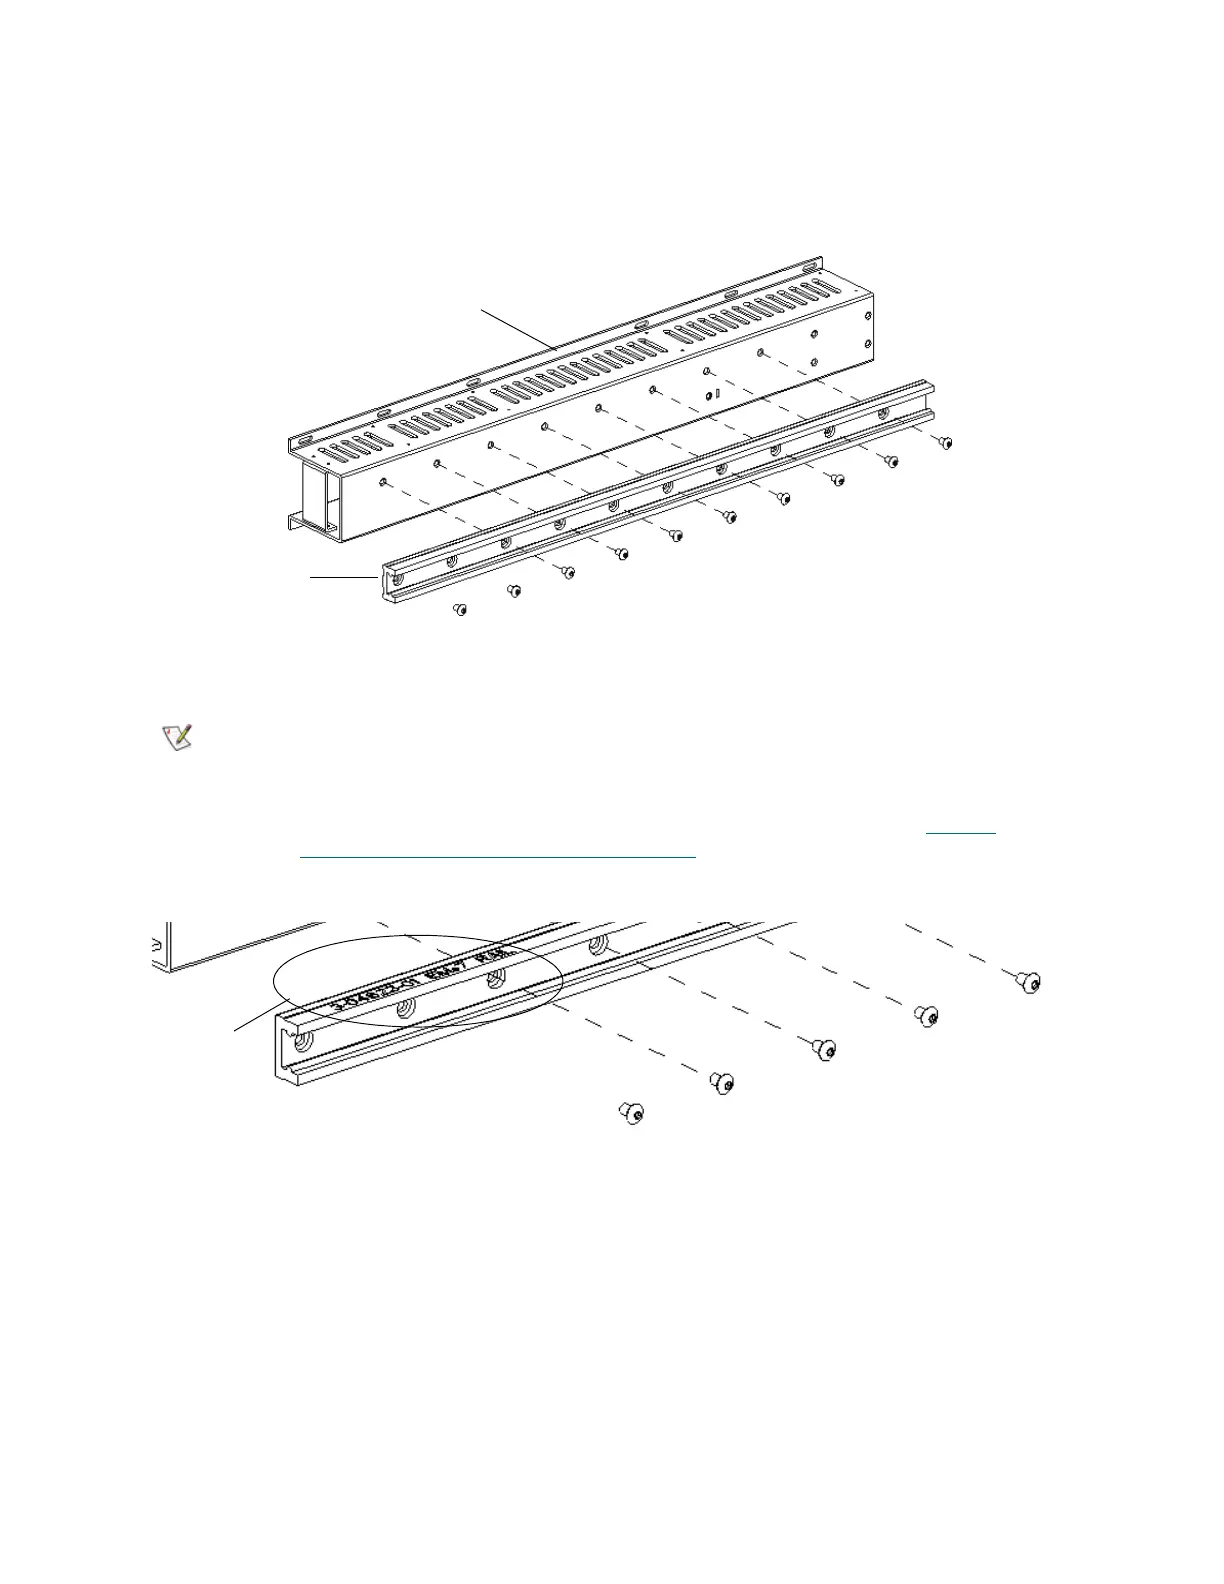
1 Use a 3 mm hex wrench to attach the middle X-axis rail loosely to the X-axis channel with screws 1
through 10.
If you are adding expansion modules onto an eight module library, the new
expansion modules ship with a special center X-axis rail that must be installed
in module eight of the existing library. This rail is 7mm shorter then standard X-
axis rails. The shorter X-rail is etched with a part number and description. You
must remove the previous middle X-axis rail to install the new rail. See Remov-
ing the Middle X-Axis Rail from Module Eight on page 81.
1
2
3
4
5
6
7
8
9
10
X-axis channel
middle X-axis rail
Etched part
number
identifying
special rail
for adding EM to eight or more library configuration

 Loading...


