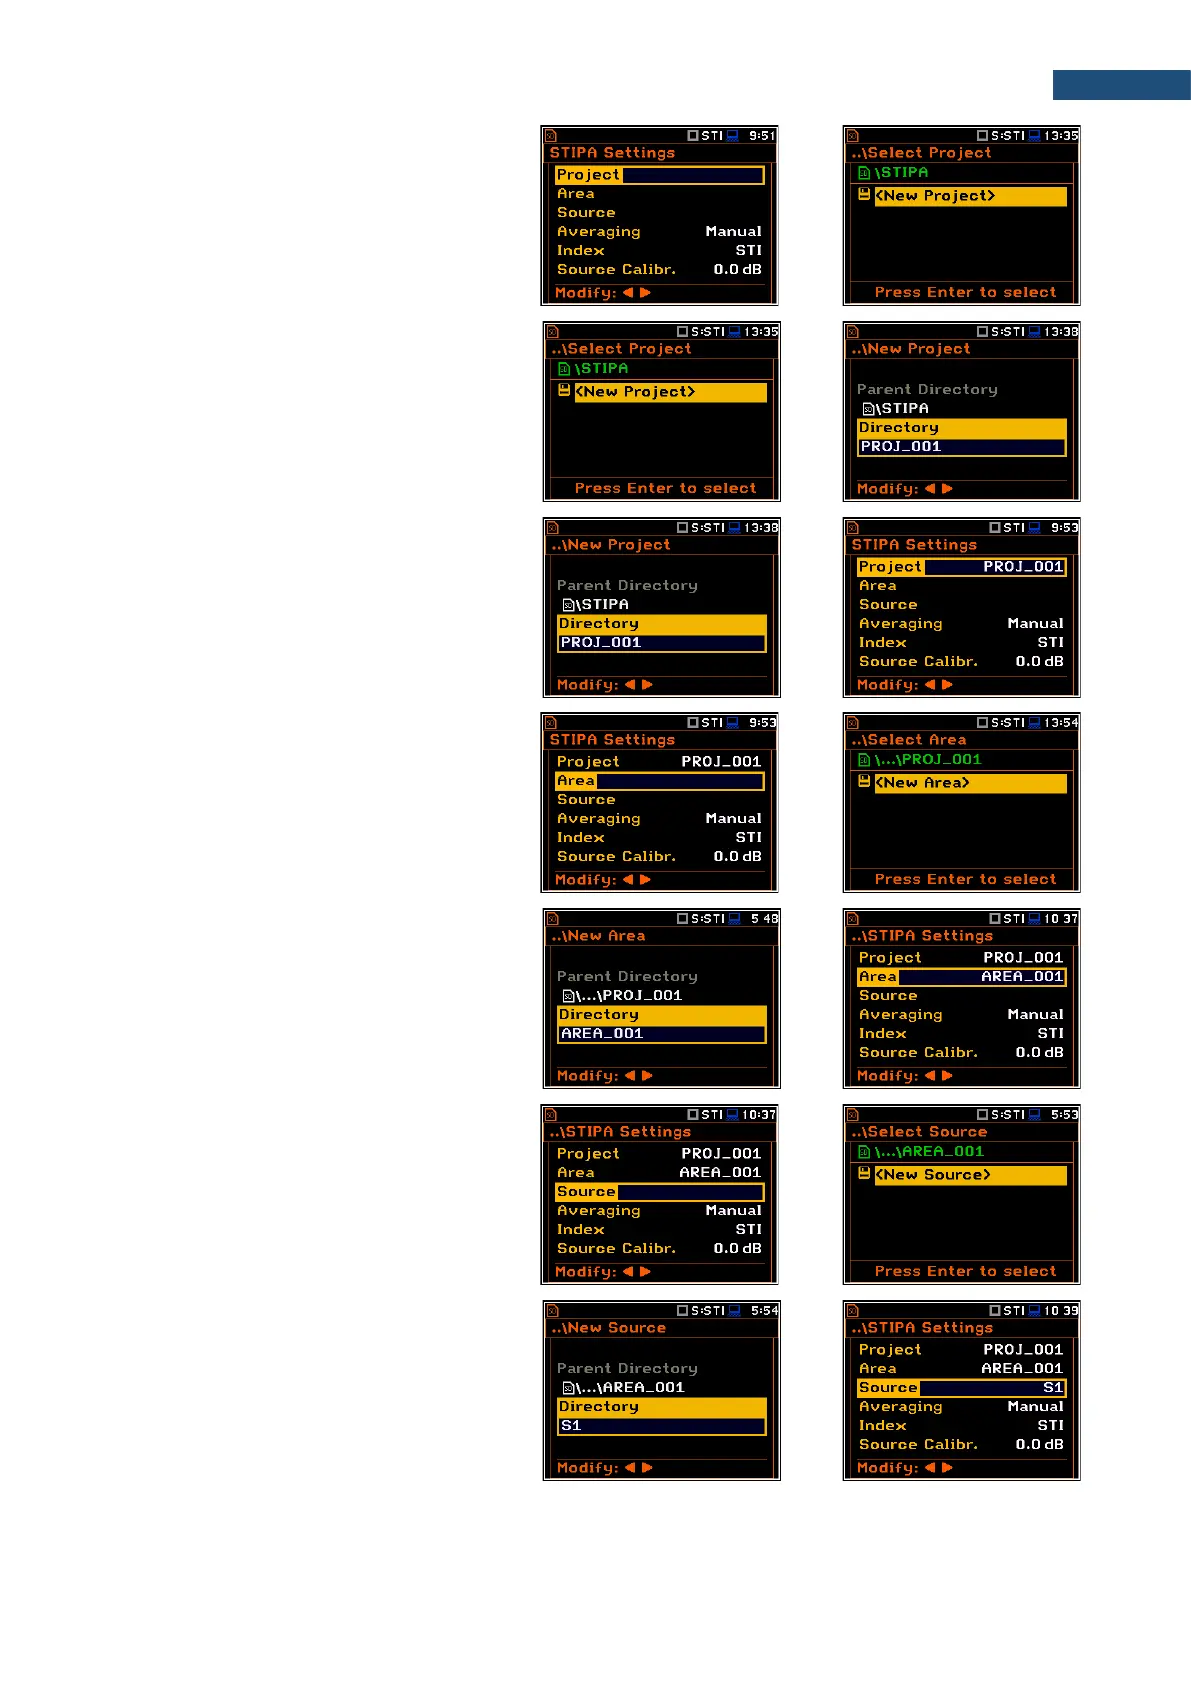
2. Being at the Project position, press the
► key and, in the Select Project screen,
select <New Project> to create a new
project directory or select the directory of
the previously created Project and press
<ENTER>.
In case of <New Project>, the
instrument will propose a default name
for the new Project directory which can
be modified in the editor screen opened
after pressing the <ENTER> key.
After edition of the project name it should
be confirmed by the <ENTER> key.
In the New Project screen press
<ENTER> to return to the
STIPA Settings screen.
The selected project name will be
displayed in the Project position of the
STIPA Settings screen.
3. Go to the Area position, press the ► key
and, in the Select Area screen, select
<New Area> to create a new area
directory or select the directory of the
previously created Area and press
<ENTER>.
After creation of a new area directory or
selection of the existed one press
<ENTER> and the selected area name
will be displayed in the Area line of the
STIPA Settings screen.
4. Being at the Source position, press the
► key and in the Select Source screen
create <New Source> or select
previously created one (as a directory).
After creation of the new source position
or selection of the existed one press
<ENTER> and the selected source
position name will be displayed in the
Source position of the STIPA Settings
screen.