The period during which the logger results
are saved before or after the fulfilment of the
trigger condition can be calculated by
multiplying the value set up in the Pre or
Post positions by the value set up in the
Logger Step position (path: <Menu> /
Measurement / Logging / Logger Setup).
The result of this calculation is presented in
the same line for the Pre and Post
parameters.
These parameters can perform double role. Firstly, when you wish to collect data right after or before the event
that caused logger trigger. Secondly, when it is necessary to have continuous logging, but the source is
oscillating near the threshold level. The extension of the registration window allows you to avoid the effect of
pulsation.
Periods of logging before or after fulfilment of the trigger condition are shown to the right of the number in
minutes and seconds (in the format 0m00s) as a result of multiplication of number of results by the
Logger Step.
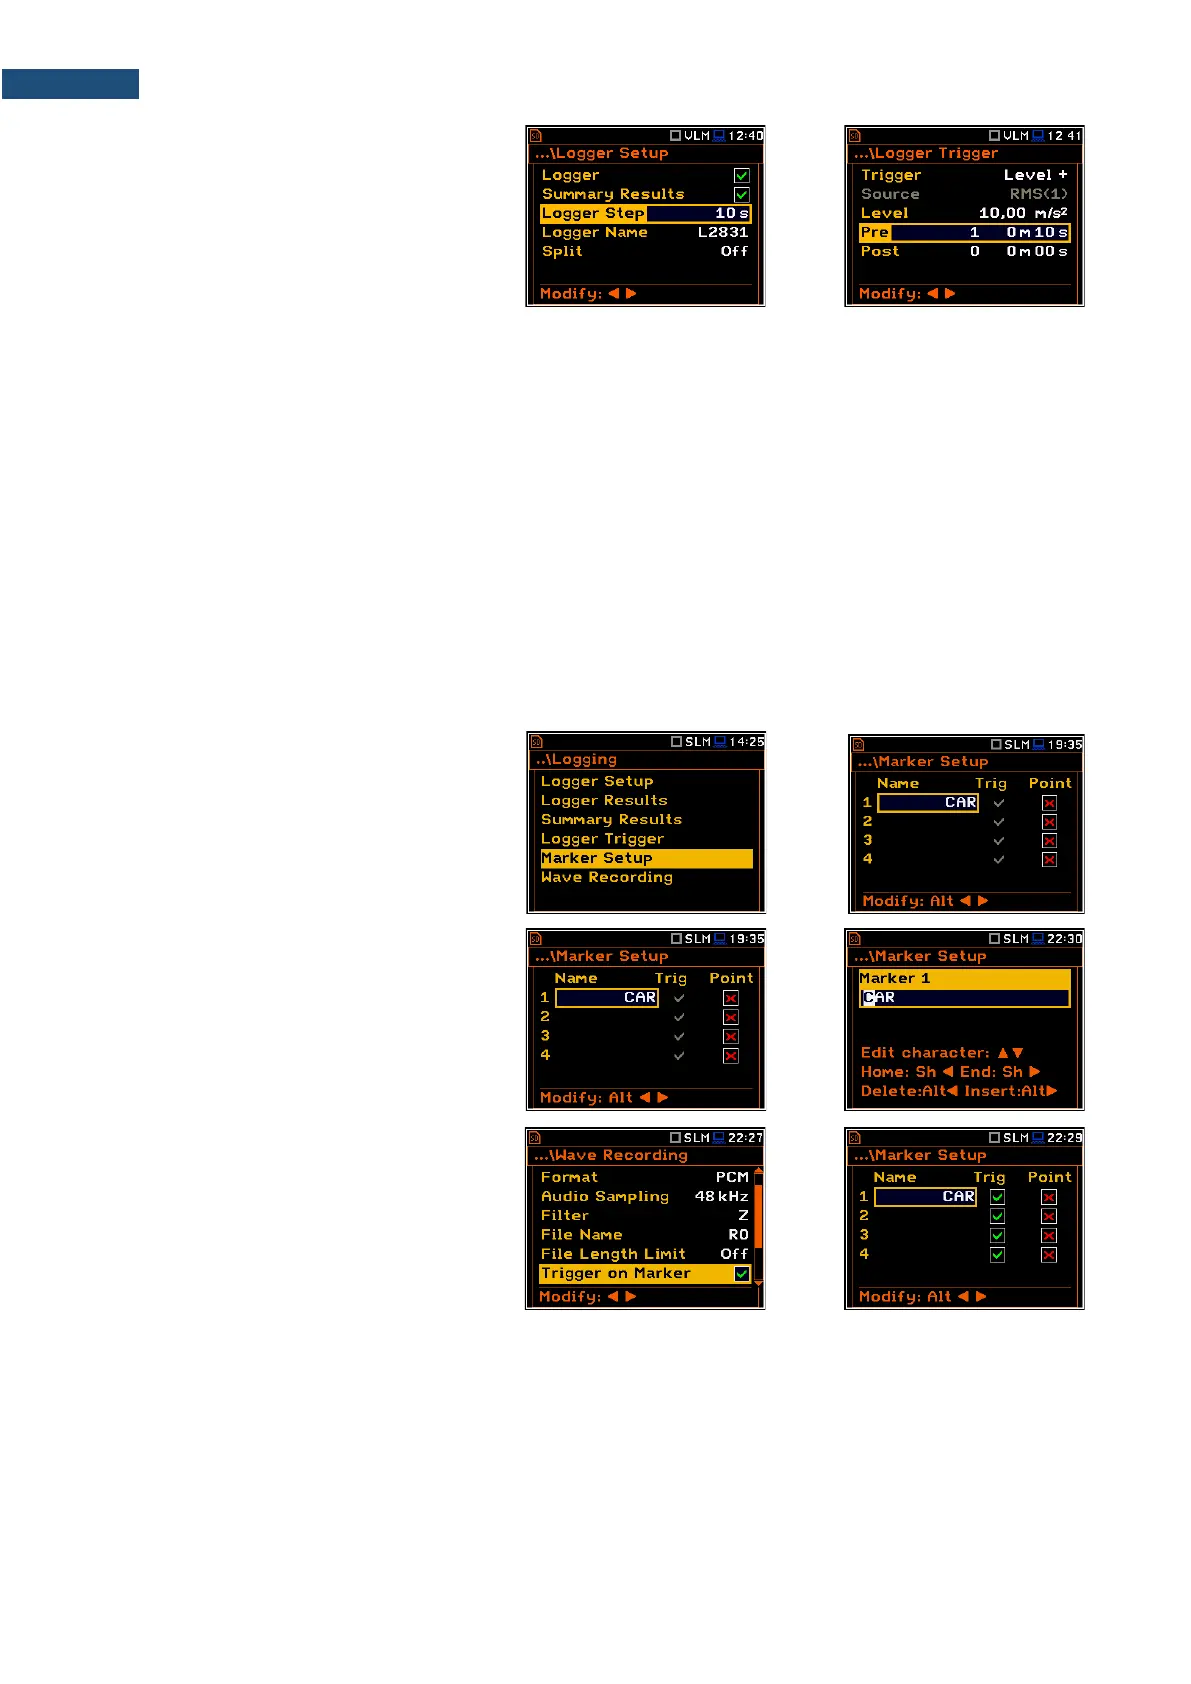
4.4.5 Setting markers – Marker Setup
Marker is used to mark (or highlight) special events during the measurement such as "airplane flight" and is
nothing but an indication of the beginning and end of the block of logger results in which the event occurred. In
case of point markers there is no start and end of the marker, but only one record in the logger file. Markers are
activated in the result presentation views by pressing the arrow keys.
The Marker Setup allows you to assign a
specific name for each marker, select its
type (normal or Point) and define markers
for triggering wave recording (Trig column).
Name edition is performed in a special text
editor screen after pressing the ► key
together with <Alt>.
The Trig column becomes active only when
Trigger on Marker (path: <Menu> /
Measurement / Logging / Wave Recording)
is enabled.
Switching on Trig for some markers means,
that wave recording will be triggered by
activating one of these markers.