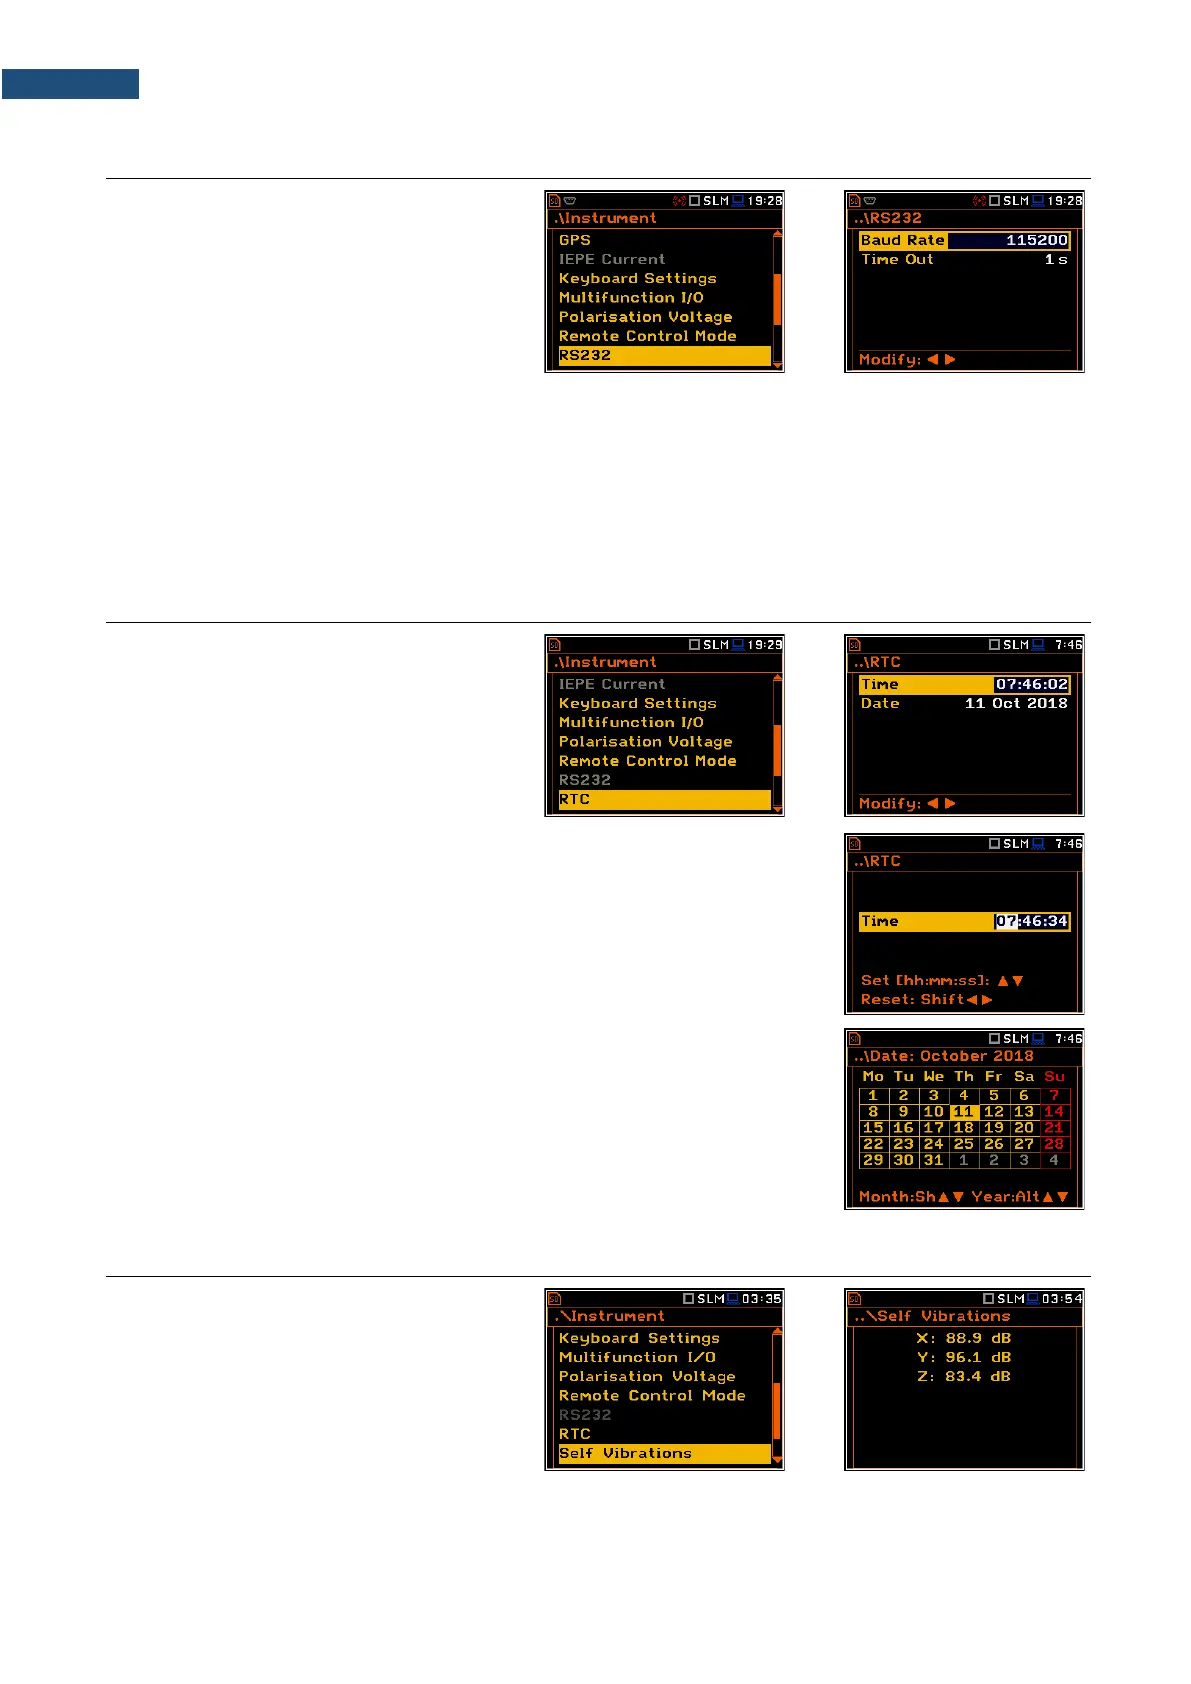
7.13 SETTING PARAMETERS OF THE SERIAL INTERFACE – RS232
The RS232 position becomes active after
activation of RS232 in the
Communication Ports screen and enables
programming the RS 232 interface
transmission speed (Baud Rate) and the
time limit during which the communication
operation should be performed (Time Out).
The RS 232 interface transmission speed (Baud Rate) can be selected from the following available values:
1200, 2400, 4800, 9600, 19200, 38000, 57600 or 115200 bits/s. The transmission speed should be the same
as in the connected device to ensure successful data transfer.
Other RS 232 transmission parameters are fixed to 8 bits for data, No parity & 1 Stop bit.
The default value of the Time Out parameter is equal to one second, but this may be too short for the printers,
which are not fast enough. In such cases, the Time Out parameter should be increased.
7.14 PROGRAMMING THE INSTRUMENT’S INTERNAL REAL TIME CLOCK – RTC
The RTC position allows you to programme
the internal Real Time Clock. This clock is
displayed in the upper right corner of the
display.
The required time (hour, minute and second) is set in a special screen, which is
opened with the ◄ / ► key when the Time position is selected.
To set hour, minute or second, select the appropriate field with the ◄ / ► key,
select value with the ▲ / ▼ key and press <ENTER>.
If you exit this screen with <ESC> the new time will be also saved.
The required date can be selected in a special screen, which is opened with the
◄ / ► key when the Date position is selected.
To set the date, select its position in the calendar with the ◄ / ► or ▲ / ▼ key
and press <ENTER> to confirm the selection.
If you exit this screen with <ESC> the new time will be also saved.
7.15 CHECKING THE INSTRUMENT'S VIBRATION – SELF VIBRATION
The Self Vibration position allows you to
check the self-vibration levels of the
instrument. The X direction is from side to
side, the Y direction is from top to bottom
and the Z direction is from front to back. The
“self-vibration” icon will flash momentarily at
the top of the screen if the level in any
direction exceeds 100 dB.