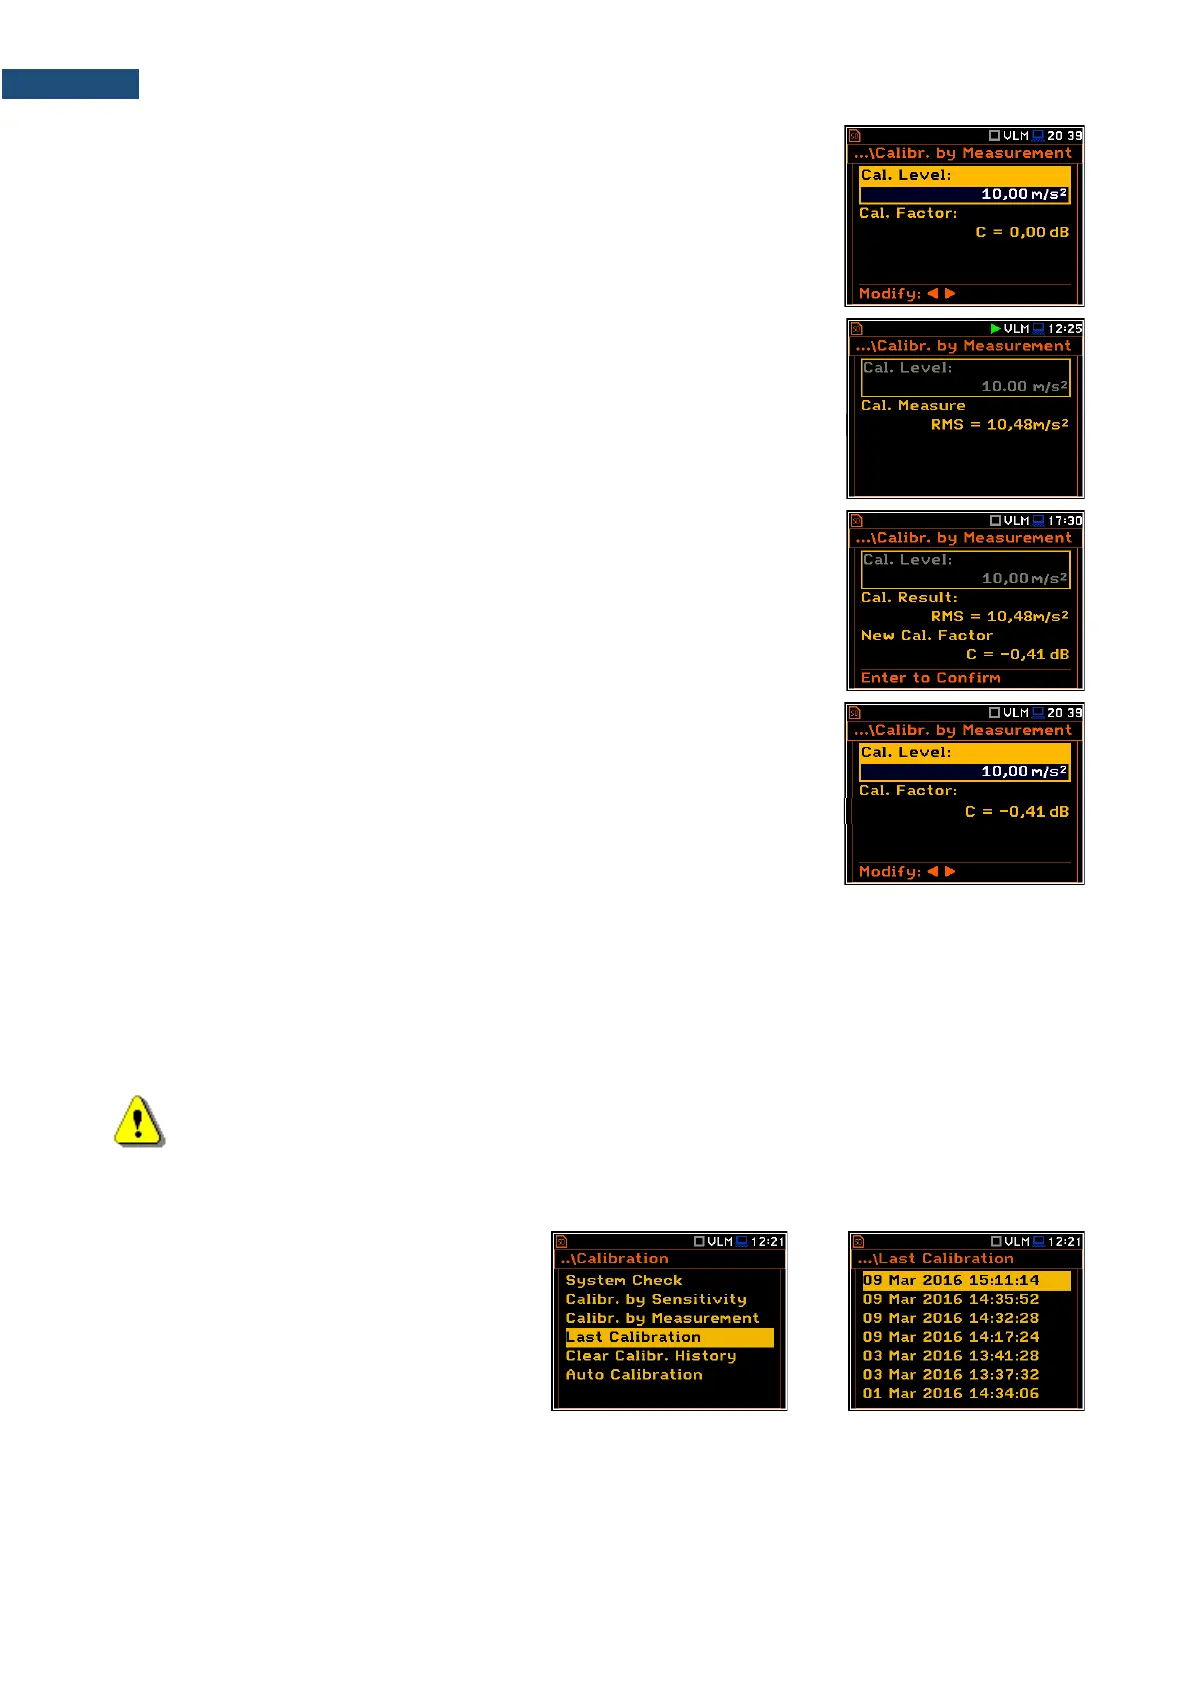
2. Set the calibration level (Cal. Level) appropriate to the used calibrator. The
default level for calibration in the vibration mode is 10 m/s
2
at 159.2 Hz.
Remember to change this level if using an alternative vibration calibration
signal source.
3. Attach the instrument’s accelerometer to the vibration calibrator using an
appropriate or recommended fixing method.
4. Switch on the calibrator and wait approximately 30 seconds before starting
the calibration measurement.
5. Start the calibration measurement by pressing the <Start> key.
The instrument performs series of 1-second consecutive measurements
displaying levels of the measured calibration signal.
If maximal difference between three 1-second consecutive results (RMS(HP10))
is less than 0.05dB, the calibration measurement will be stopped, and the
calibration factor calculated. The measurement can be always stopped by the
<Stop> key.
The Calibration Result (measured reference signal without calibration factor
correction) and the New Calibration Factor (difference between the Calibration
Level and the Calibration Result, calculated in dB) are displayed.
6. Press <ENTER> to save the new calibration factor (Enter to Confirm), or
press <ESC> to reject it.
7. Press <ENTER> to exits the Calibration by Measuement screen.
It is recommended to repeat the calibration measurement few times. Obtained results should be almost the
same (with 0.1 dB difference). Reasons for unstable results are as follows:
• the accelerometer is not properly attached to the calibrator,
• there are external disturbances,
• the calibrator or the measurement channel (the accelerometer or the instrument itself) are damaged.
8. Detach the accelerometer from the calibrator.
Note: During the calibration measurement, the external disturbances (vibrations or acoustic noise)
should not exceed a value of 1/10 of the level of the calibration level signal being used.
3.3.6 History of performed calibrations – Last Calibration
The Calibration History screen displays
records of performed calibrations.
To review the calibration records, select the
required line in the Calibration History
screen and press <ENTER>.