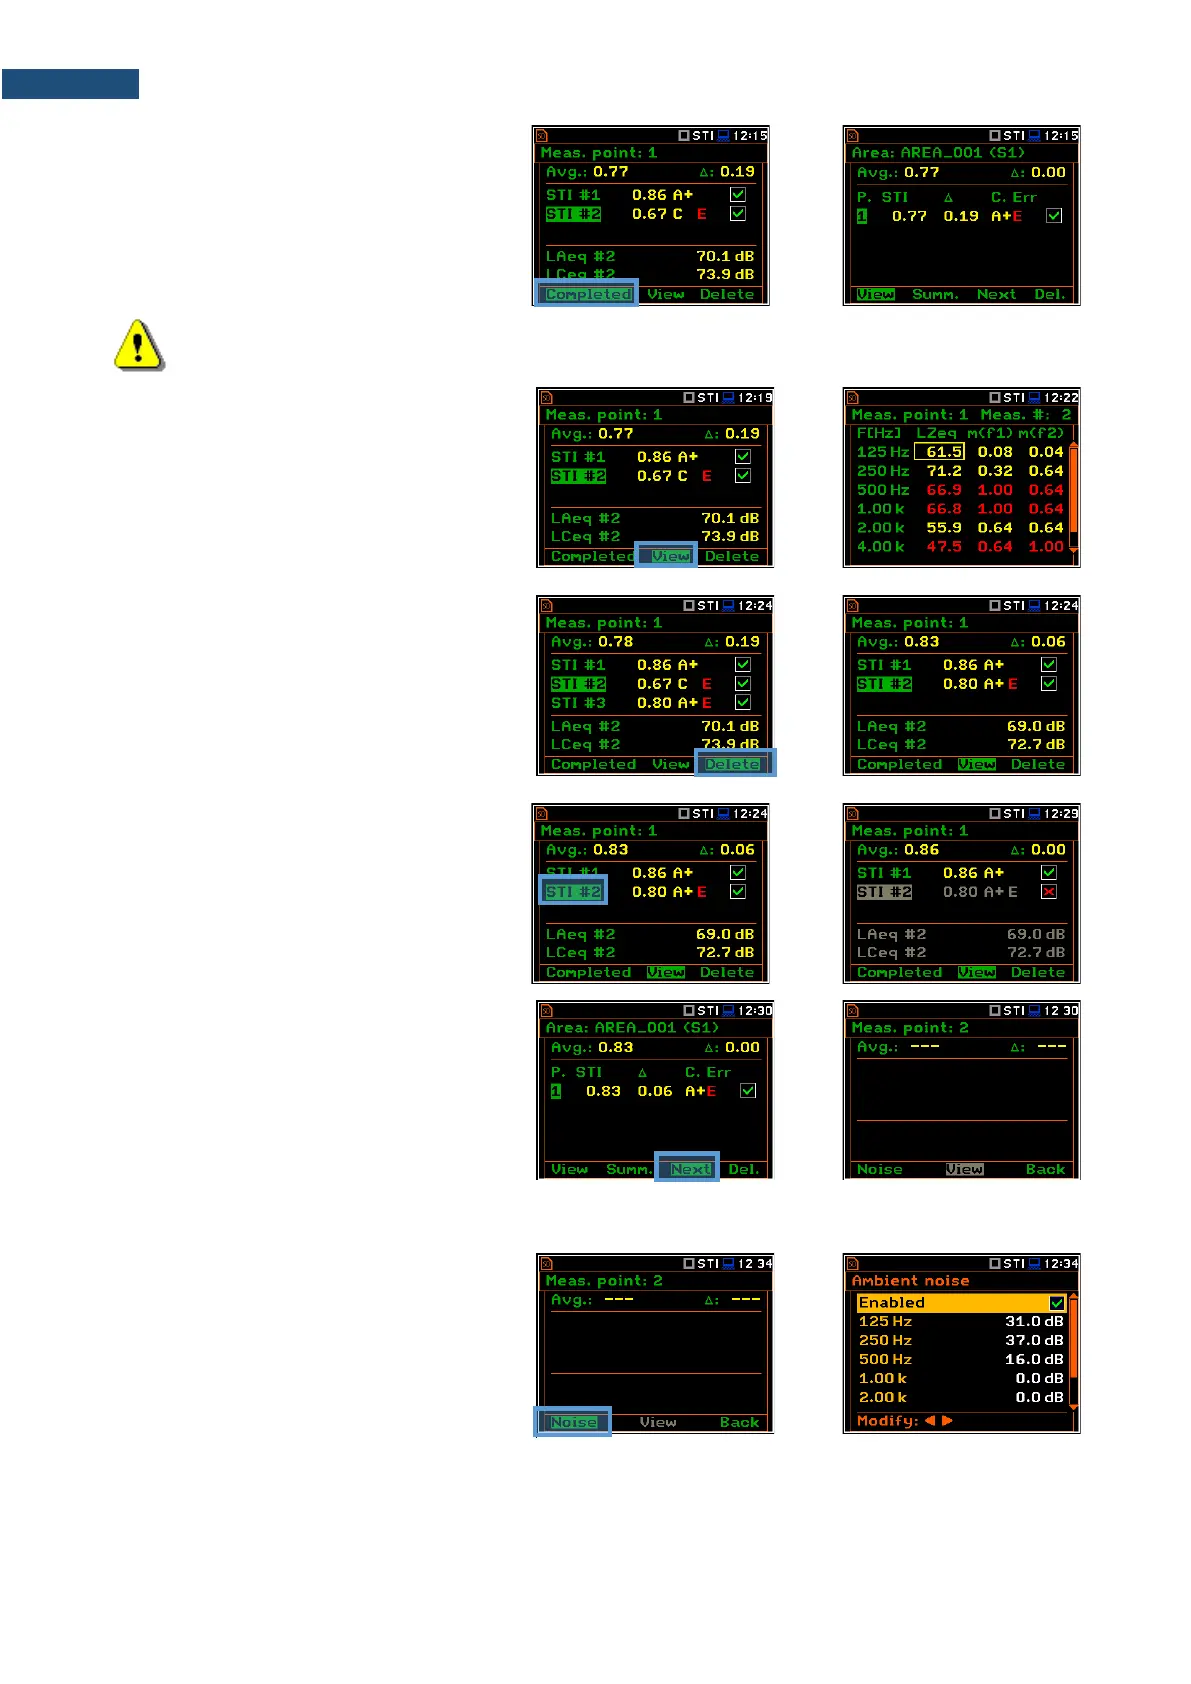
4. To finish measurement series for the
measurement point, you should
complete them pressing the
<Completed> soft-key.
The instrument switches to the Area
view.
Note: In case of automatic averaging the series of measurements will be completed automatically
after meeting the conditions specified in the selected standard.
If you select a measurement in the Point
view and press the <View> soft-key, you
can view the modulation function
coefficients for seven octave bands and two
modulation frequencies (f1 and f2) for this
measurement.
To return to the Point view press <ENTER>
or <ESC>.
You can delete the selected measurement
pressing the <Delete> soft-key.
After deleting the measurement, the
instrument will change the numeration of
measurements in the Point view. At the
same time the file with the measurement
results will be deleted from the Point
directory.
You can exclude/include the selected
measurement from the averaging by
pressing the ◄/► key together with <Alt>.
The file with the excluded measurement
results will have the “_” character instead of
“M”.
5. After completion of the measurement
series for the measurement point, you
can create a new measurement point
pressing the <Next> soft-key in the
Area view. The instrument will create a
new point directory and switch to the
Point view.
To start measurements in the new
measurement point, press the <Start>
key and follow steps 2 – 4.
In some cases, it may be necessary to
change ambient noise levels for a new
measurement point.
In such a case, before making first
measurement in the Point view press the
<Noise> soft-key and in the Ambient noise
screen make necessary adjustments of the
noise levels for octaves.
After confirmation of the changes with the <ENTER> key you will return to the measurement mode with new
ambient noise distortion parameters.