58
CAPTURING TOMOGRAMS
(4) Set data for printing
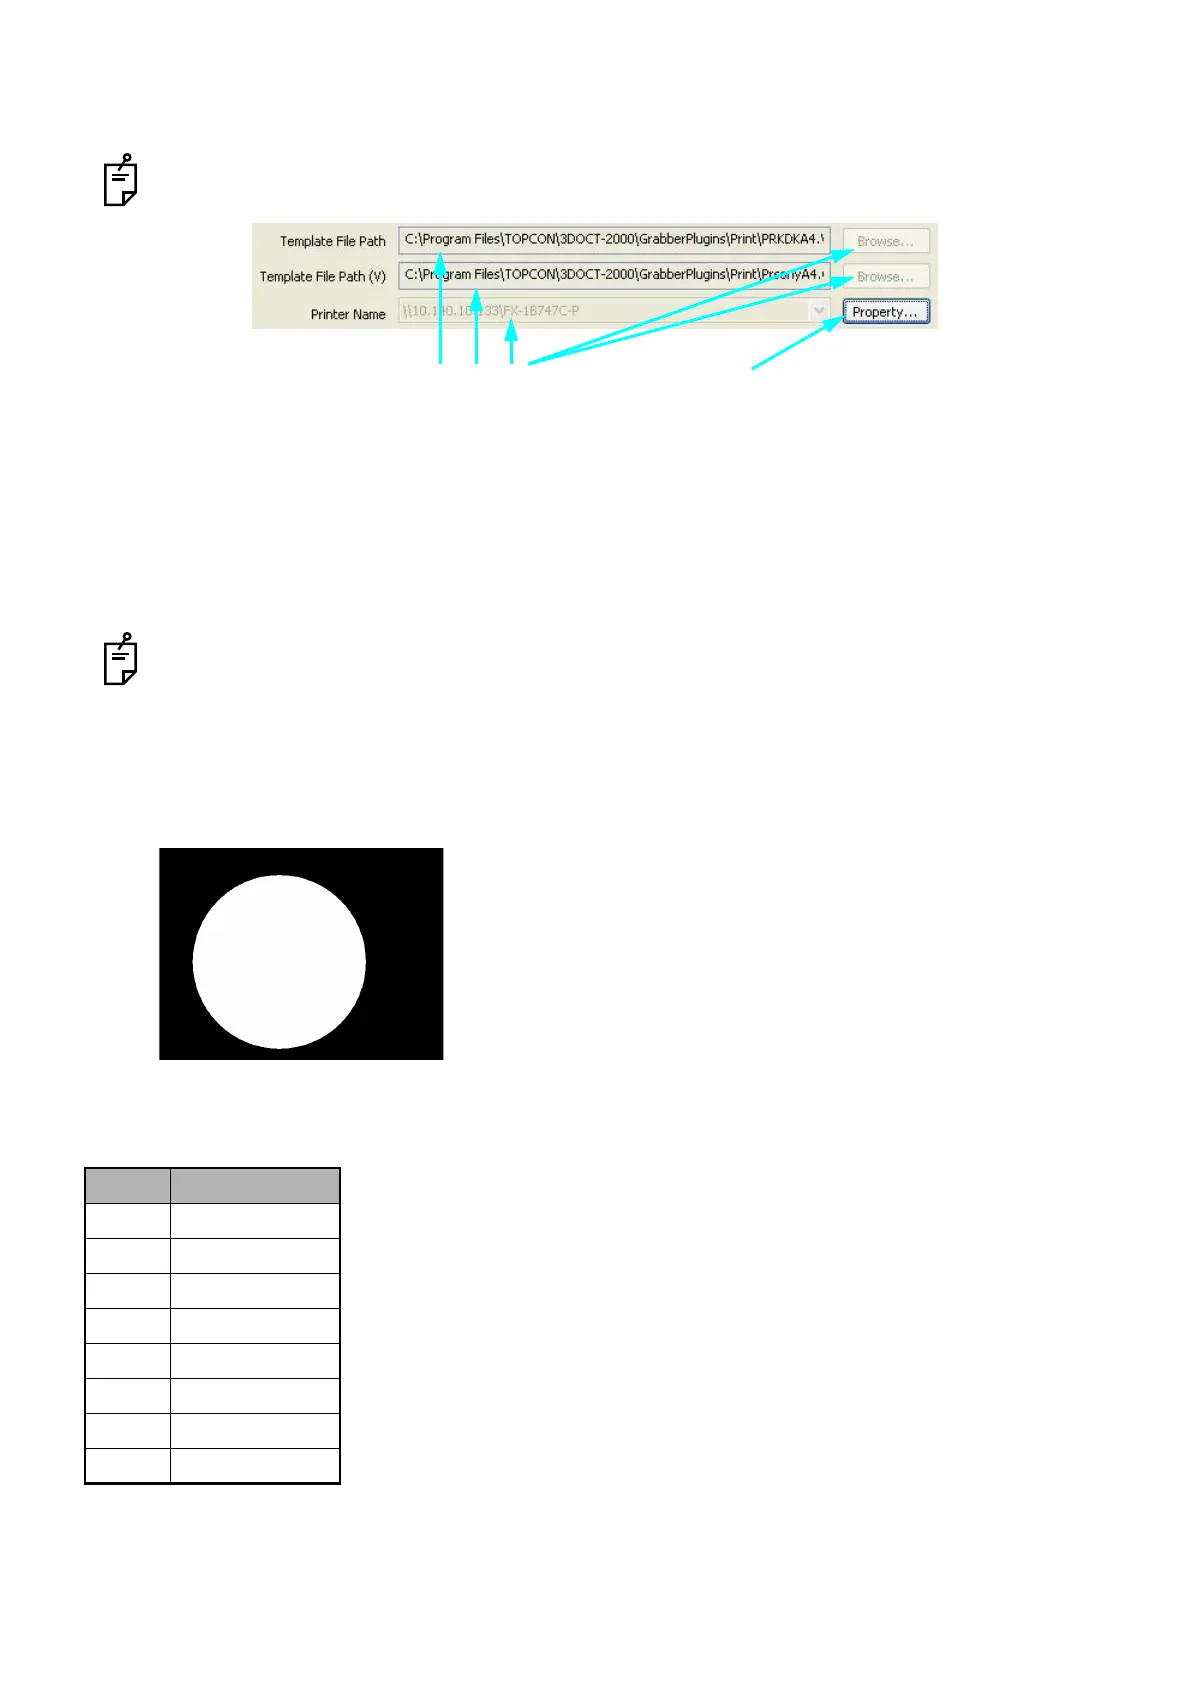
Displays the template file path and printer that are set in (3).
These data cannot be changed here. Only when "Not use template set" is selected in (3), the set-
ting for the template file path and printer is validated. You can set the data on this dialog box.
As a template file, you can specify the file having the extension ".WRI" that exists in the "GrabberPlu-
gins\Print" folder of the 3D OCT program folder (example: C:\Program Files\TOPCON\3DOCT-2000).
(5) Remove Mask
Specify the mask method for the fundus image according to the need. There are two methods: one is to
apply a mask by image processing and the other is to specify a mask file.
"Mask File" is the black-and-white Bit Map image as shown below. This is used as a template to
remove the black portion around the image. To create a mask file, use "Maskedit.exe".
"Maskedit.exe" is contained in the CD-ROM of IMAGEnet R4™. It is necessary to save the mask
file with the following filename.
Picture angle_Horizontal pixels_Vertical pixels_Procedure.bmp
Example: 45_2048_1536_Color.bmp
(6) Layout
Set the layout for printing. The following table shows the selectable items.
No. Contents
1 Original
21UP
32UP (H)
42UP (V)
54UP
66UP (V)
79UP
816UP
Validated only when "Not use
template set" is selected.
Usually validated.
Displays the "Property" dialog box for printer.