ControlPanelandWindshieldWiperAssembly
g316356
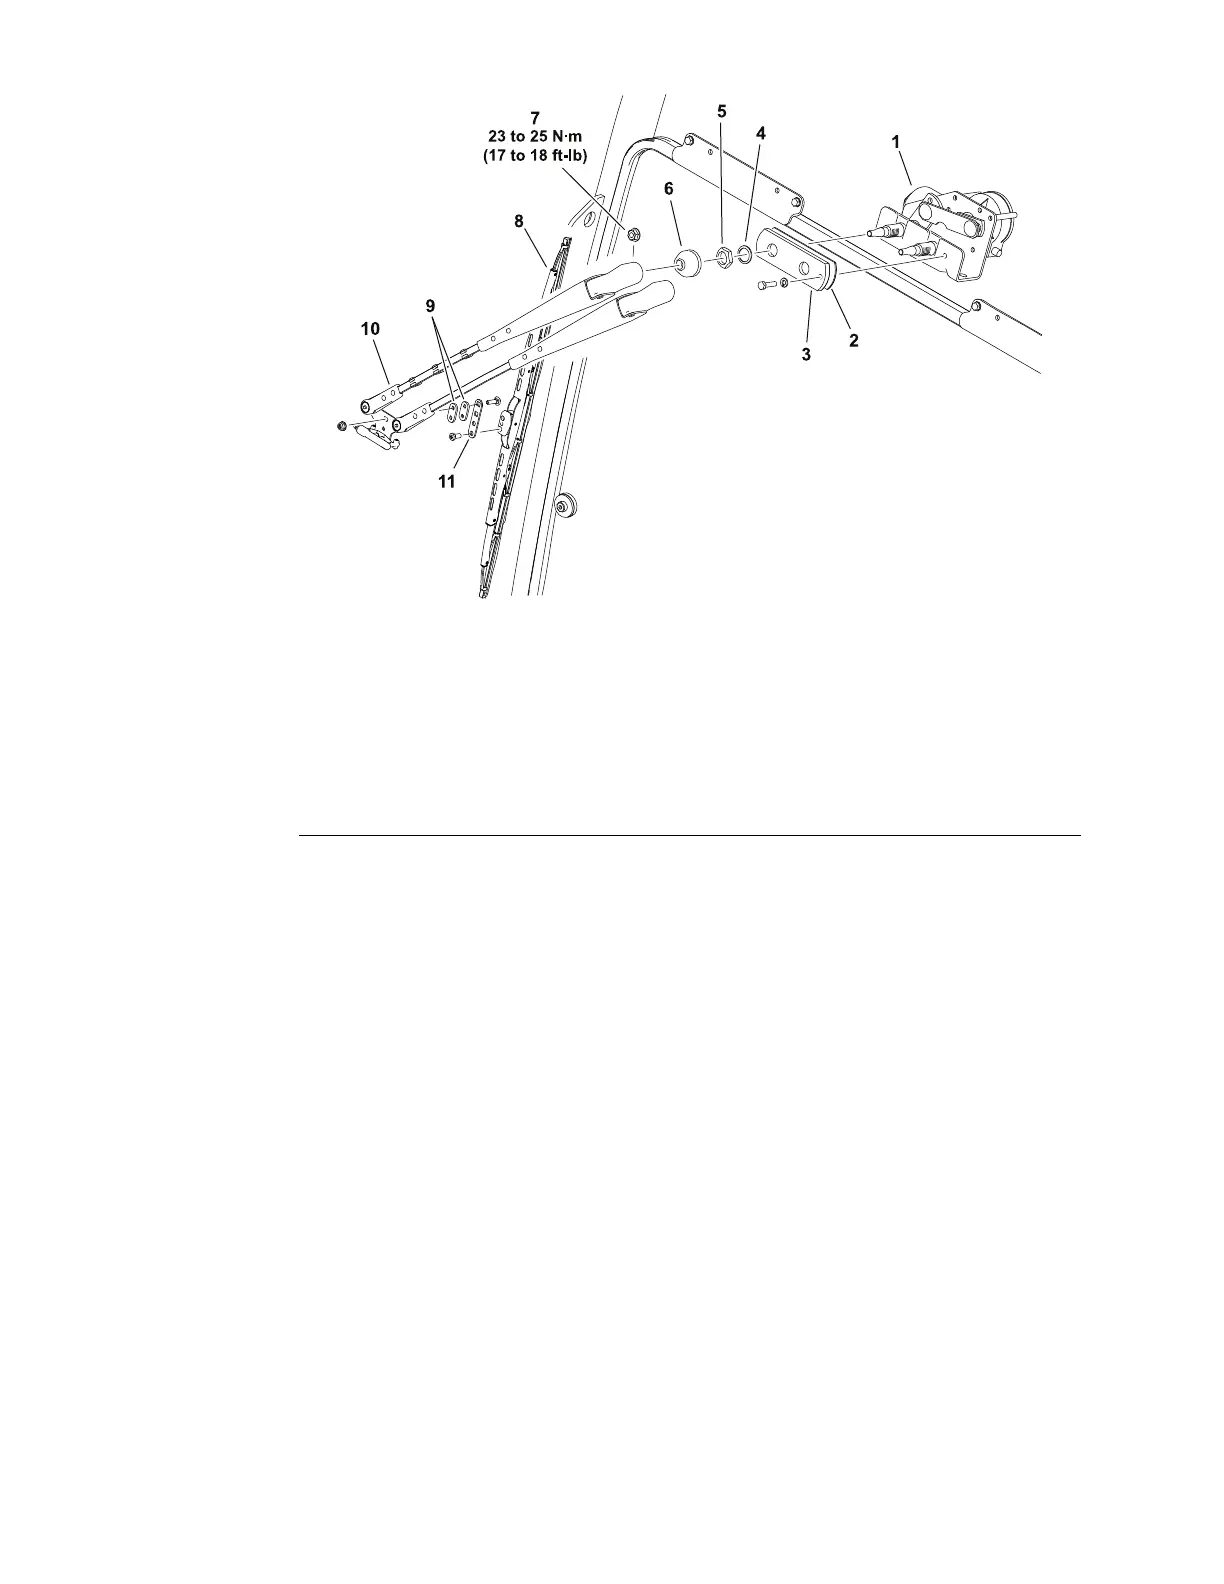
Figure149
1.Wipermotor
7.Flangenut(2each)
2.Gasket
8.Wiperblade
3.Mountingplate
9.Spacer(2each)
4.Washer(2each)
10.Wiperarmassembly
5.Locknut(2each)
11.Bracket
6.Boot(2each)
RemovingtheWindshieldWiperAssembly
Note:Ifpossible,operatethewindshieldwiperstoensurethatthewipermotor
shaftisinitshomepositionpriortodisassembly.
1.Disconnectthewashersupplyhoseandremovethewiperarmassembly.
2.Removethe4capscrewssecuringthecontrolpanelcover.Disconnect
thewindshieldwiper/washerswitchfromthewireharnessandremovethe
coverassembly.
3.Removethewindshieldwiperboots,locknuts,andwashersfromoutside
theroofpanel.
4.Supportthewipermotor,removethemountingplatefromoutsidethecab,
andremovethewipermotor.
InstallingtheControlPanelandWindshieldWiperAssembly
1.Fitthewipermotorshaftsthroughthecabframeandinstallthemounting
platefromoutsidethecab.
2.Installthewashers,locknuts,andboots.
Note:Thewipermotormustbeinitshomepositionpriortoinstallingthe
wiperarmassembly.Replacementwipermotorsareshippedwiththemotor
inthehomeposition.Youmayalsoenergizeandoperatethewipermotorfor
atleastonecycletosetthemotortoitshomeposition.
OperatorCab:ServiceandRepairs
Page9–14
Groundsmaster
®
3200,3300and3310
19240SLRevA