Removing the SDLA Spool Valve (continued)
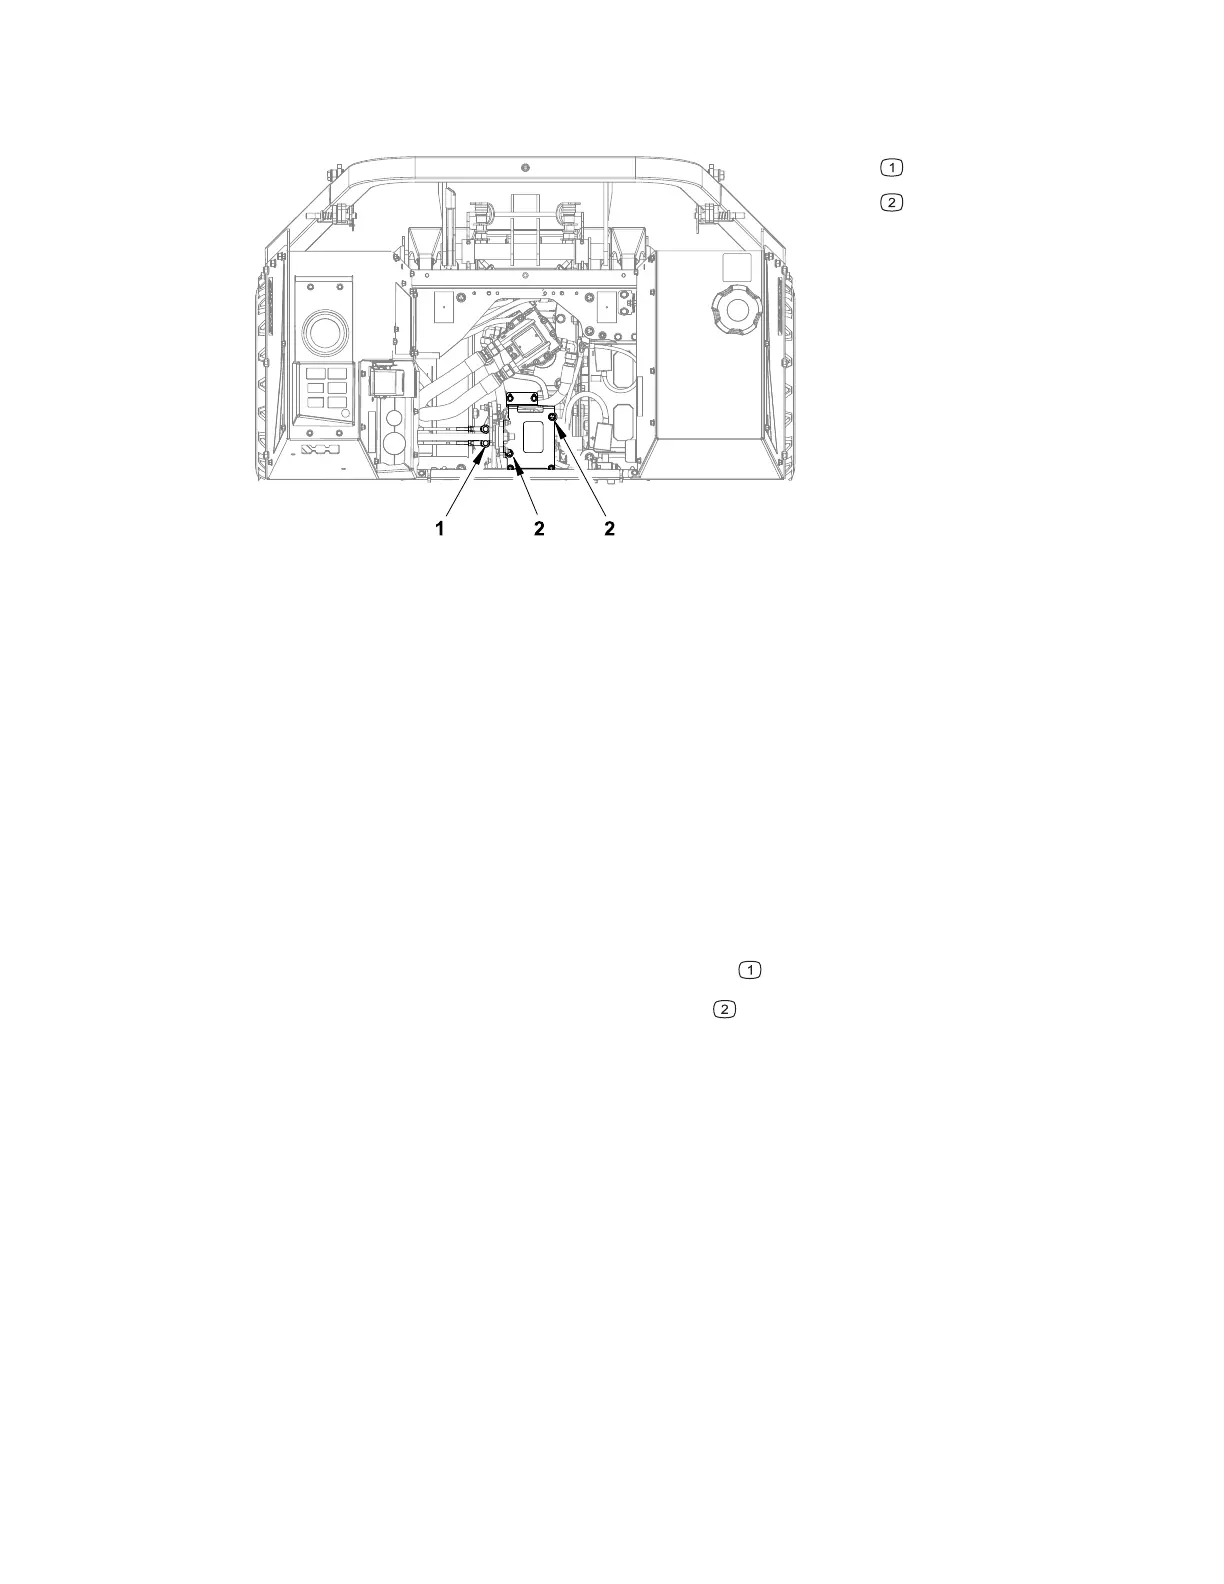
Figure 33
G448312
Linkage mounting bolts
Valve mounting bolts
1. Remove any attachments from the machine, park the machine on a level surface,
engage the parking brake, remove the key from the ignition, and switch the main
circuit breaker to the O
FF position.
2. Remove the lower frame cover; refer to Removing and Installing the Lower
Frame Cover, page 7–18.
3. Remove the seat and seat mount; refer to Removing and Installing the Seat
Mount, page 7–31.
Note: Clean the hydraulic connections before disconnecting any hydraulic hoses or
fittings.
4. Label and disconnect the hydraulic hoses from the spool valve. Install clean caps
or plugs on the hydraulic hoses and fittings to prevent contamination.
5. Remove the SDLA linkage mounting bolts
6. Remove the spool valve mounting bolts and remove the spool valve from the
machine.
Installing the SDLA Spool Valve
1. Position the spool valve in the machine aligning the mounting holes, install the
mounting bolts Figure 33, item 2.
2. Install the SDLA linkage mounting bolts Figure 33, item 1.
3. Remove the caps and plugs that were installed on the hydraulic hoses. Lubricate
and install new O-rings, connect the hydraulic hoses to the fittings on the spool
valve. Tighten the hose connections; refer to Installing the Hydraulic Hoses and
Tubes (O-Ring Face Seal), page 5–10.
4. Install the seat and seat mount.
5. Add hydraulic fluid to the system.
4520P Page 5–27 Hydraulic System: Service and Repairs
09.40003Rev 00
 Loading...


