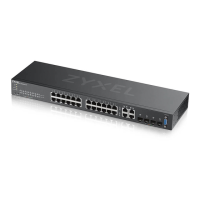
GS2220 Series User’s Guide
242
24.5.1 MVR G ro up C o nfig ura tion
All source ports and receiver ports belonging to a multicast group can receive multicast data sent to this
multicast group.
Use this screen to configure MVR IP multicast group addresses. Click the G ro up C o nfig ura tio n link in the
MVR screen.
Note: A port can belong to more than one multicast VLAN. However, IP multicast group
addresses in different multicast VLANs cannot overlap.
Source Port Select this option to set this port as the MVR source port that sends and receives multicast
traffic. All source ports must belong to a single multicast VLAN.
Receiver Port Select this option to set this port as a receiver port that only receives multicast traffic.
None Select this option to set the port not to participate in MVR. No MVR multicast traffic is sent or
received on this port.
Tagging Select this check box if you want the port to tag the VLAN ID in all outgoing frames
transmitted.
Add Click this to create a new entry or to update an existing one.
This saves your changes to the Switch’s run-time memory. The Switch loses these changes if it is
turned off or loses power, so use the Sa ve link on the top navigation panel to save your
changes to the non-volatile memory when you are done configuring.
Cancel Click Ca nc e l to begin configuring this screen afresh.
VLAN This field displays the multicast VLAN ID. Click on an index number to change the settings.
Active This field displays whether the multicast group is enabled or not.
Name This field displays the descriptive name for this setting.
Mode This field displays the MVR mode.
Source Port This field displays the source port numbers.
Receiver Port This field displays the receiver port numbers.
802.1p This field displays the priority level.
Select an entry’s check box to select a specific entry. Otherwise, select the check box in the
table heading row to select all entries.
Delete To delete a multicast VLANs, select the rules that you want to remove, then click the De le te
button.
Cancel Click Ca nc e l to clear the check boxes.
Table 107 Advanced Application > Multicast > MVR (continued)
LABEL DESC RIPTIO N
 Loading...