Date and Time Setting Management Configuration
Date and Time Setting
ML systems support manual and automatic date and time assignment. Automatic assignment
uses Simple Network Time Protocol (SNTP) and requires connectivity to NTP/SNTP server.
(Automatic Time of Day (TOD) adjustments according to Daylight Savings Time (DST)
rules is also supported.)
It is recommended to configure Date and Time of the system manually, even when planning
to use automatic Date and Time synchronization. Correct date and time allows reliable
system monitoring and is helpful in troubleshooting.
Configuring Date and Time Manually
This section describes how to configure the ML clock manually. Manual clock configuration
is recommended even when planning to use automatic Date and Time synchronization.
To set Date and Time
1. On the Navigation tree in the Network Element tree, expand System Administration.
2. Open Date and Time. The Date and Time pane opens in the work area.
3. In the SNTP area, verify Auto-sync is Disabled (go to step 7 to configures only the Time
Zone).
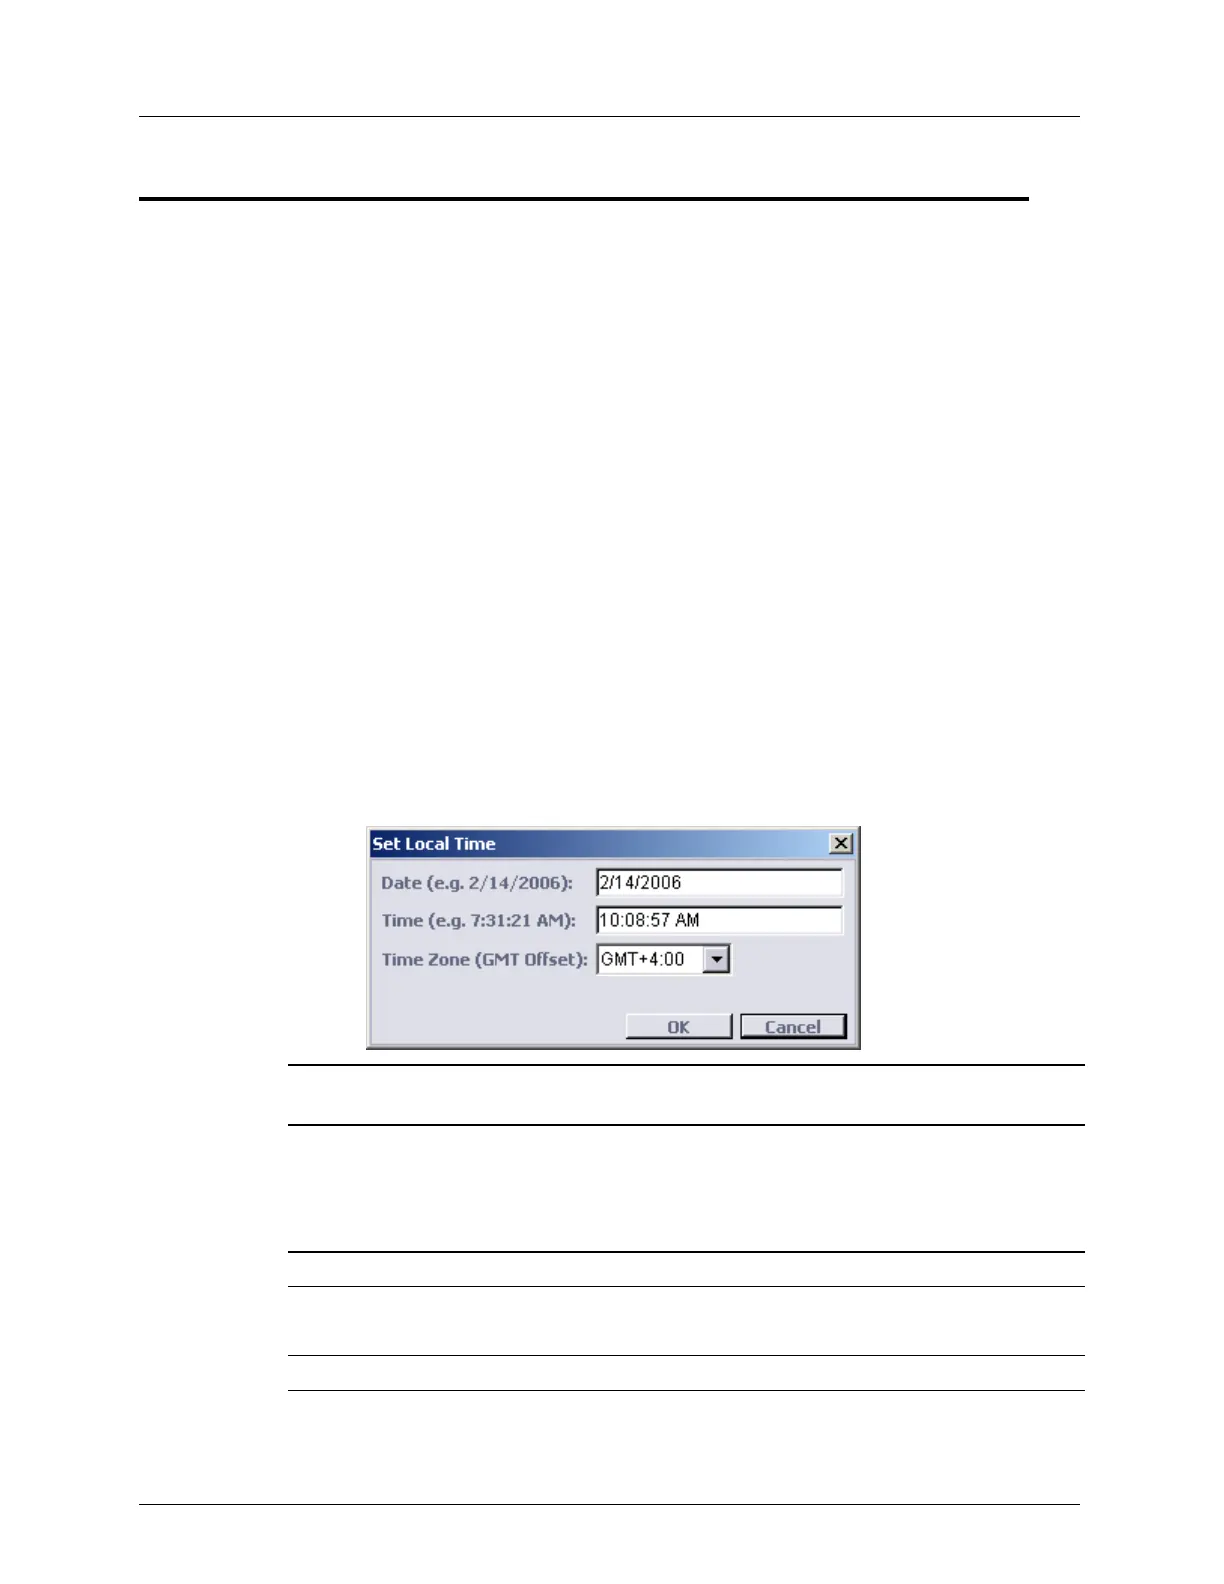
4. In the Local Time area, click Configure. The Set Local Time dialog appears.
NOTE: For group operations, open the Set Local Time dialog box via the menu bar: Group
Operations, Date and Time, Configure.
5. To set the date: in the Date box type the date in accordance to the computer format (for
example, 2/14/2006).
6. To set the time: in the Time box type the time in accordance to the computer format (for
example, 10:08:57 AM).
NOTE: Refer to Daylight Saving Time (DST) Configuration (on page 3-23).
7. To set the time zone from the Time Zone list box, select the time zone in accordance to
the local time zone (for example, GMT +4:00).
NOTE: Time Zone is effective in Auto Sync mode only.
8. Click OK.