Chapter 8
8.6 Menu Calibration
Press ’Save file(s)’ option in the Body calibration dialogue to store the calibration file(s) of
the currently used bodies.
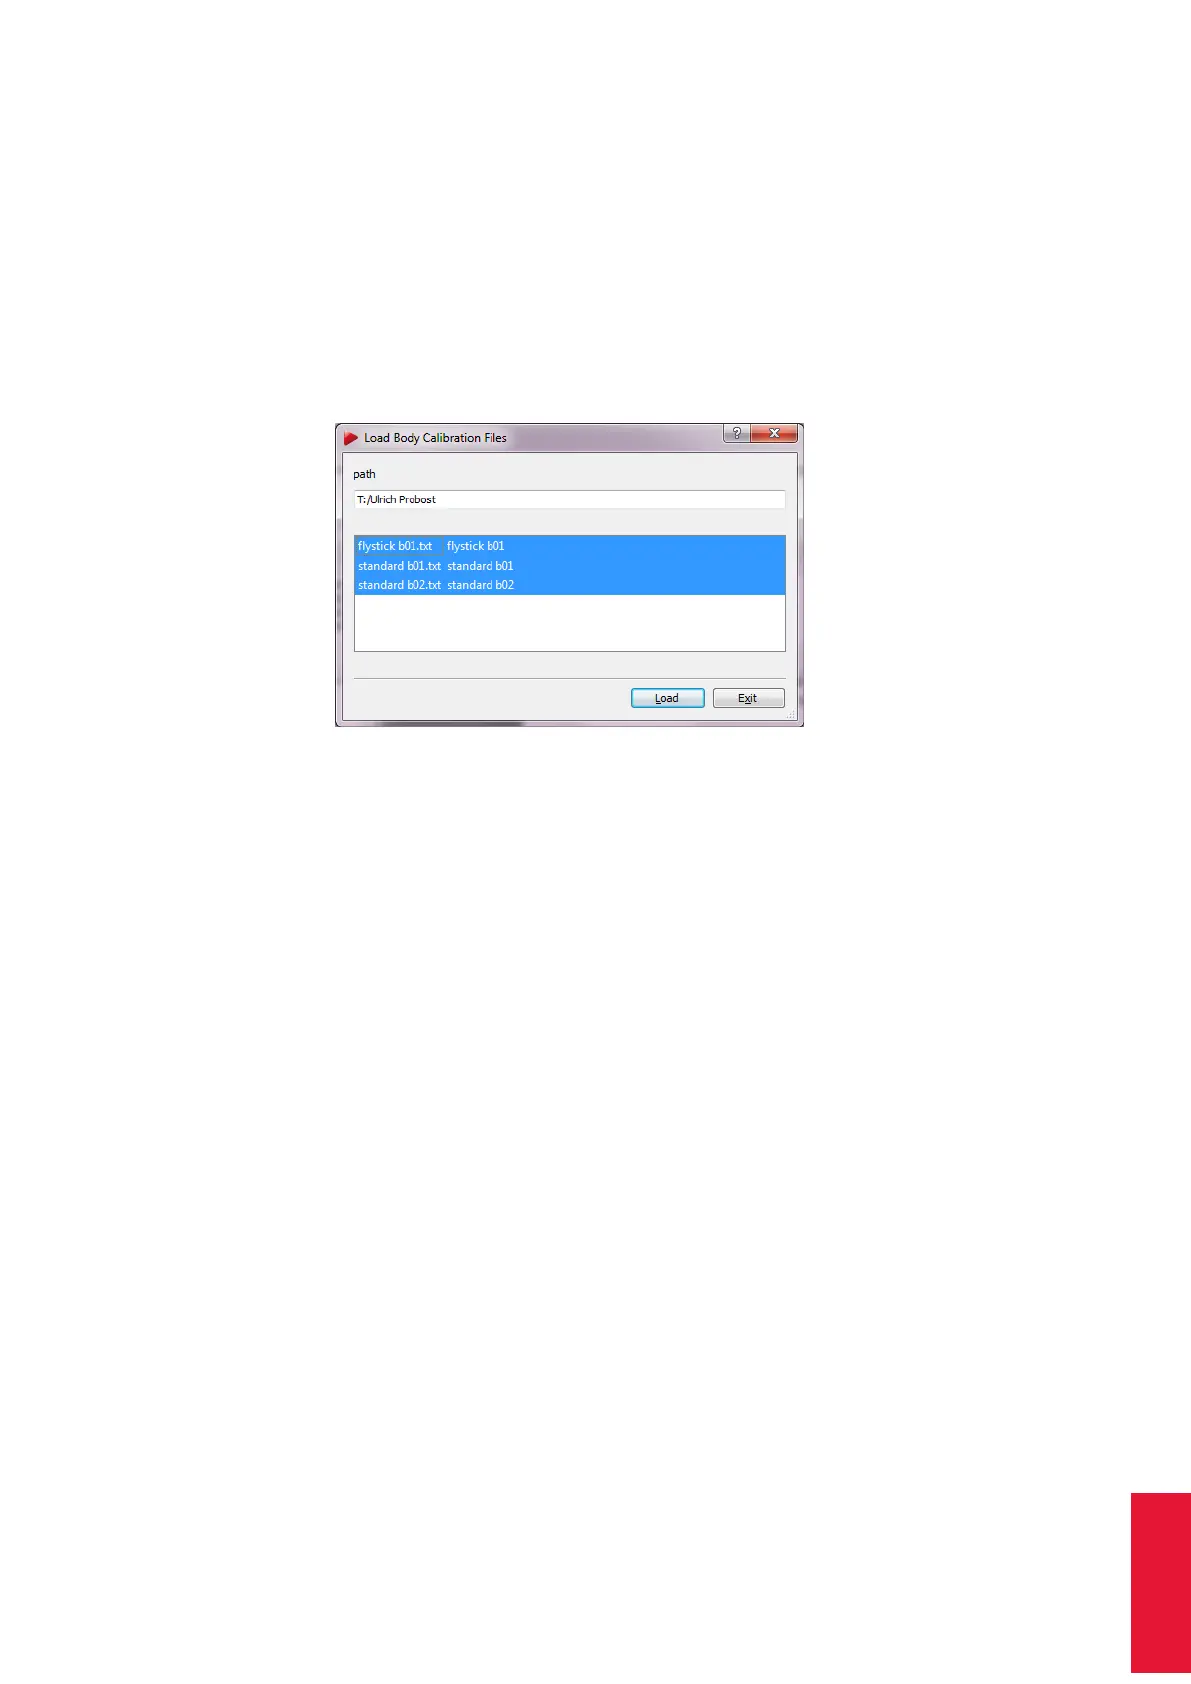
You can also load calibrations . Press Load file(s) (see figure 8.34) and choose the cali-
bration file(s) for your targets. The format of the file name has to be according to "standard
b01.txt" - the identifier "b01" refers to the ID of the target. DTrack2 automatically assigns
the calibration file to the respective target by using the identifier in the file name. Press
’Load’ again to confirm the import of the body calibration files.
Figure 8.34: Import of calibration files
Z
The previous body calibrations will be lost if you load new calibration
files.
i
Invalid or corrupt files are not loaded by DTrack2 . This is indicated by
an error message in the confirmation dialogue.
In the upcoming window (see figure 8.32 on page 178) the coordinates of all identified
markers are listed together with the body’s label as well as the number of markers. It is
analogue to the body calibration result.
By clicking Show details additional information can be displayed.
• ’Distances’ shows all possible combinations of distances for all markers (min. dis-
tances are important for customer-specific geometries, call ART for further informa-
tion)
• ’Emissions’ shows normalised emission vectors x, y, z and emission aperture for
bodies with restrictions of visibility (calibration files available on request by ART )
• ’Cylinder’ shows coordinates and radii for bodies with (cylindrical) ring markers
Restricted Visibility / Emission Cones Optionally a restricted visibility can be defined
for each marker of a body. This is performed setting up so called ’emission cones’; in
essence, a 2DOF observation from a camera has to be inside this cone so that tracking
data can be used later for pose estimation. Currently the only way to equip markers with
181