5-43
Confidential
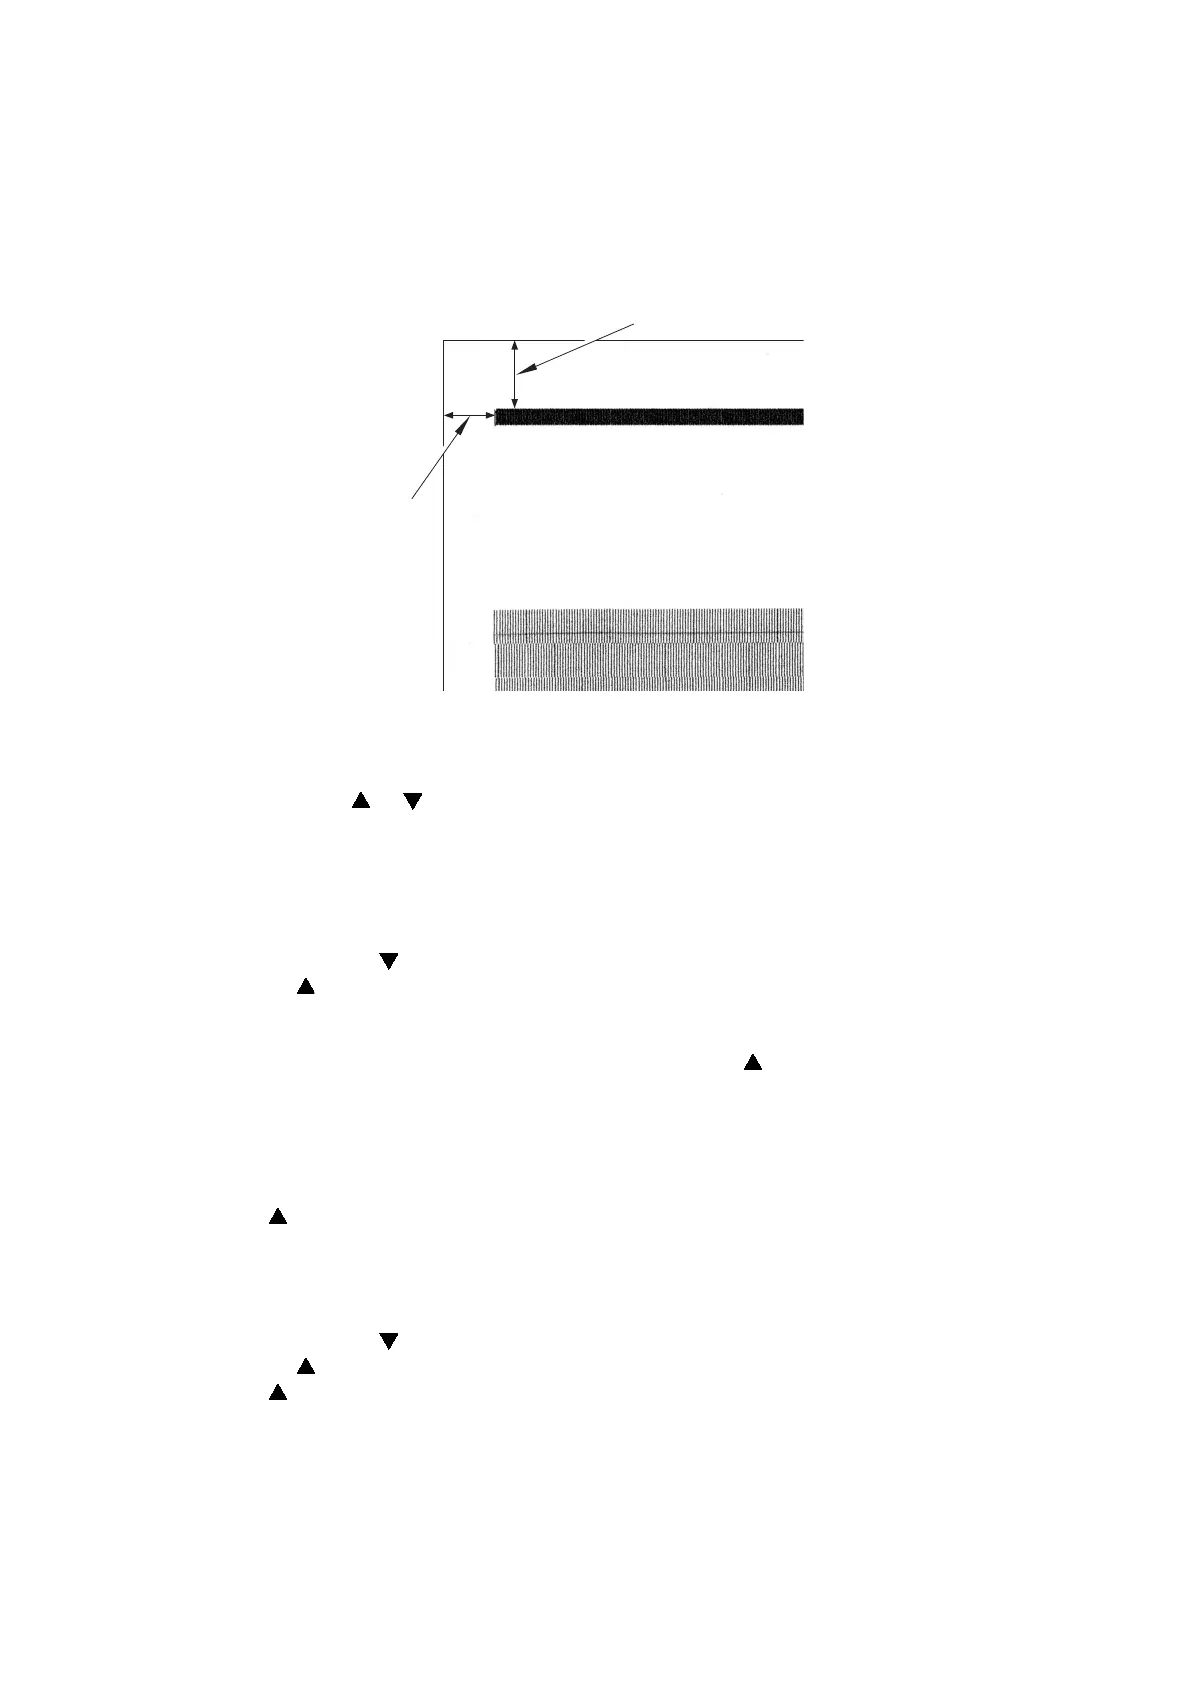
(6) Measure the adjustment values for the print start position.
For the left margin adjustment, measure and record the distance between the left end of
the pattern "A" and the left end of the paper. For the top margin adjustment, measure and
record the distance between the top end of the pattern "A" and the top end of the paper.
Fig. 5-25
(7)
Press the or button to display "
2.2 ADJUST
" on the LCD and press the
OK
button.
"GRADCHK 1.OK 2.NG" is displayed on the LCD.
(8) Press the 1 button. Display "LR Adjust=10.0" on the LCD to activate the "Input margin
adjustment" screen.
(9) Enter the left margin adjustment value first.
Pressing the button decreases the value displayed on the LCD, and pressing
the button increases the value.
In the case of Letter size paper
For example, if the measured value is 11.0, press the button repeatedly to display
"LRAdjust=11.0" on the LCD and press the OK button.
In the case of A4 size paper
Input the measured value +3 mm (the difference in the width between Letter size paper
and A4 size paper) in the machine. For example, if the measured value is 11.0, press the
button repeatedly to display "LRAdjust=14.0" on the LCD and press the OK button.
The left margin adjustment value is input and the machine displays "Edge Adjust=10.0"
on the LCD.
(10) Enter the top margin adjustment value.
Pressing the button decreases the value displayed on the LCD, and pressing
the button increases the value. For example, if the measured value is 9.5, press the
button 5 times to display "EdgeAdjust=9.5" on the LCD and press the OK button. The
top margin adjustment value is input and the machine returns to the initial state of the
maintenance mode.
Top margin
Left margin
A

 Loading...


