IMS.OM.002949.DRM Page 55 of 310 Version 1.4
Doremi Labs
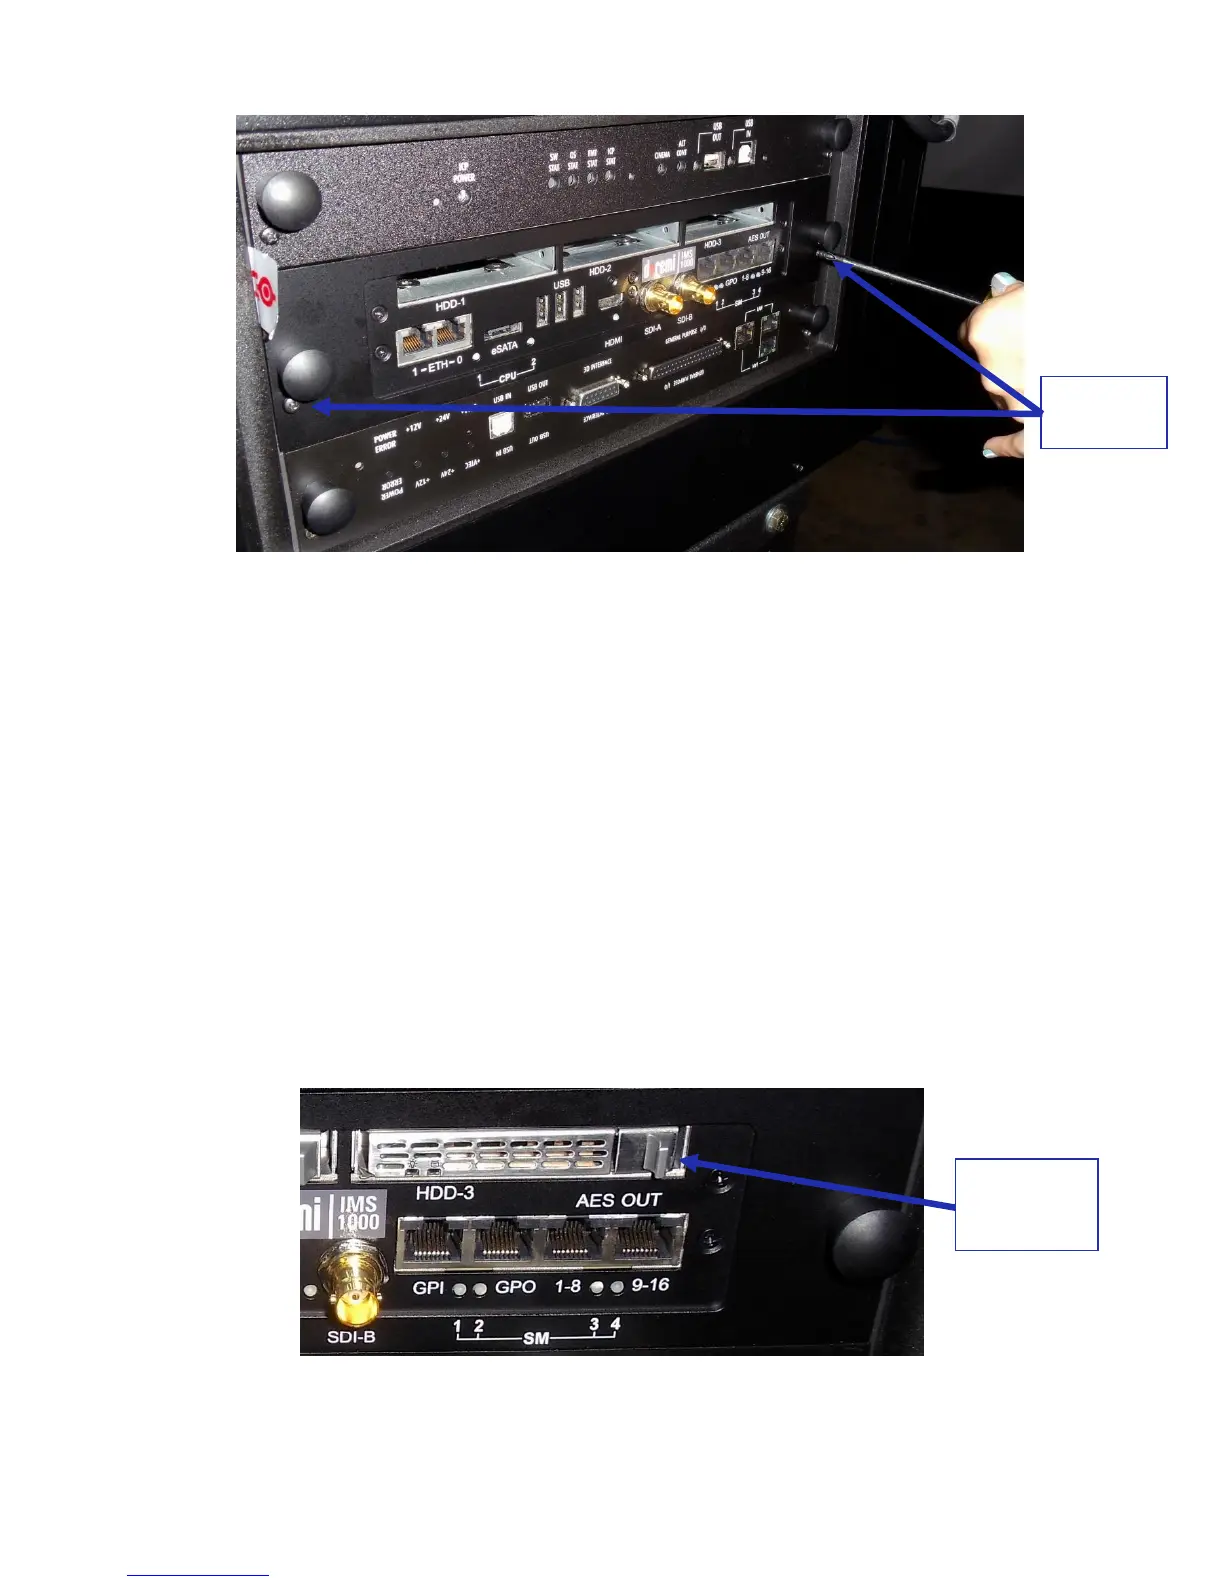
Figure 45: Tightening the Screws
5.2 HDDs
HDDs are to be shipped out of their chassis. Upon initial installation, insert them into the
IMS1000 HDDs chassis carrier prior to powering up the projector.
Do not insert or remove HDDs if the unit is powered on.
HDDs are to be of the same make and model and have the same capacity.
Doremi prohibits mixing SATA I drives with SATA II drives within the same RAID.
Each one of the three HDDs that come with the IMS1000 will be labeled with a 1, 2, or 3.
The HDD labeled 1 is to be inserted into the left hand HDD slot, labeled HDD-1, on the
IMS1000.
The HDD labeled 2 is to be inserted into the middle HDD slot, labeled HDD-2, on the
IMS1000.
The HDD labeled 3 is to be inserted into the right hand HDD slot, labeled HDD-3, on the
IMS1000.
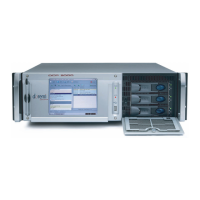
Each HDD has a silver latch mechanism that allows for unlatching of the drive from the
hard drive cage (Figure 46).
Figure 46: Silver Latch on HDD