EasyManuals Logo

Fujitsu PRIMERGY RX1330 M1 Upgrade And Maintenance Manual

Fujitsu PRIMERGY RX1330 M1
312 pages
To Next Page IconTo Next Page
To Previous Page IconTo Previous Page
Page #220 background imageLoading...
Page #220 background image
220 Upgrade and Maintenance Manual
RX1330 M1
Processor
11.2.6 Installing the heat sink
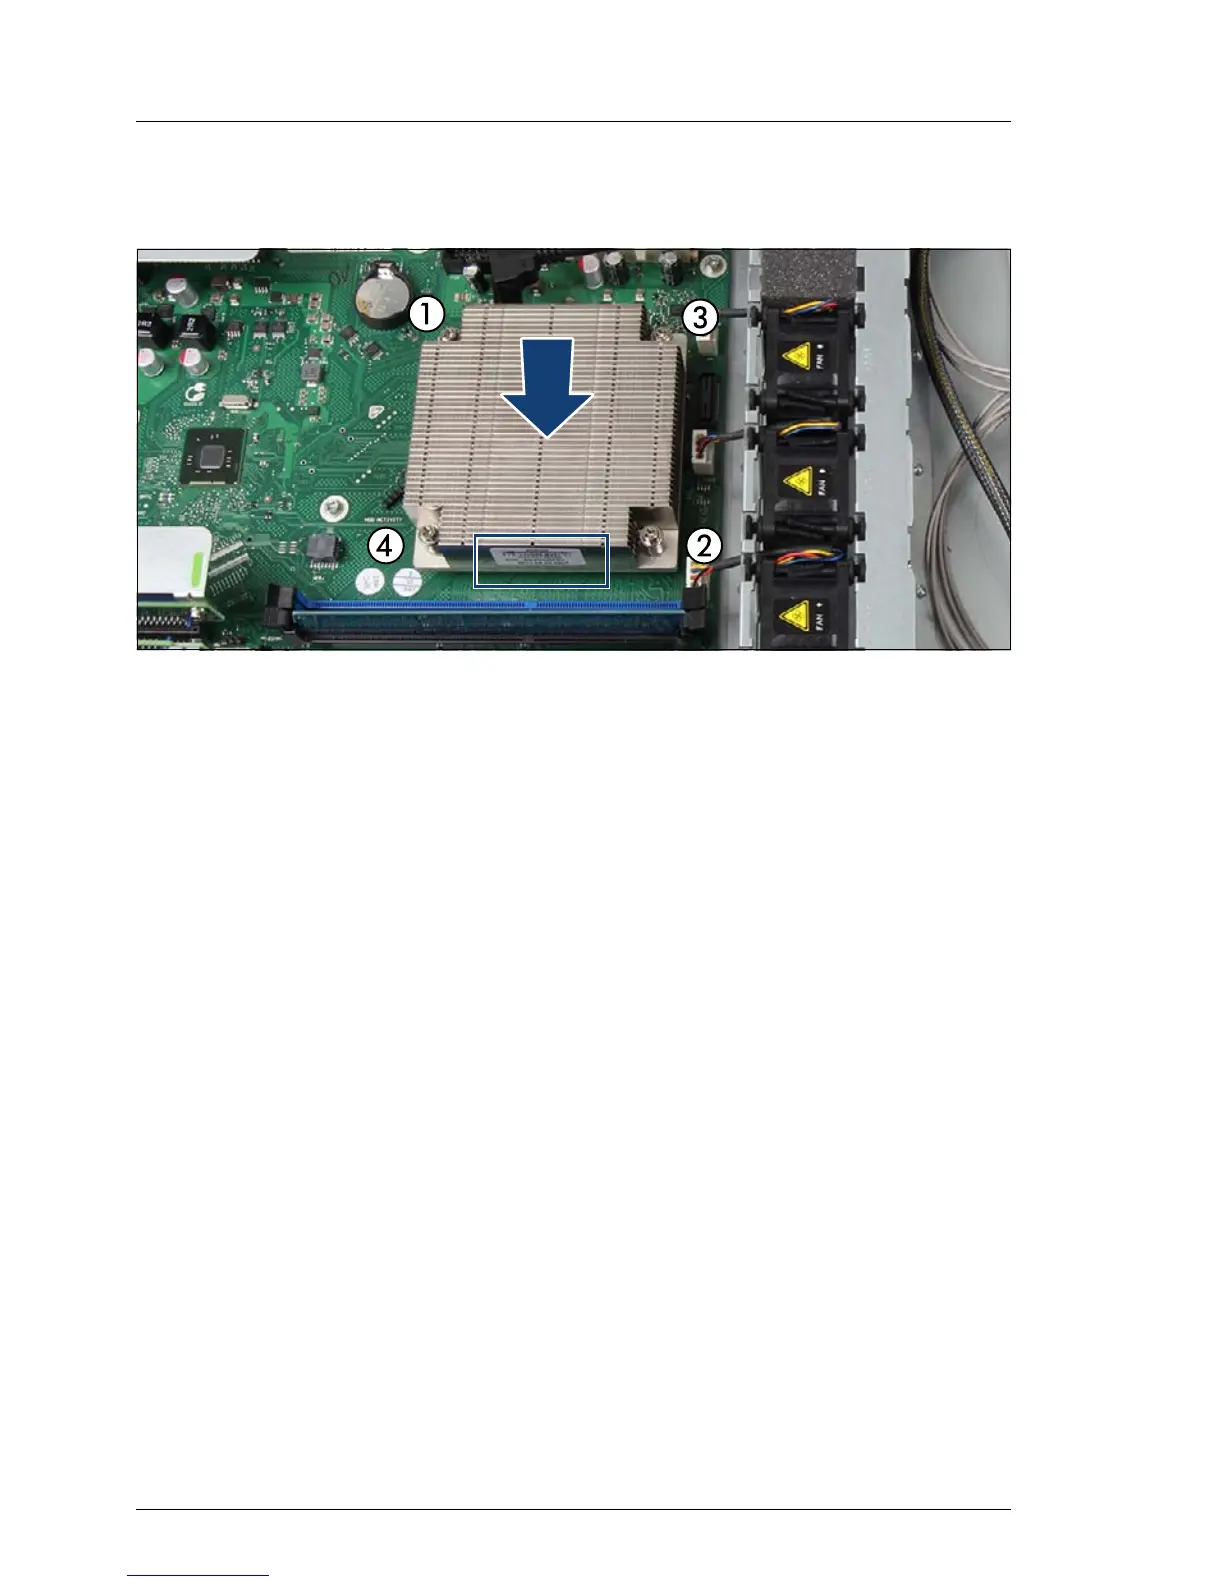
Figure 150: Installing the heat sink
Ê Align the heat sink and fit it on the processor socket.
Ê Position the screws in the holes carefully, making sure they are upright.
Ê Fasten it in a crossover pattern with four screws according to the numbering
(torque 6.0 Nm, the description of this torque value doesn't apply to the
Japanese market). Notice the position of the air flow label.
11.2.7 Concluding steps
Ê "Installing a riser module" on page 60
Ê "Reassembling" on page 52
Ê "Connecting the server to the mains" on page 55
I If the Global Error LED is flashing with the error message "CPU has
been changed" on the display after the system is powered on, please
follow the steps below.
Ê Restart the system and wait until the screen output appears.
Ê Press [F2].
Ê If a password is assigned, enter this password and confirm with
[Enter].
The BIOS setup main menu will be displayed on the screen.

Table of Contents

Other manuals for Fujitsu PRIMERGY RX1330 M1

Questions and Answers:

Question and Answer IconNeed help?

Do you have a question about the Fujitsu PRIMERGY RX1330 M1 and is the answer not in the manual?

Fujitsu PRIMERGY RX1330 M1 Specifications

General IconGeneral
Number of Processors1
Memory Slots4
Maximum Memory32 GB
Form Factor1U Rack
ProcessorIntel Core i3 product family Intel Pentium product family
CPU FamilyIntel Xeon
Memory TypeDDR3 UDIMM
StorageUp to 4 x 3.5" or 2.5" drives
Drive Bays4
RAID0, 1, 5, 10
RAID ControllerOptional
Network2 x Gigabit Ethernet
Operating System SupportWindows Server, Red Hat Linux, SUSE Linux

Related product manuals