53
Connecting Current Sensors and Conguring Current Sensor Settings
Connecting current sensors other than the optional sensors
1
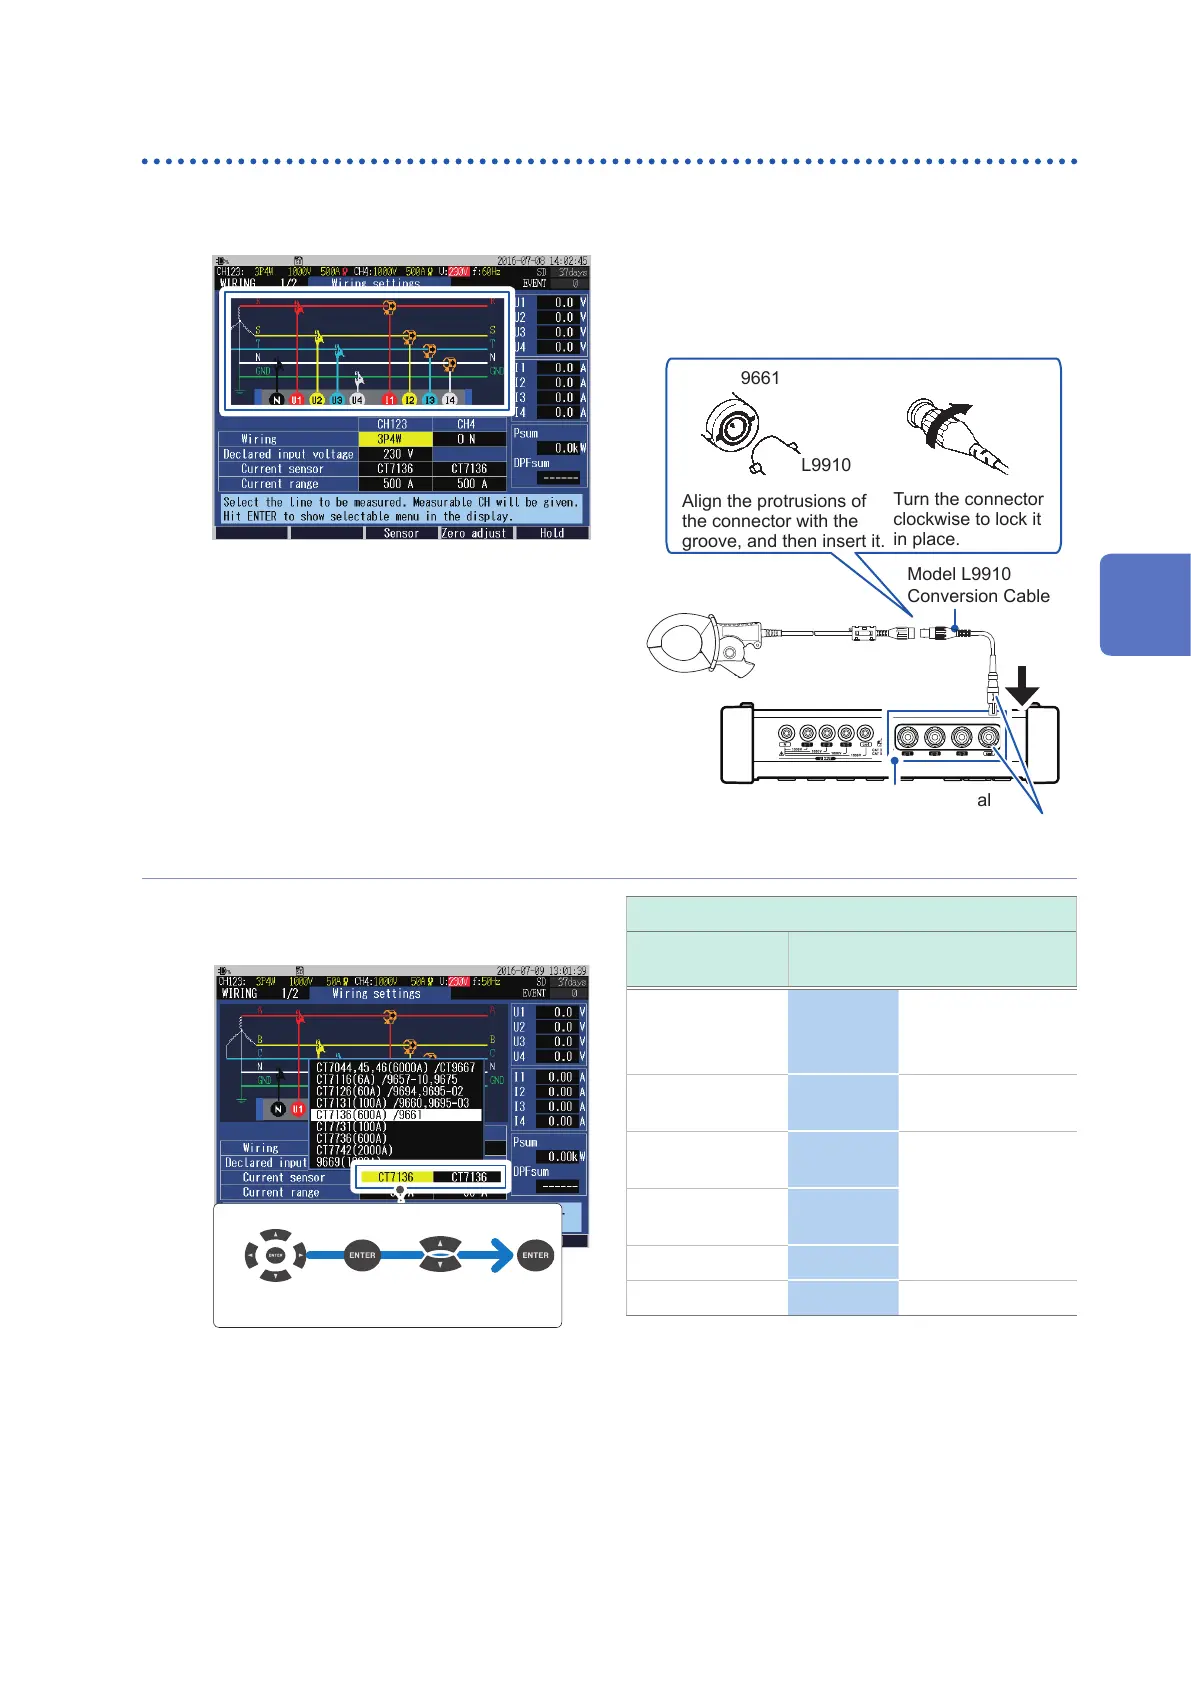
Press the [WIRING] key to display the
WIRING, wiring settings screen.
2
Insert the connector of the current
sensor while checking the channel on
the screen.
Example: Model 9661 clamp on
sensor
Align the protrusions of
the connector with the
groove, and then insert it.
Turn the connector
clockwise to lock it
in place.
Current input terminal
Model L9910
Conversion Cable
9661
L9910
1 2
Align the arrow with the concave part of the
terminal to insert the connector.
3
See the table given on the right side,
and select the corresponding optional
current sensor.
Move the cursor
Select
Example: Select CT7136 for Model 9661 clamp
on sensor
Current sensor
Other than the
optional*
Optional
CT9667-01*
CT9667-02*
CT9667-03*
CT7044
CT7045
CT7046
AC Flexible Current
Sensor
9657-10
9675
CT7116
AC Leakage
Current Sensor
9694
9695-02
CT7126
AC Current Sensor9660
9695-03
CT7131
9661 CT7136
9669 9669 Clamp On Sensor
*: Set the range switch of the sensor to 500 A
when the current range of this instrument is set
to 500 A or 50 A.
4
Wiring (WIRING Screen)

 Loading...


