104
Time Control Function
Time control function setting method
When using the all-wiring-conguration integration
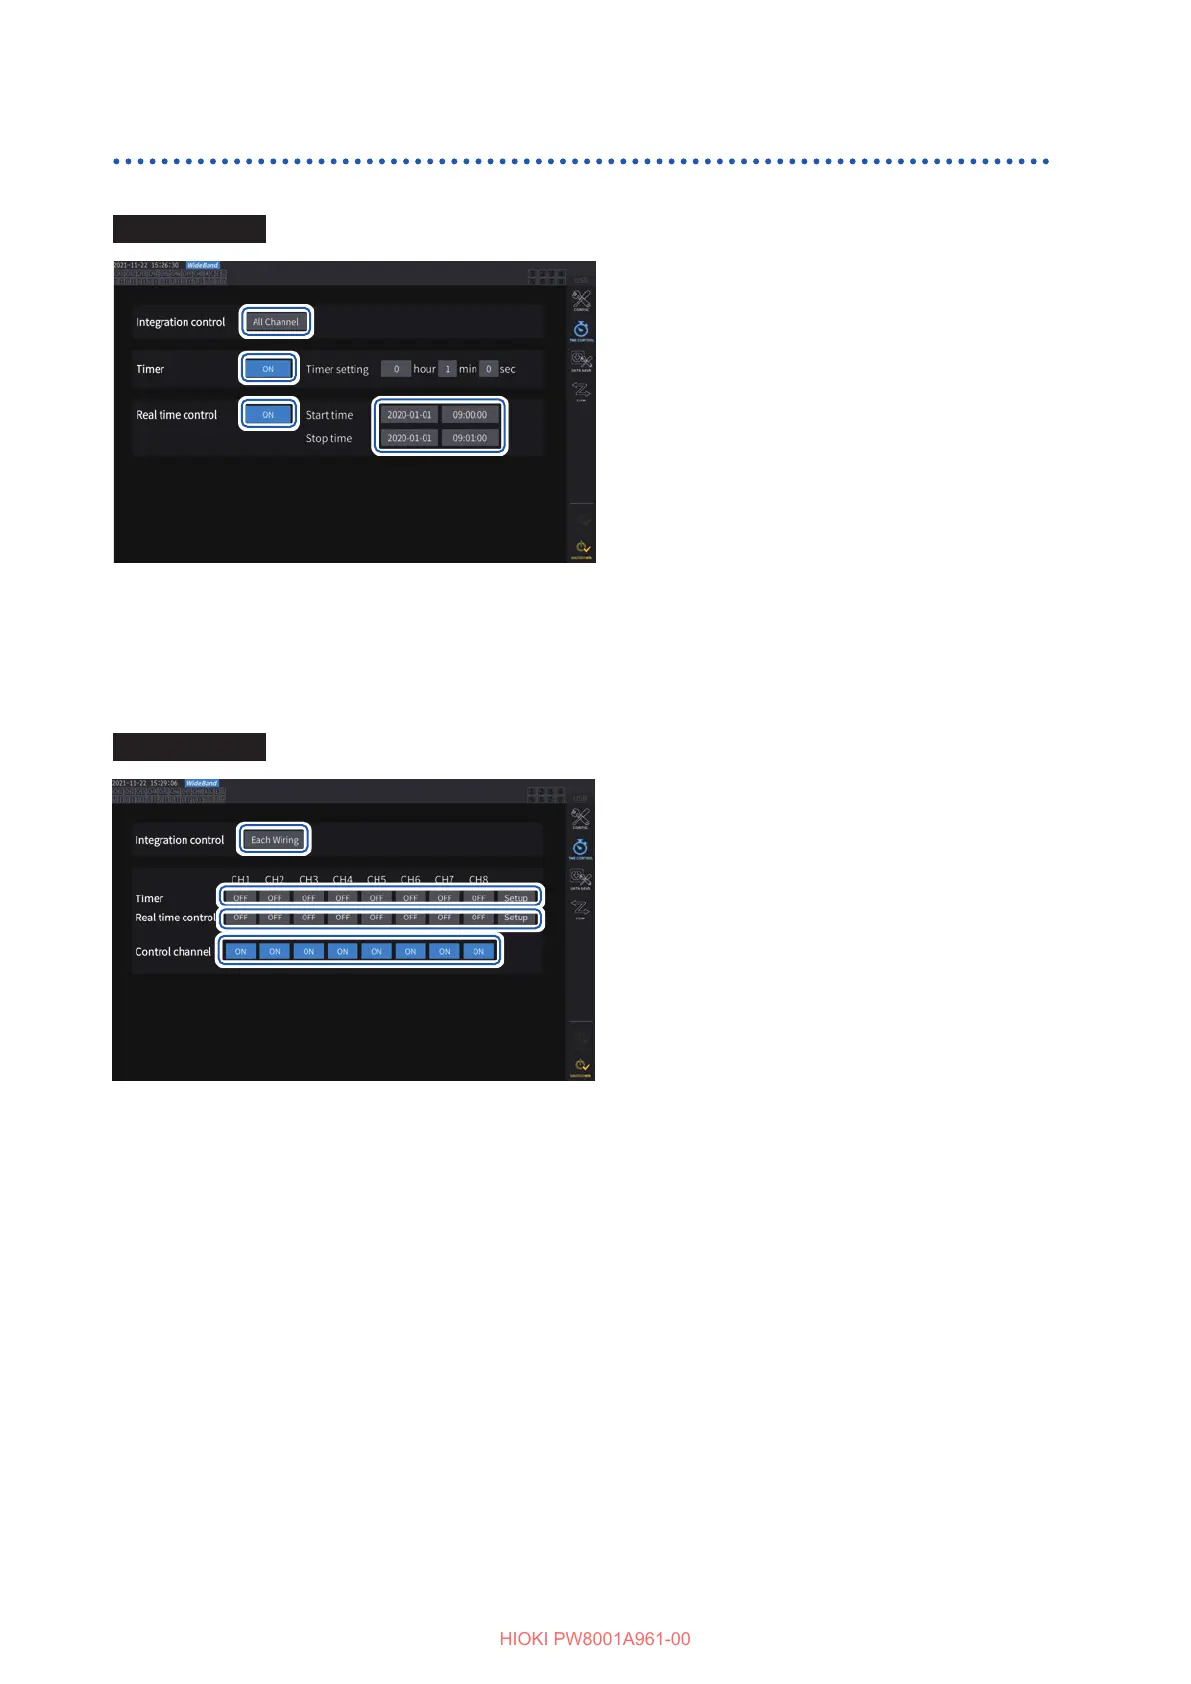
Display screen [SYSTEM] > [TIME CONTROL]
11
33
44
55
22
1
Tap [Integration control] box indicating
[All Channels].
2
(When using the timer control)
Tap the [Timer] box of the channel you
wish to control to set it to [ON].
3
(When using the real time control)
Tap the [Real time control] box of the
channel you wish to control to set it to
[ON].
4
Tap the [Start time] box to set the
integration start time.
5
Tap the [Stop time] box to set the
integration stop time.
When using each-wiring-conguration integration
Display screen [SYSTEM] > [TIME CONTROL]
11
44
22
33
1
Tap [Each Wiring] box under
[Integration control].
2
(When using the timer control)
Tap the [Timer] box of which you wish
to control to set it to [ON], and then tap
[Setup] to enter the timer setting value.
3
(When using real time control)
Tap the [Real time control] box of
which you wish to control to set it to
[ON], and then tap [Setup] to enter the
start and stop time.
4
Tap the [Control channel] box to set
the channel to be controls to [ON].
Before performing integration or saving data using the time control function
• Make sure that you set the clock (current time) before automatically saving data or using the
integration function.
See “6 System Settings” (p. 115).
• The auto-save operation and the integration function cannot be congured separately.
• When the integration control setting is set to [All Channel], the integration function is always
active. After stopping the time control, press the DATA RESET key to reset integrated values.
• When the integration control setting is set to [Each Wiring], the auto-save operation is not
available.

 Loading...


