126
Saving Measured Data
Automatically saving measured data
This function automatically saves measured values at the set time. Parameters that have been set
in advance will be saved.
Saving
destination
location
USB ash drive
Filename
Automatically generated based on the time and date at start of saving with CSV or BIN
extension for measured data or SET for settings data
MMDDnnkkk.CSV, MMDDnn000.SET
(MM: month, DD: date, nn: sequential number from 00 to 99 within the same folder
kkk: sequential number from 000 to 999 for le segments when the le size exceeds
500 MB)
Example: 110400000.CSV (rst le saved on November 4)
See “Folder and le structure when saving data automatically” (p. 128).
IMPORTANT
• If auto-save operation starts during manual save operation, waveform save operation, or
screenshot operation, some data sets that should be saved may be discarded.
• No auto-save le is created when each wiring integration is enabled. (p. 64)
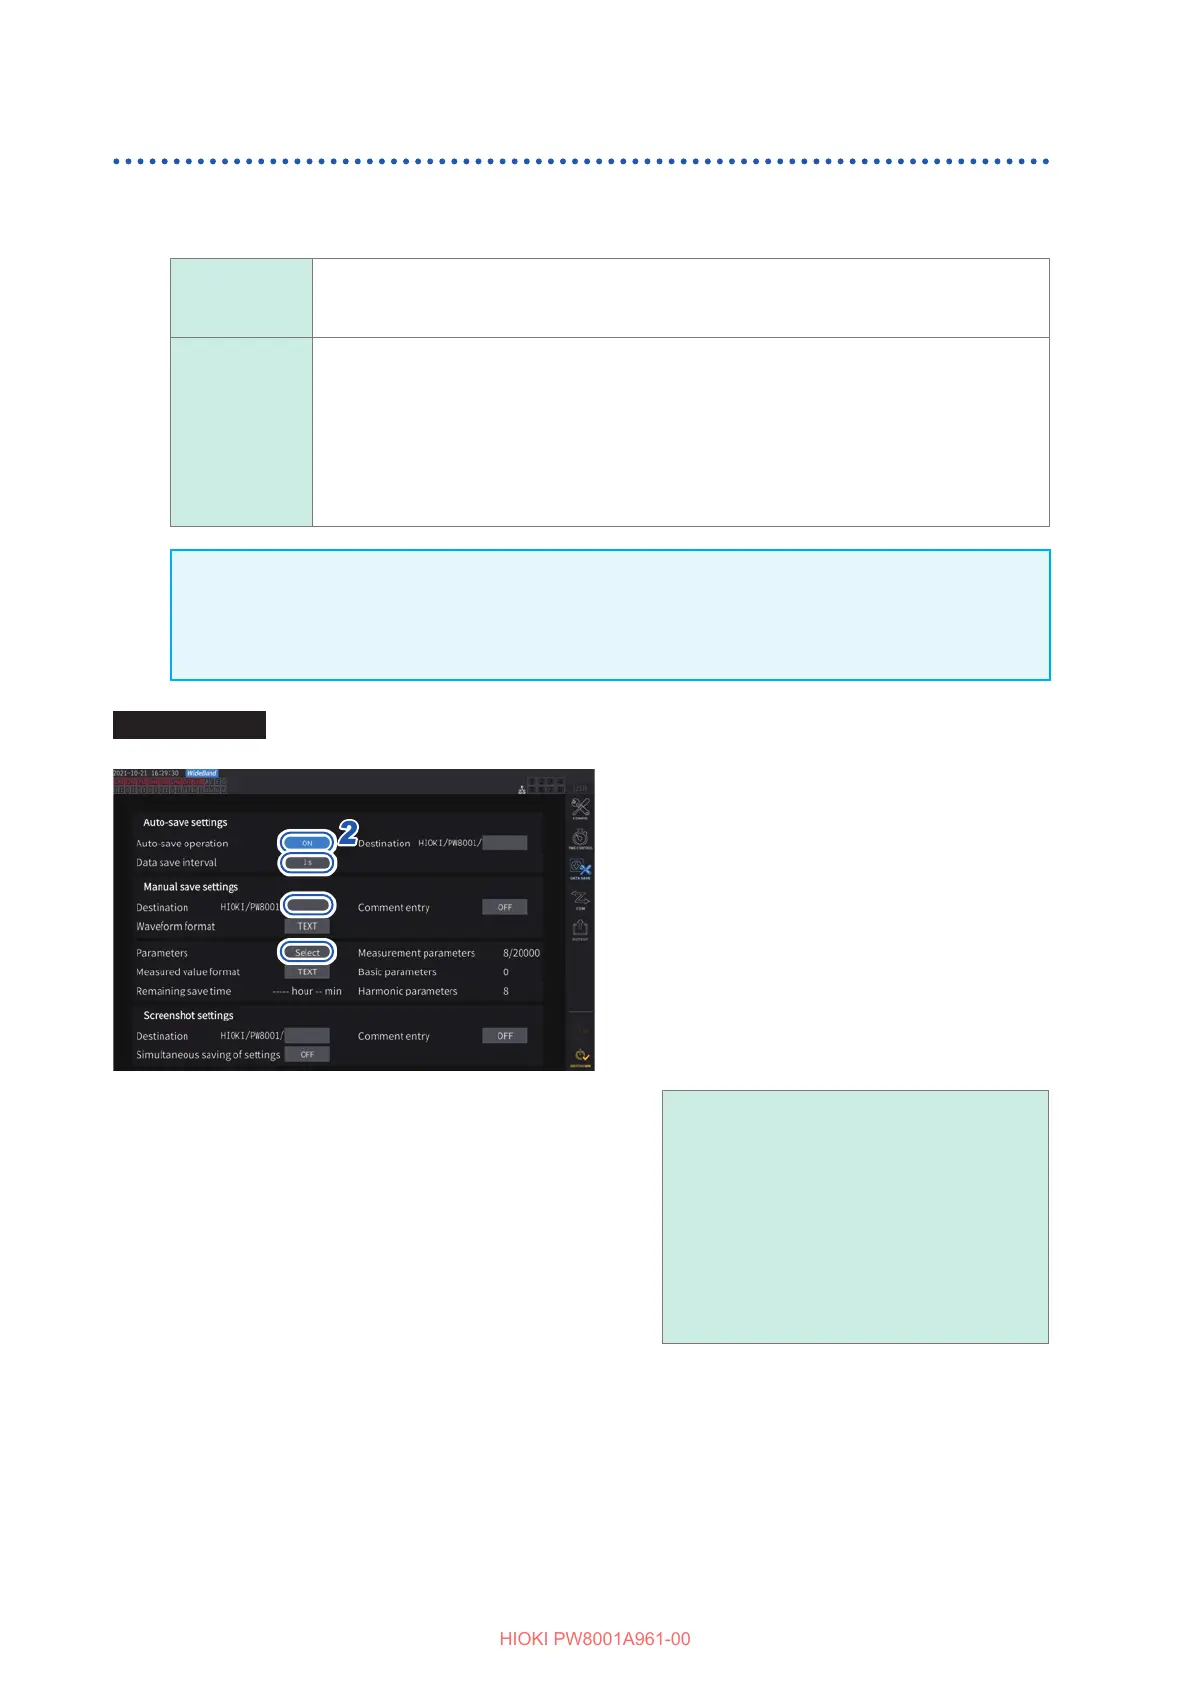
Display screen [SYSTEM] > [DATA SAVE]
33
11
22
44
1
Follow the procedure described
in “Settings which measurement
parameters to save” (p. 123)
2
Tap the [Auto-save operation] box to
set it to [ON].
3
Tap the [Data save interval] box, then
set the data saving interval using the X
rotary knob.
The selections vary depending on the data
refresh interval setting [Meas. Interval]
(p. 57).
(When the data refresh interval is set at 10 ms)
OFF, 10 ms, 50 ms, 200 ms, 500 ms,
1 s, 5 s, 10 s, 15 s, 30 s, 1 min, 5 min,
10 min, 15 min, 30 min, 60 min
(When the data refresh interval is set at 50 ms)
OFF, 50 ms, 200 ms, 500 ms, 1 s, 5 s, 10 s, 15 s,
30 s, 1 min, 5 min, 10 min, 15 min,
30 min, 60 min
(When the data refresh interval is set at 200 ms)
OFF, 200 ms, 1 s, 5 s, 10 s, 15 s, 30 s,
1 min, 5 min, 10 min, 15 min, 30 min, 60 min
• During auto-save operation, neither manual save
operation nor waveform save operation can be
performed.
• The maximum number of recordable parameters varies
depending on the data saving interval time. The longer
the data saving interval time becomes, the more the
maximum number of recordable parameters becomes.
See “Settings which measurement parameters to save”
(p. 123) and “Copying a le” (p. 135).
4
Tap the [Destination] box, then enter a folder name using the keyboard window.
(Up to 8 alphanumeric characters and symbols)
See “Keyboard window” (p. 22).
5
Set the save time.
See “5.1 Time Control Function” (p. 103) and “Auto-save operation using time control” (p. 129).
6
Press the START/STOP key.
Auto-save operation will start. The set folder will be created automatically, and data will be saved there.
7
Press the START/STOP key again to stop the auto-save operation.

 Loading...


