132
Saving and Loading Screenshots
7.5 Saving and Loading Screenshots
Saving screenshots
You can save a screenshot as a PNG le on a USB ash drive by pressing the COPY key.
Screenshots can be saved during auto-save operation. However, auto-save operation will have
priority, and screenshots cannot be made when the interval is set to less than 1 s.
Saving destination location
Screenshots are saved on the USB ash drive.
Filename
The le name is generated automatically. The le extension is PNG.
H8001nnn.PNG (where nnn indicates sequential numbering in the folder from 000 to 999)
Ex.: H8001000.PNG (the rst saved le)
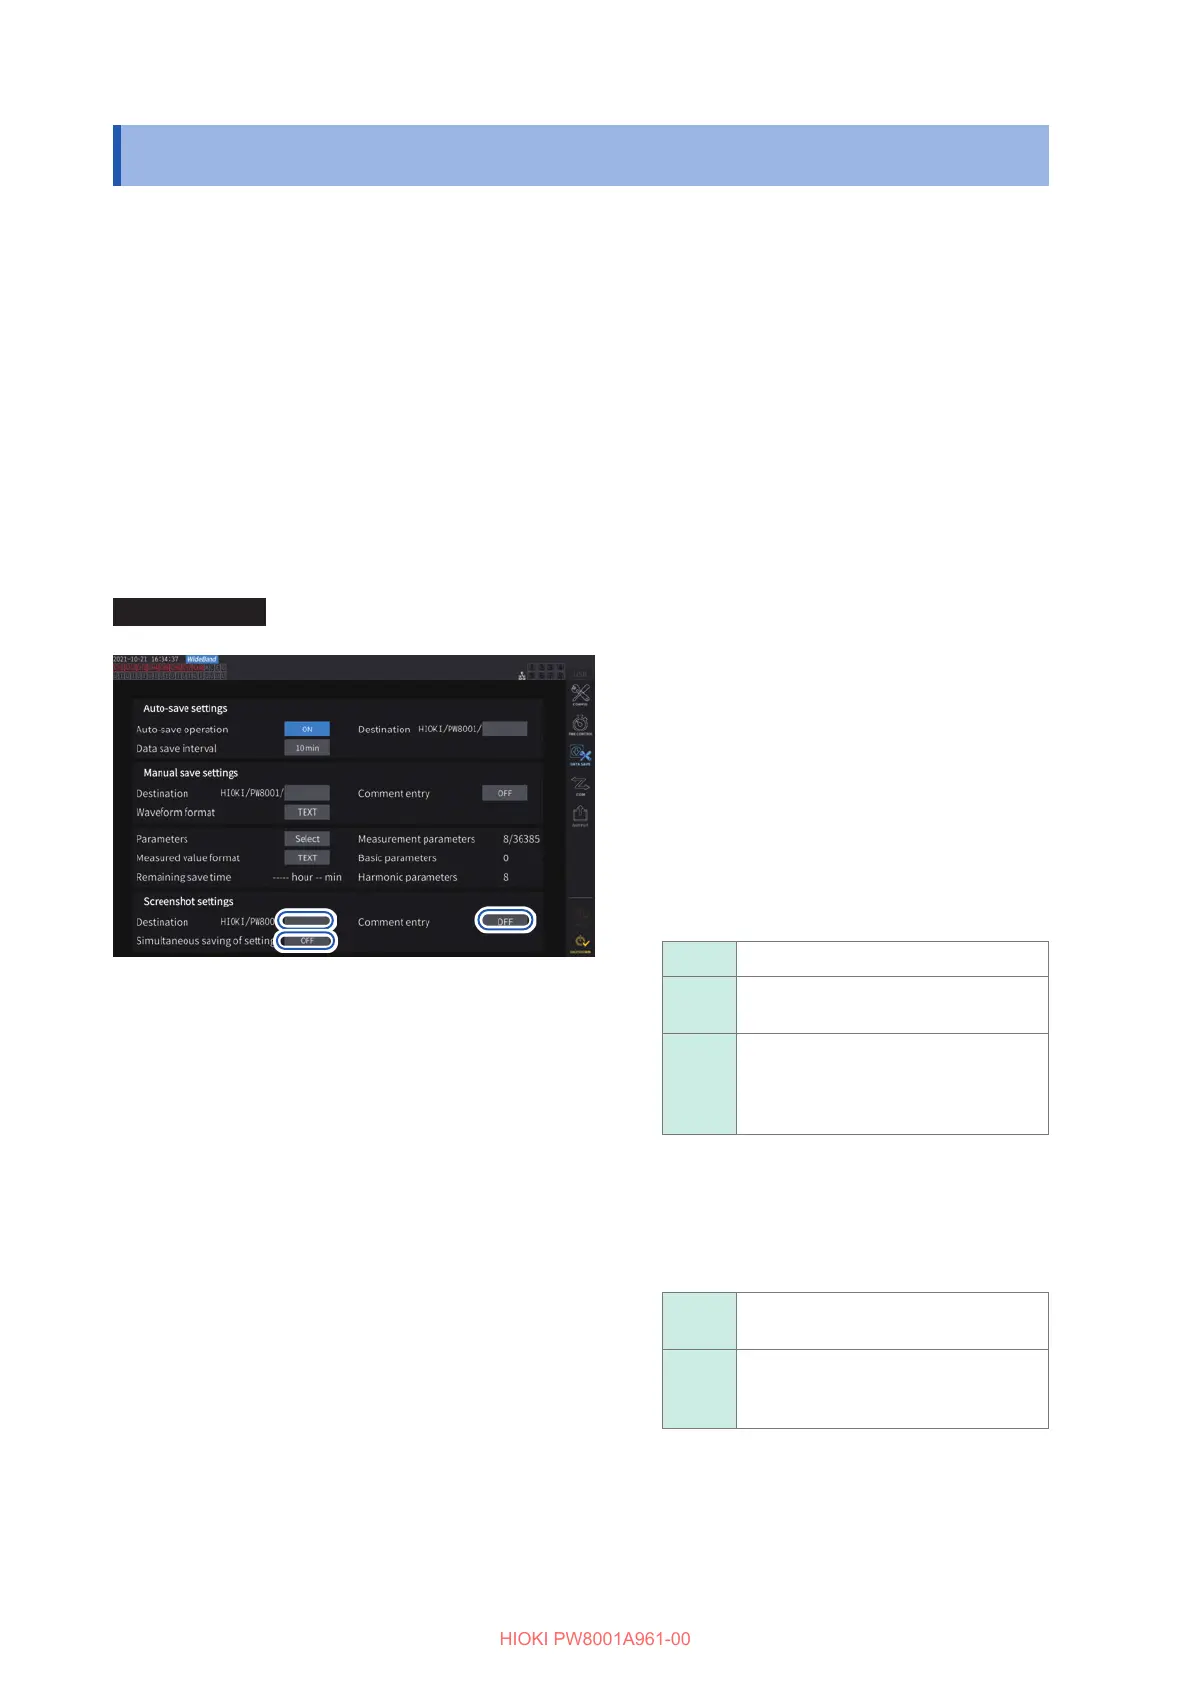
Display screen [SYSTEM] > [DATA SAVE]
11
22
33
1
Tap the [Destination] box to specify a
folder.
(Up to eight alphanumeric characters and
symbols)
See “Keyboard window” (p. 22).
2
Tap the [Comment entry] box to select
an entry way.
(Up to 40 alphanumeric characters and
symbols)
OFF Disables comment entry.
TEXT
Allows you to enter comments with
the keyboard window.
PNG
Allows you to enter comments
as handwriting on the screen.
(Comments will be added to the
screenshot and saved.)
3
Tap the
[Simultaneous saving of settings] box
to set it to [ON] or [OFF].
OFF
Disables saving of settings
information.
ON
Saves a screenshot of each
channel’s measurement condition
settings.
4
Press the COPY key, then enter a
comment.
Up to 1000 les can be created in the same folder.
When the sequential number used for les in the
folder reaches 1000, an error will be displayed. Set
a new destination folder.

 Loading...


