Output Calibration - Current Proportional Output/Aux Out 2 and 3 Calibration
Release M DR4500A Classic Series Circular Chart Recorder With or Without Control Product Manual 195
April 2017
8.2 Current Proportional Output/Aux Out 2 and 3 Calibration
Introduction
Calibrate the recorder so that the output provides the proper amount of current over the desired range.
The recorder can provide an output current range of from 3.1to 21 mA and can be calibrated at 4 mA for
0 % of output and 20 mA for 100 % of output or any other values between 3.1 and 21 mA.
Equipment needed
You will need a standard shop type milliammeter, with whatever accuracy is required, capable of
measuring 0 to 20 milliamps.
Calibrator connections
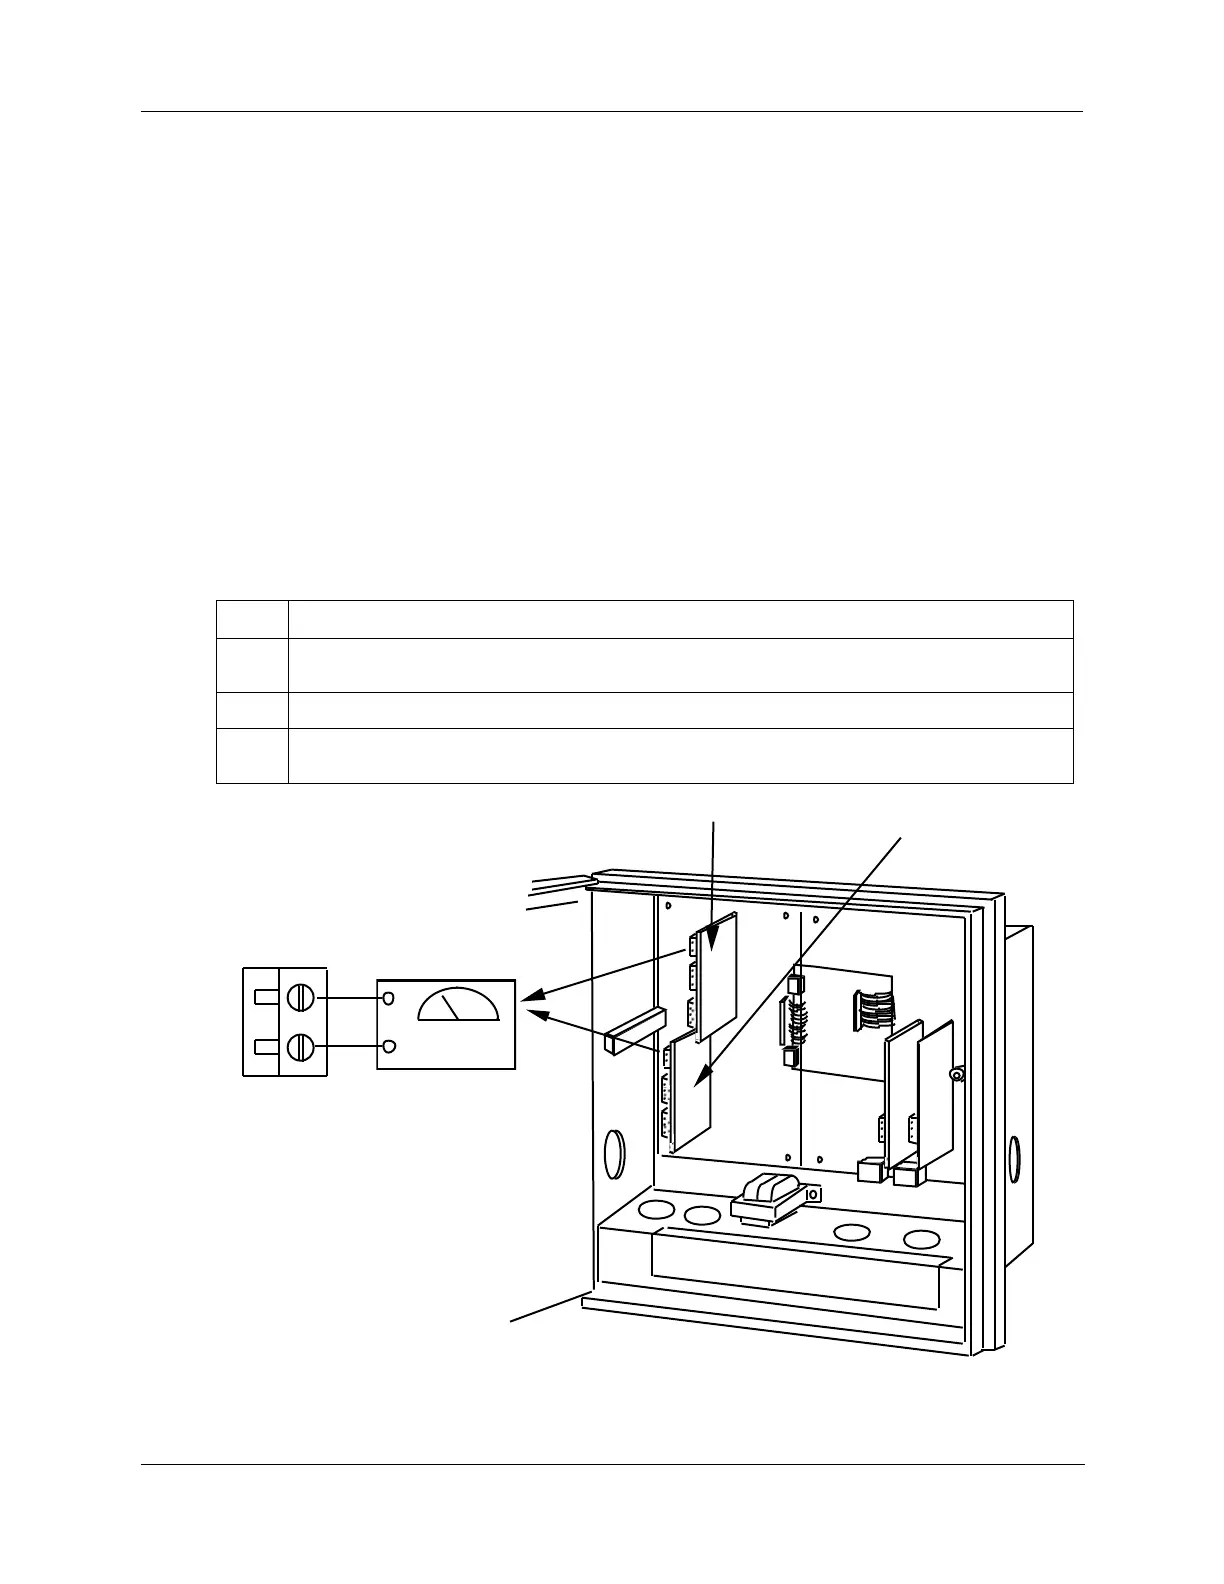
Refer to Figure 8-1 and wire the recorder according to the procedure given in Table 8-1.
Table 8-1 Set up wiring procedure current proportional output/Aux Out 2 and 3
With the power off, door open, and the chart plate swung out; tag and disconnect field wiring
from the plug in connector J1 on the appropriate control output PCB (see Figure 8-1).
Observing polarity, connect a milliammeter’s leads to the plug for connector J1.
Close the chart plate: apply power and allow the recorder to warm up 15 minutes before you
calibrate.
22095
Milliammeter
Plug J1
(current output)
+
-
Control output
#1 PCB
#2 #1
Control output
#2 PCB
Figure 8-1 Test equipment connections for calibrating current proportional output