Installation - Mounting Methods
20 DR4500A Classic Series Circular Chart Recorder With or Without Control Product Manual Release M
April 2017
Mounting flush in panel (using universal filler plate kit)
Refer to Figure 2-6 and follow the procedure in Table 2-5 to mount your recorder in an existing cutout
using the Universal Filler Kit.
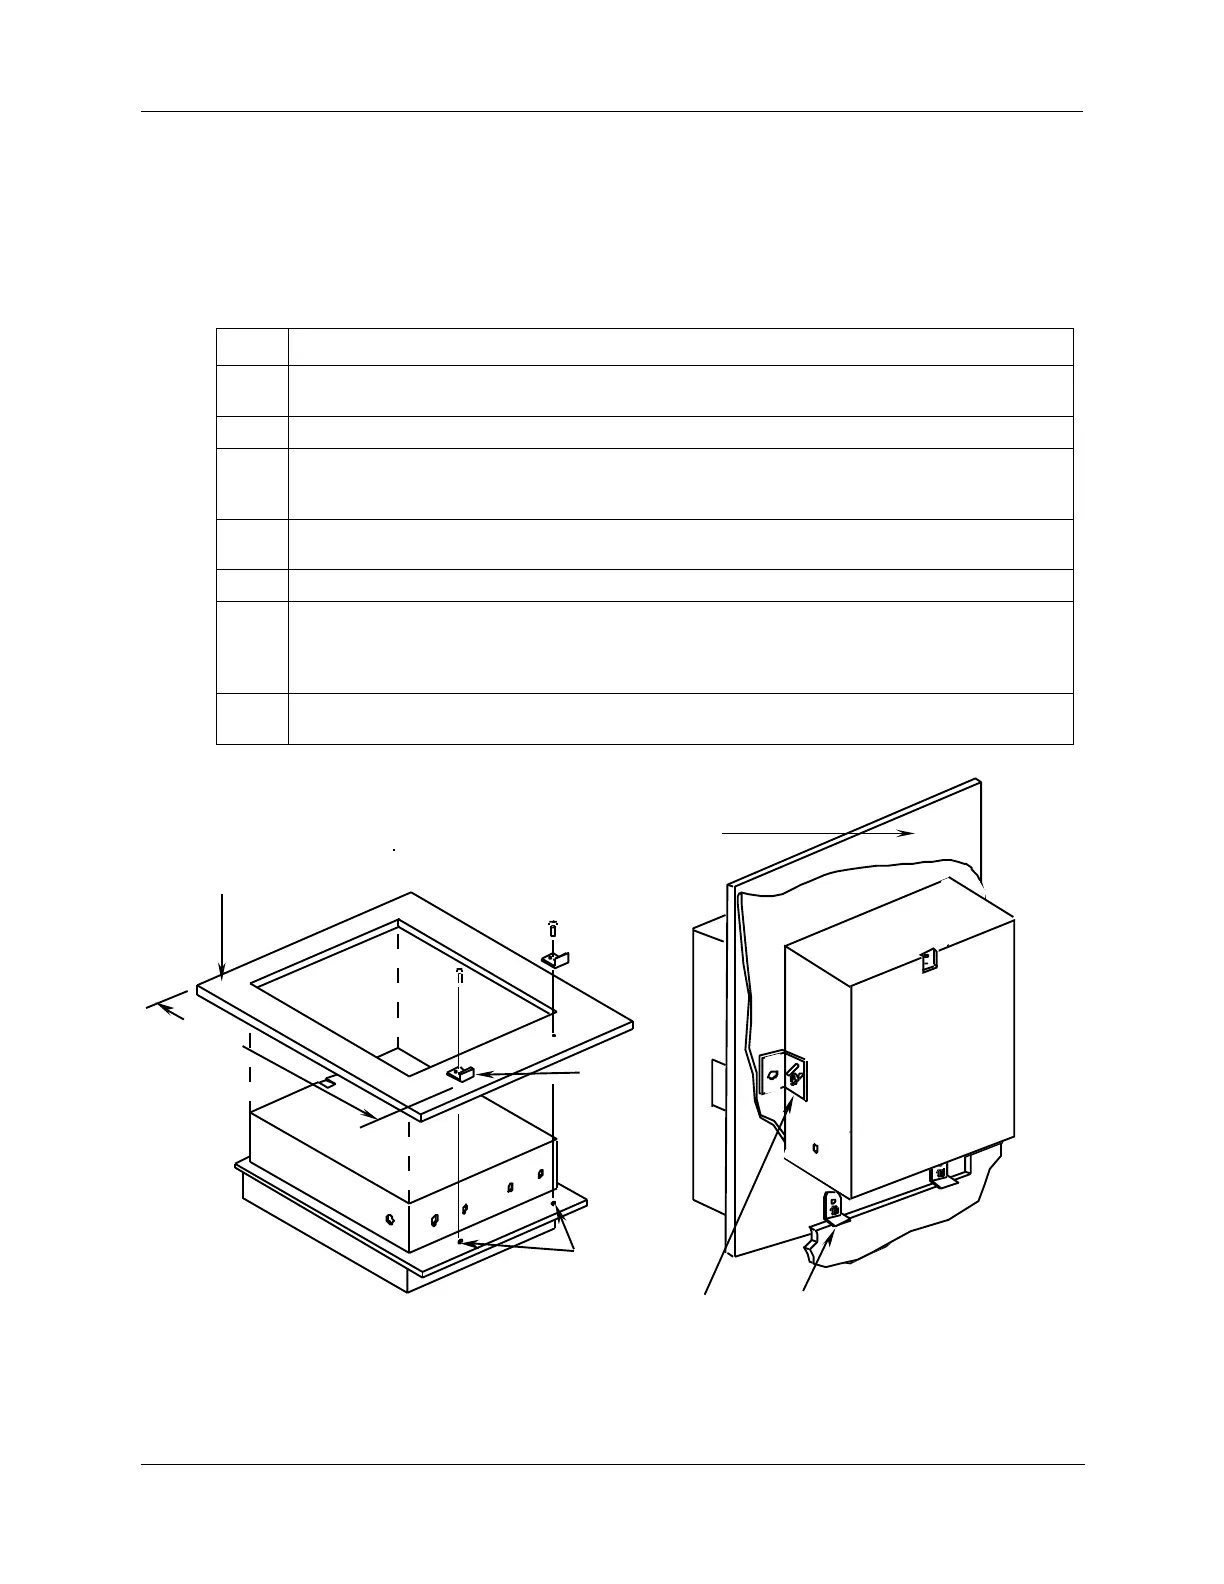
Table 2-5 Mounting flush in a panel using universal filler kit
Lay the recorder face down on a clean work surface and position the universal filler plate as
shown in Figure 2-6.
Measure the height of the existing panel cutout.
Refer to Figure 2-6. Position the support brackets, supplied with the kit, so that the distance
from the top of the “window” in the filler plate to the right angle of the support brackets is just
less than the height of the existing panel cutout.
Secure brackets with two 10-32 x 1/4 inch screws, provided in the kit, by inserting them
through the holes in the filler plate into the tapped screw holes in the recorder case.
Insert the recorder into the cutout from the front of the panel as shown in Figure 2-6.
Refer to Figure 2-6. From the back of the panel attach a mounting bracket to each side of the
recorder case using a 1/4-20 x 1/2-inch hex screw and a lockwasher for each bracket
(mounting hardware supplied with recorder). Leave the screws slightly loose so you can adjust
the brackets.
While holding the recorder firmly against the panel, slide each bracket against the back of the
panel and tighten the screws.
Universal
filler plate
Height
of
cutout
in
panel
Tapped
screw holes
Support
brackets
Universal
filler plate
21407
Support brackets
(included in kit 30755134-xxx
Mounting brackets (supplied
with recorder)
NOTE: Universal filler plate and attaching
hardware are included in kit 30755134-xxx
Figure 2-6 Mounting in a panel using universal filler kit