Installation - Mounting Methods
Release M DR4500A Classic Series Circular Chart Recorder With or Without Control Product Manual 21
April 2017
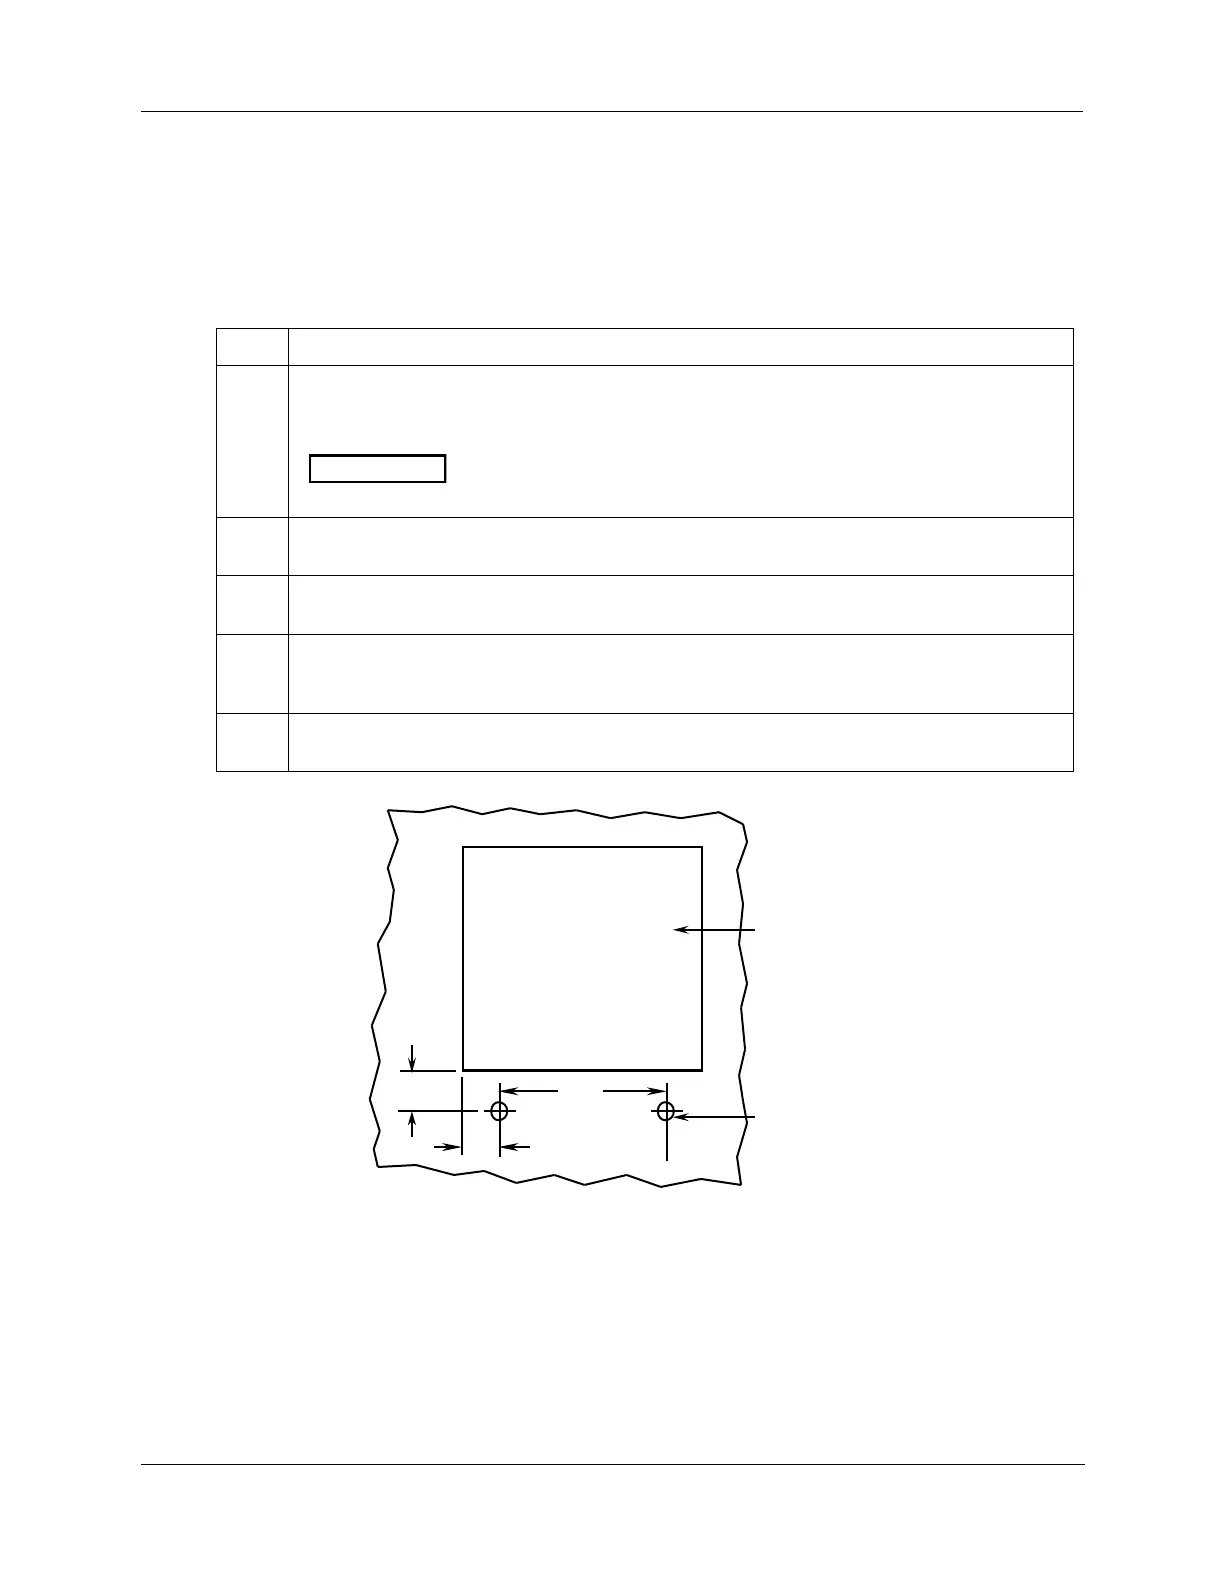
Mounting flush in panel (using cutout made for Kent Model 105M)
Refer to Figure 2-7 and follow the procedure in Table 2-6 to mount your recorder in an existing cutout
using the cutout made for Kent Model 105M.
Table 2-6 Mounting flush in a panel using Kent Model 105M cutout
Drill two 1/4-inch holes in the back of the panel as shown in Figure 2-7. These holes are for 10-
32 screws to be inserted from back of panel into threaded inserts in the back of the recorder
case.
If the panel is more than 1/4-inch thick, substitute 10-32 x 1/2-inch long
screws for the 3/8-inch long screws supplied with the recorder.
While supporting the recorder, insert it through the panel cutout and orient the case so that the
threaded inserts at the bottom of the case align with the holes drilled in the panel.
From the rear of the panel, insert two 10-32 pan head screws of appropriate length into
threaded inserts in the recorder case.
From the back of the panel, attach a mounting bracket to each side of the recorder case using
a 1/4-20 x 1/2-inch hex screw and a lockwasher for each bracket (mounting hardware supplied
with recorder). Leave the screws slightly loose so you can adjust the brackets.
While holding the recorder firmly against the panel, slide each bracket against the back of the
panel and tighten the screws.
21408
7 "
3-1/2"
2 "
Drill two
1/4-inch holes
Cutout for
Kent model 105M
Figure 2-7 Mounting in a panel using Kent Model 105M cutout