EasyManuals Logo

Honeywell DR4500A User Manual

Honeywell DR4500A
266 pages
To Next Page IconTo Next Page
To Previous Page IconTo Previous Page
Page #30 background imageLoading...
Page #30 background image
Installation - Mounting Considerations and Overall Dimensions
16 DR4500A Classic Series Circular Chart Recorder With or Without Control Product Manual Release M
April 2017
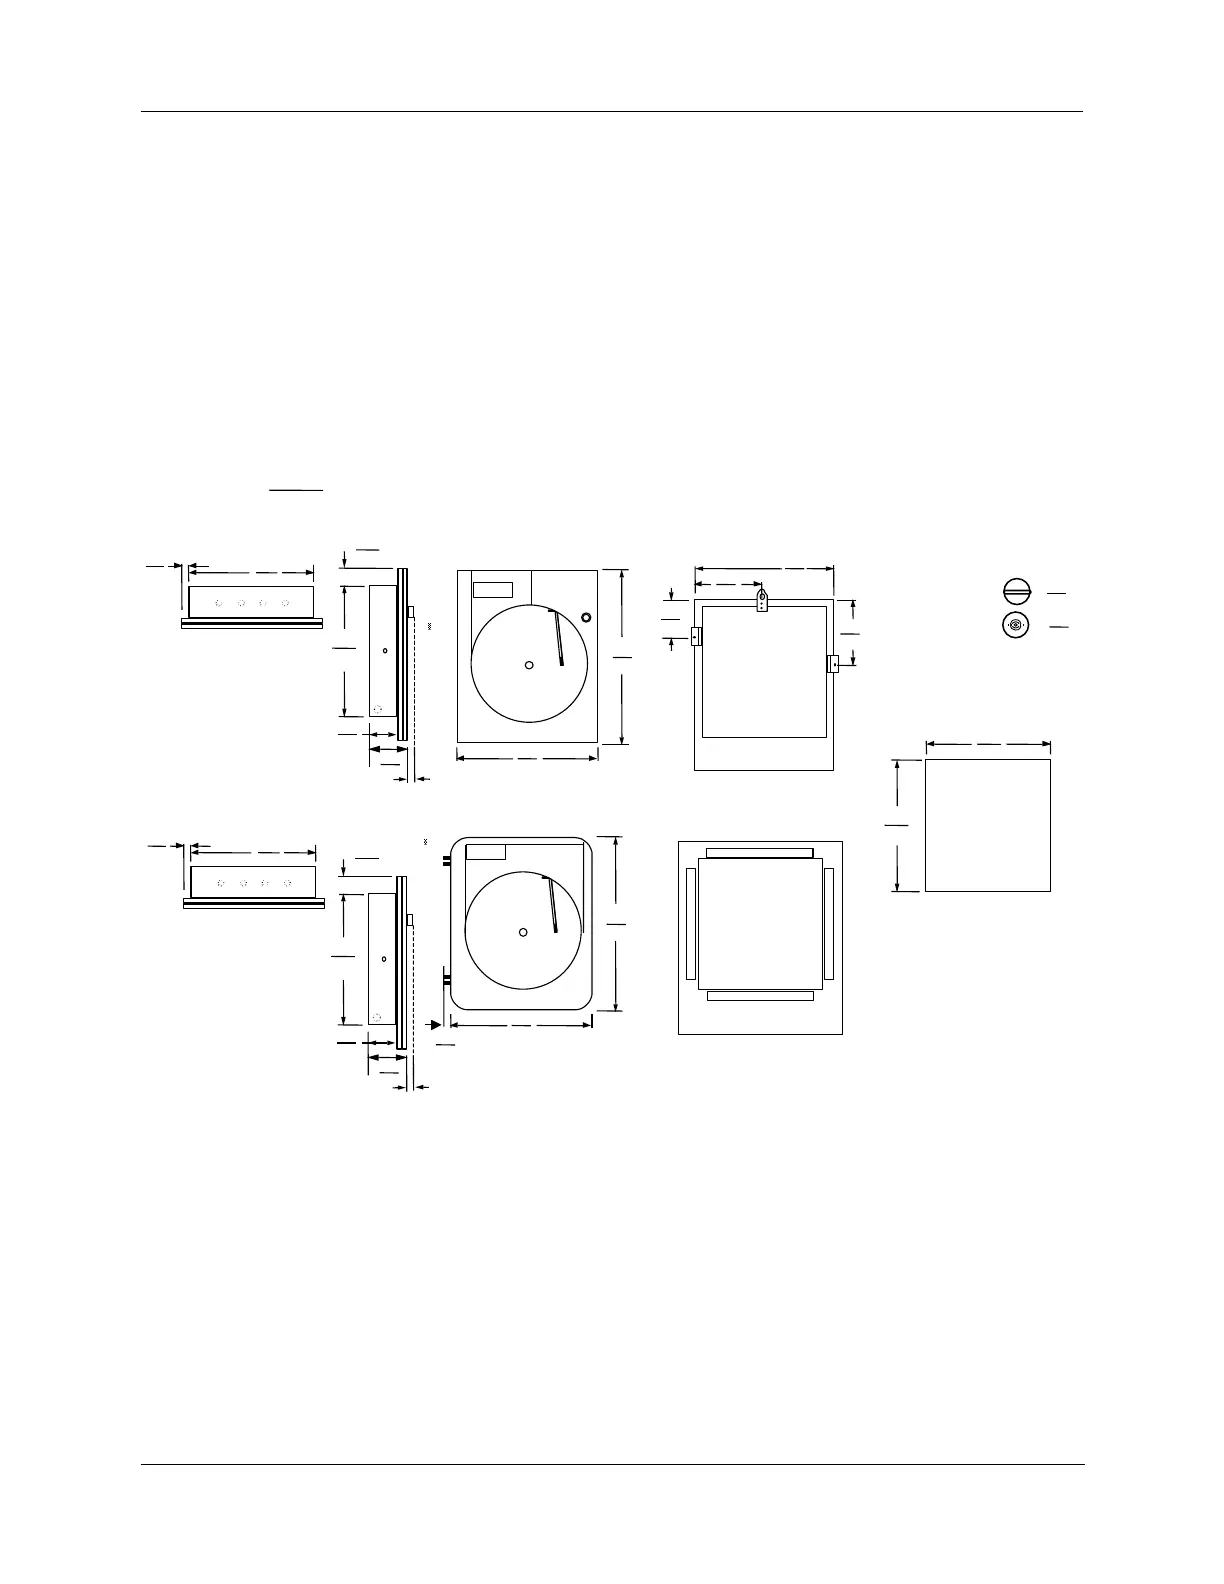
2.3 Mounting Considerations and Overall Dimensions
Physical considerations
The recorder can be mounted in a panel by making a new cutout or using an existing cutout with a filler
plate (see Table 2-4). Use the mounting kit supplied. Adequate access space must be available at the back
of the panel for installation and servicing activities.
The overall dimensions and panel cutout requirements for mounting the recorder are shown in Figure 2-3.
Overall dimensions
Figure 2-3 shows the overall dimensions for mounting the recorder.
321
12.6
17.5
0.69
Bottom view
355
14
419
16.5
Front view
322
12.7
322
12.7
Panel cutout (all m odels)
163
6.4
196
7.7
370
14.6
181
7.1
Surface mounting
Back view
Dimens ions :
millimeters
inches
Left side view
14.5
.57
S hort wing latch :
5
.19
Double
bit
latch
:
321
12.6
142
5.6
106
4.2
Reference
20.3
0.8
387
15.25
438
17.25
Front view
NEMA4X
Standard DR4500
NEMA4X DR4500
321
12.6
17.5
0.69
Bottom view
321
12.6
142
5.6
106
4.2
Reference
20.3
0.8
Surface mounting
Back view
11.0
.43
Figure 2-3 Overall dimensions

Table of Contents

Questions and Answers:

Question and Answer IconNeed help?

Do you have a question about the Honeywell DR4500A and is the answer not in the manual?

Honeywell DR4500A Specifications

General IconGeneral
BrandHoneywell
ModelDR4500A
CategoryRecording Equipment
LanguageEnglish

Related product manuals