185
17 Retrofitting optional boards
➥ Result: The correctly recognized slot can now be configured and connected.
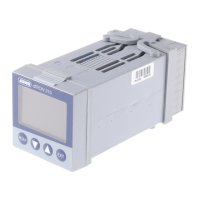
4 Slide optional board into the slot provided. The part no. is located on the screw terminal.
5 Re-tighten the 2 screws with the associated toothed lock washers and screw in the side
screw again, to ensure a conductive connection between the back panel and the side panel
(secure grounding).
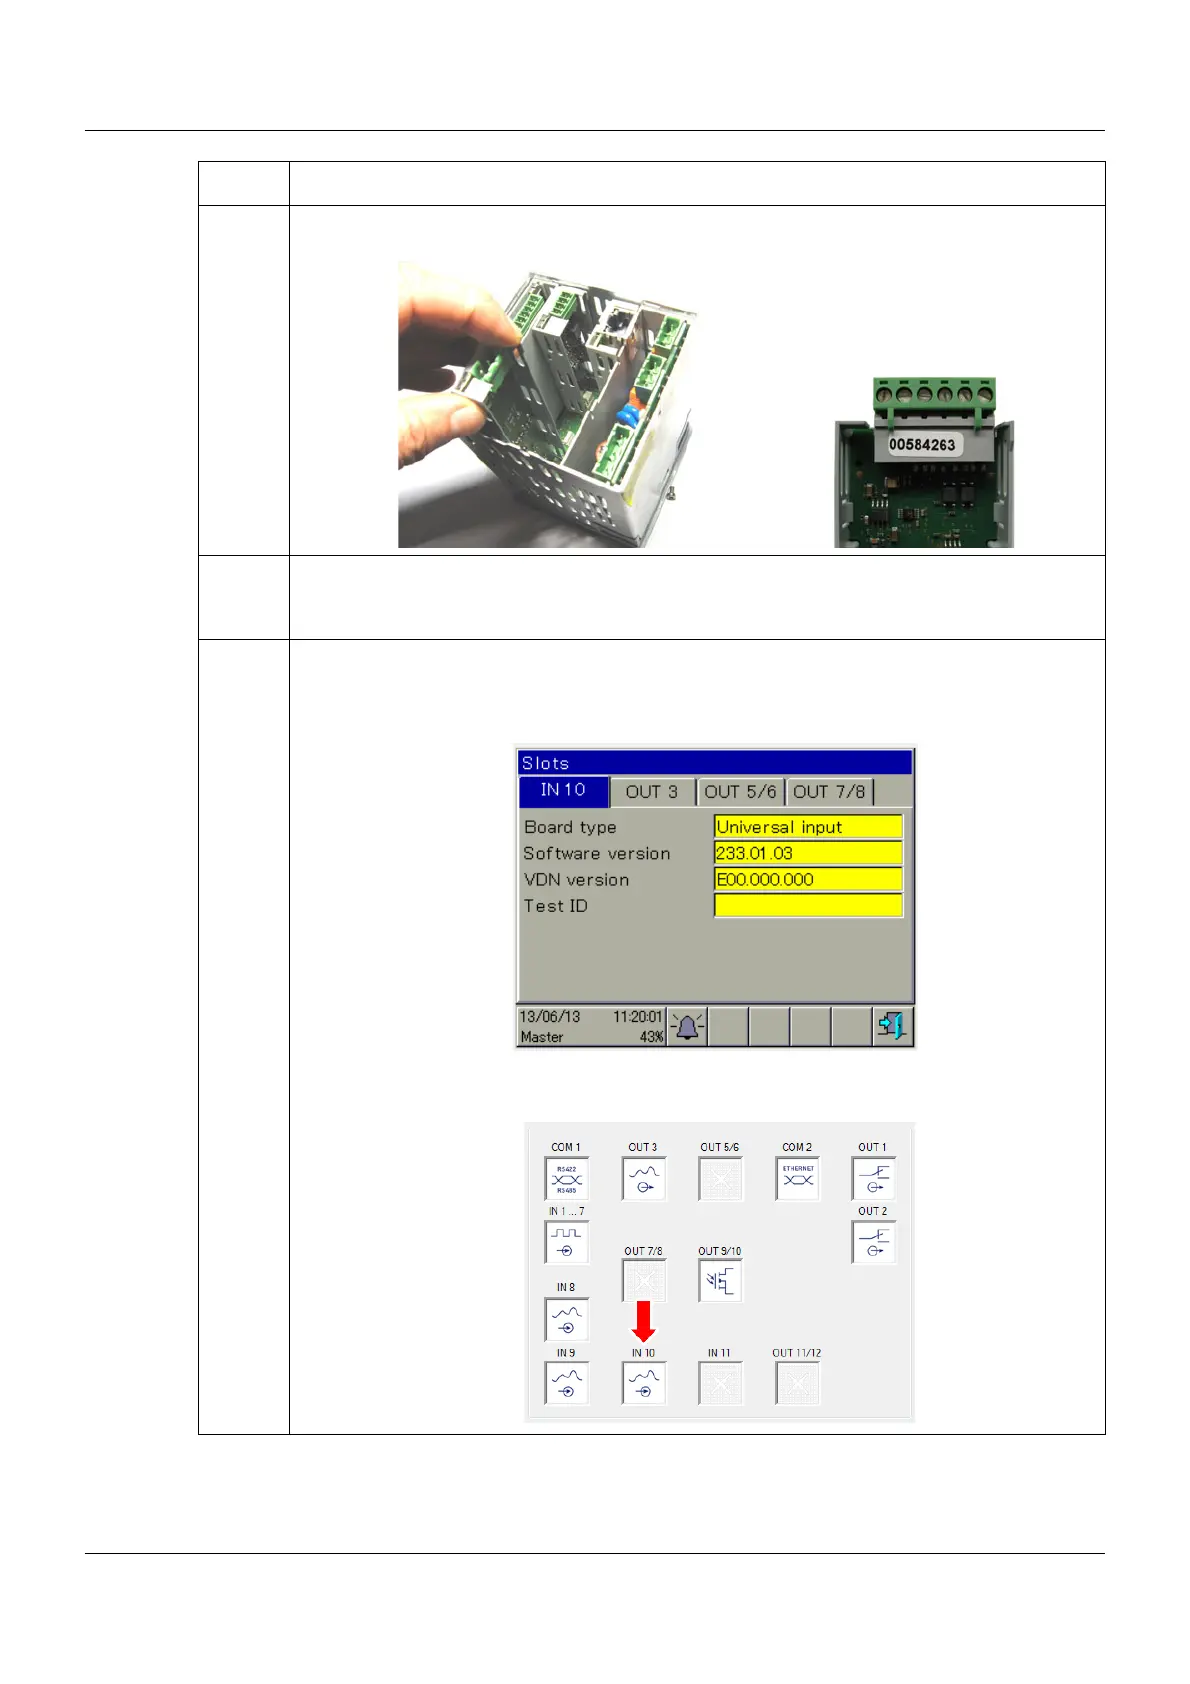
6 Switch on the device again and check whether the new hardware is recognized
The new slot should appear in the device as follows:
D
EVICE INFO -> SLOTS
IT IS RECOGNIZED IN THE SETUP PROGRAM BY THE HARDWARE ASSISTANT:
C
URRENT HARDWARE -> HARDWARE ASSISTANT
Step Activity