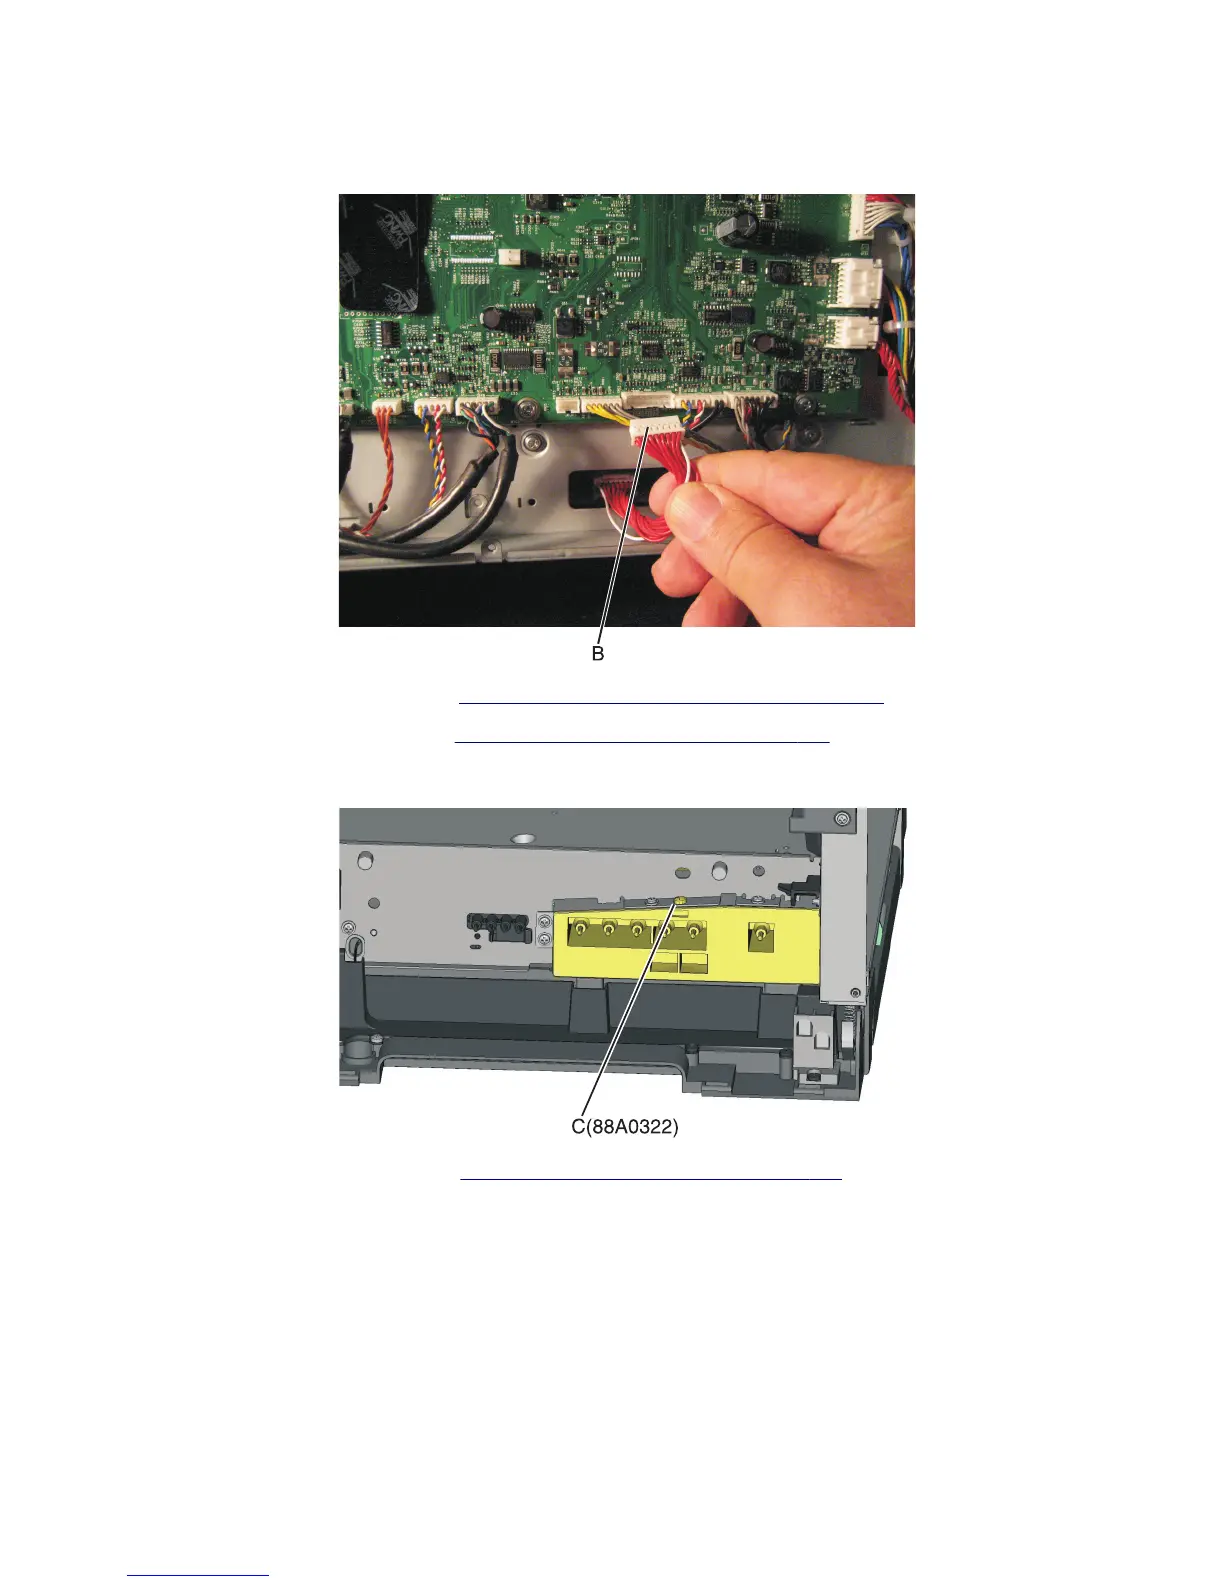
4 Disconnect the high‑voltage power supply cable (B) from the controller board.
Note: Some connectors contain a latch that has to be disengaged while removing the cable.
5 Remove the image transfer unit. See “Image transfer unit (ITU) removal” on page 243.
6 Remove the waste toner bottle. See “Waste toner bottle removal” on page 250.
7 Remove the screw (C) securing the HVPS.
8 Remove the left cover assembly. See “Left cover assembly removal” on page 219.
5027
Repair information
240