Actions Yes No
Step 7
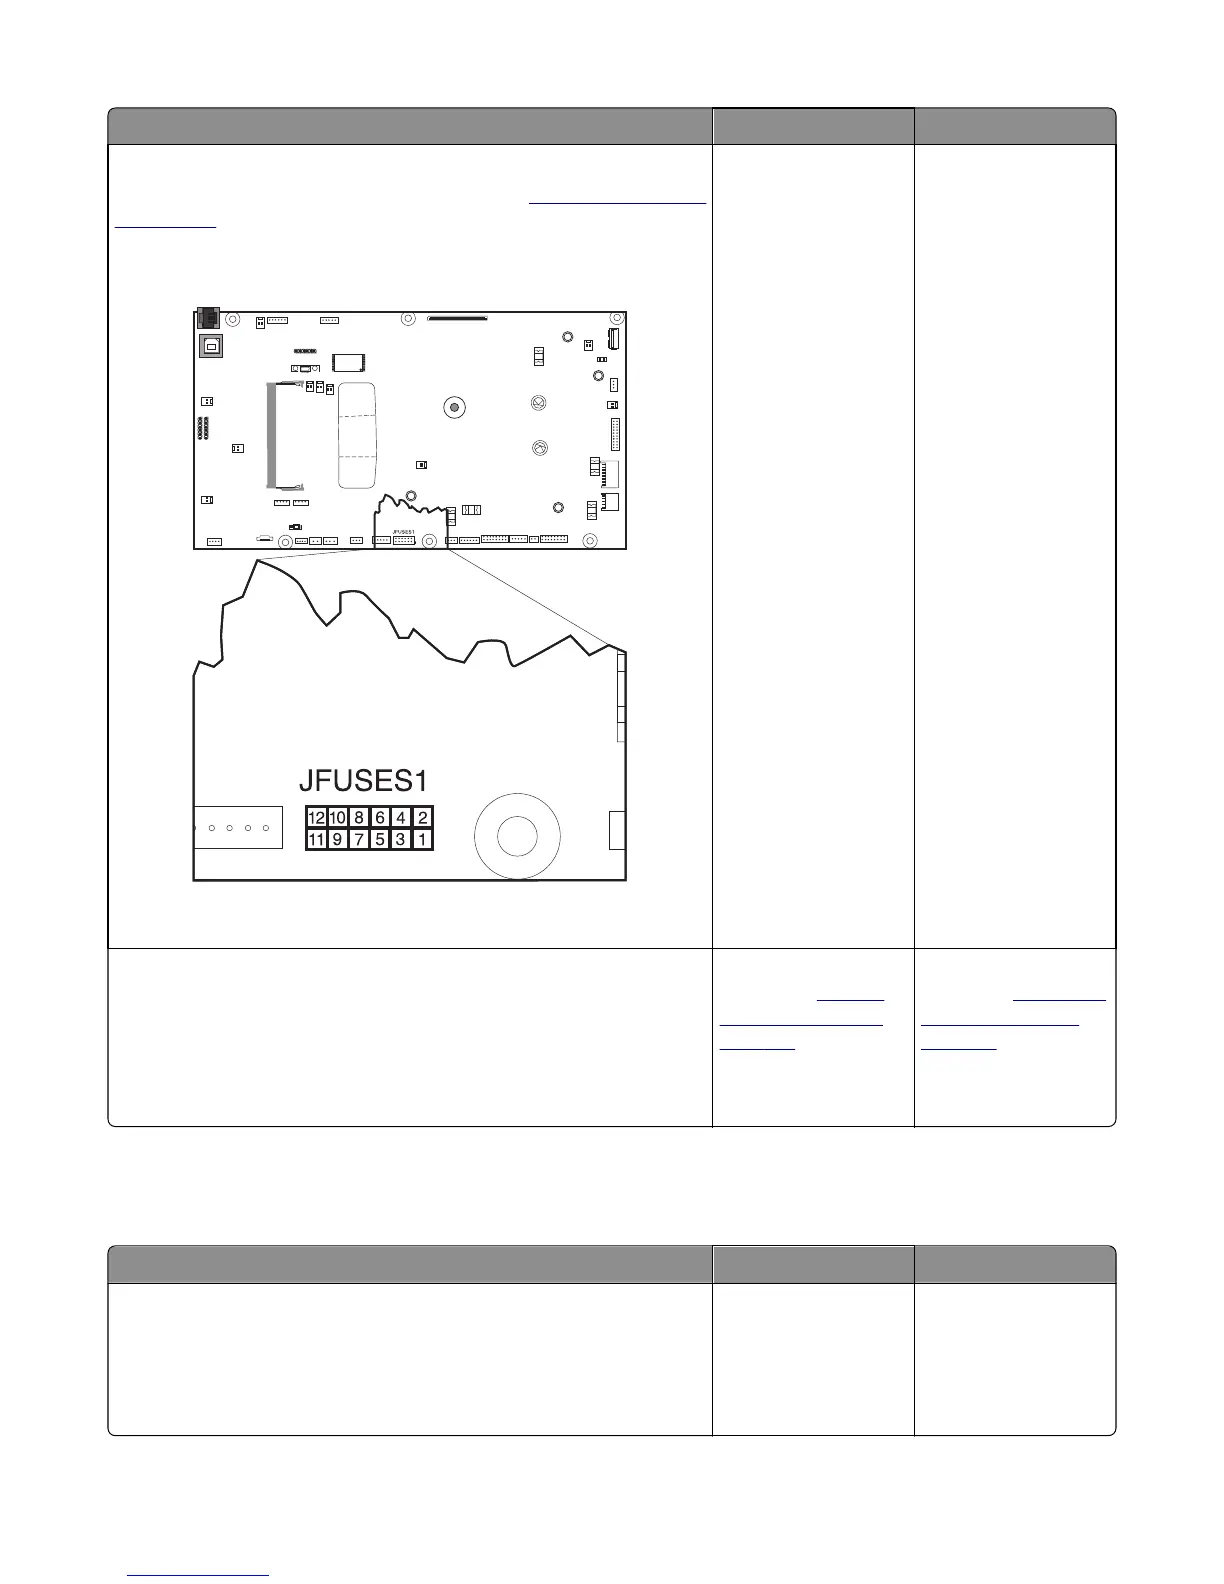
Turn the printer off, and remove the rear cover. See
“Rear cover removal”
on page 290.
Verify the cable is correctly connected to JFUSES1 on the controller board
and to the sensor.
Is the sensor cable properly connected?
Go to step 8. Reconnect the cable. If
the problem persists,
then go to step 8.
Step 8
Turn the printer on, and check the values at JFUSES1:
Pin 8: Ground
Pin 9: +3.3 V dc
Are the values approximately correct?
Replace the duplex
sensor. See
“Duplex
sensor removal” on
page 284.
Replace the controller
board. See
“Controller
board removal” on
page 291.
Duplex/manual feed sensor (S2) service check
The input (S2) sensor is part of the paper pick motor drive assembly FRU, and is not available otherwise.
Actions Yes No
Step 1
a Open the front door to access the jam area.
b Remove the jammed page(s).
Does the error clear?
Problem resolved. Go to step 2.
5027
Diagnostic information
60