262334 87 Revision A
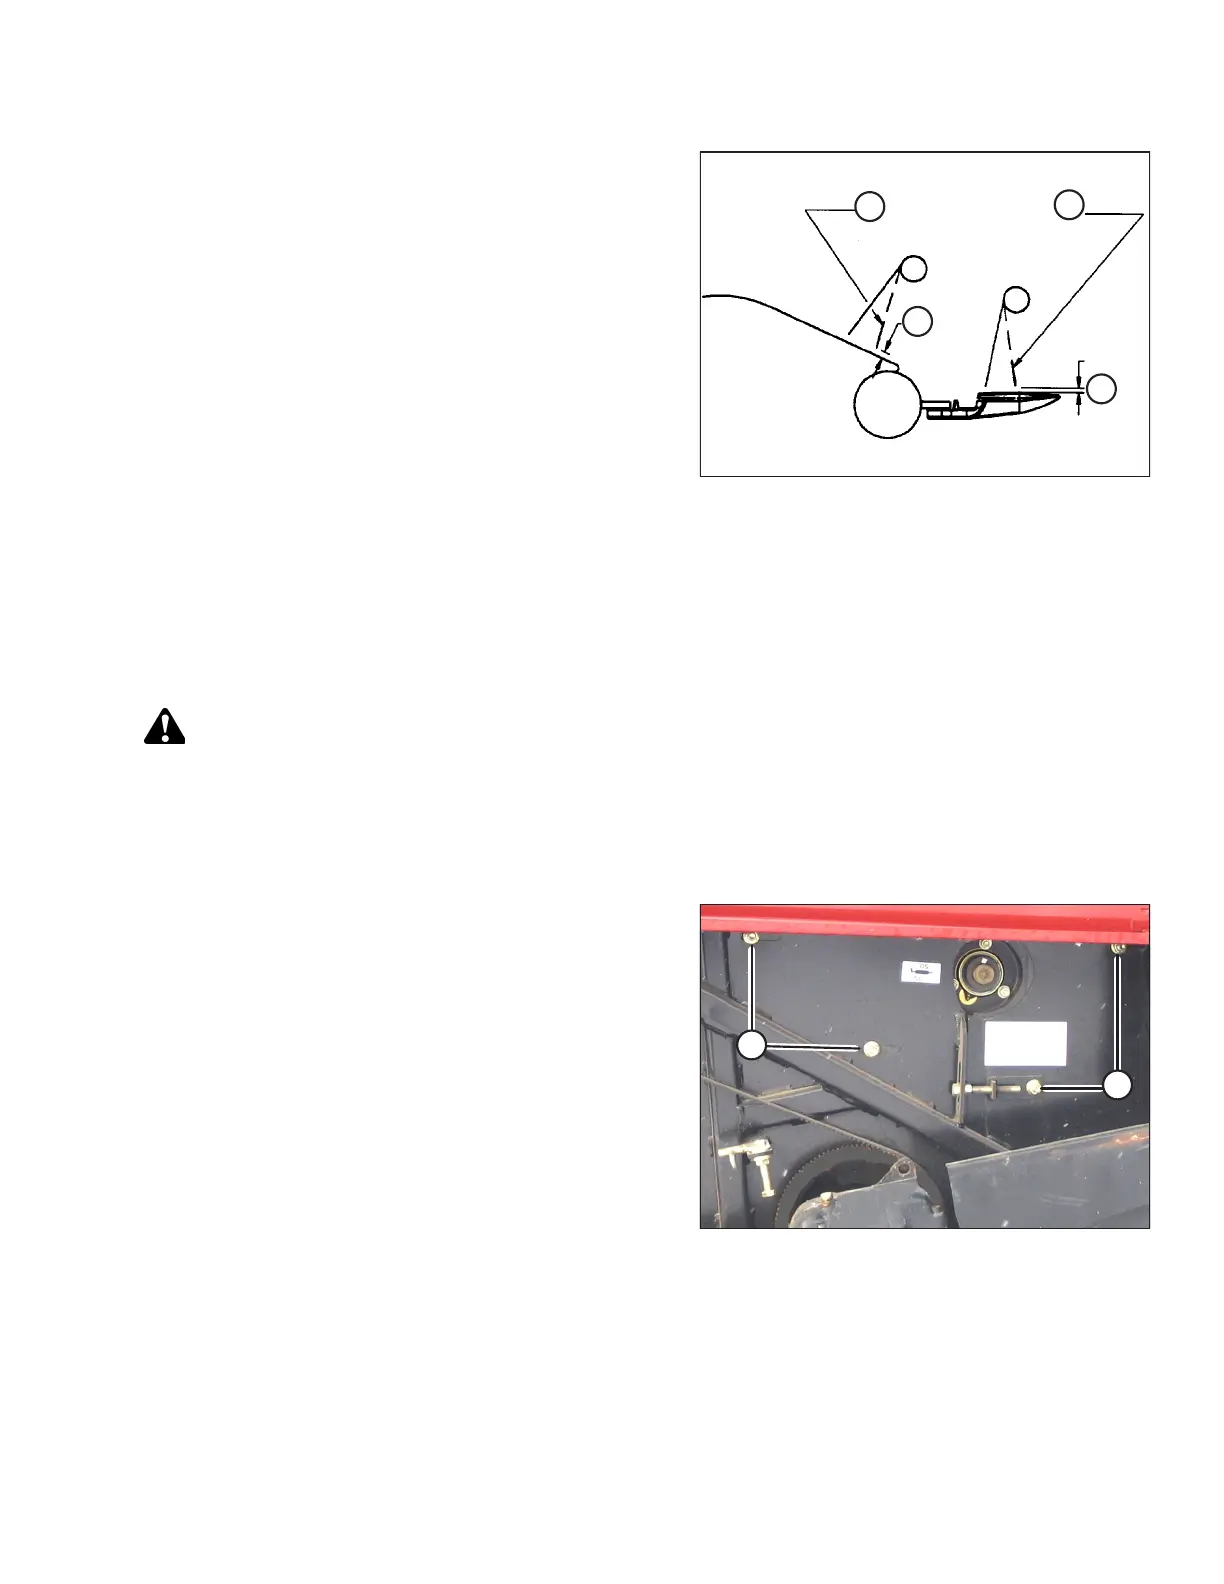
Figure 3.123: Reel Tine Clearance
A-2–10 mm (2/25–2/5 in.)
B - 2 mm (2/25 in.) Minimum to Knife Section
C - Flex Fingers Back when Checking Clearance
1. Rotate the reel slowly by hand, and check the tine
clearance at the knife and the pan. Flex the tines to
simulate crop-loaded position to ensure the tine clearances
to the knife sections and the auger pan are adequate for
working conditions.
2. Check that the reel rotates freely.
NOTE:
If there are a few reel tines that are touching the pan while
the rest are at the correct height, trim the longer tines to
match the rest. Be sure to adjust both sides of the reel.
Ensure that tines do NOT contact plastic header pan.
3.8.6 Setting Tine Aggressiveness
Follow this procedure to properly set the tine aggressiveness.
WARNING
To prevent accidental movement of windrower, return ground speed lever (GSL) to Park, center steering wheel to lock,
shut off engine, and remove key.
1. Shut down the engine, and remove the key from the ignition.
2. Open the right endshield.
Figure 3.124: Auger Header Right Side
3. At the right side of the reel (cam end) ONLY, loosen four
nuts (A).
OPERATION