262334 193 Revision A
4.13.2 Replacing Stripper Bars
To replace the stripper bars, follow these steps.
DANGER
To avoid bodily injury or death from the unexpected start-up or fall of a raised machine, shut down the engine, remove
the key, and engage the safety props before going under the machine.
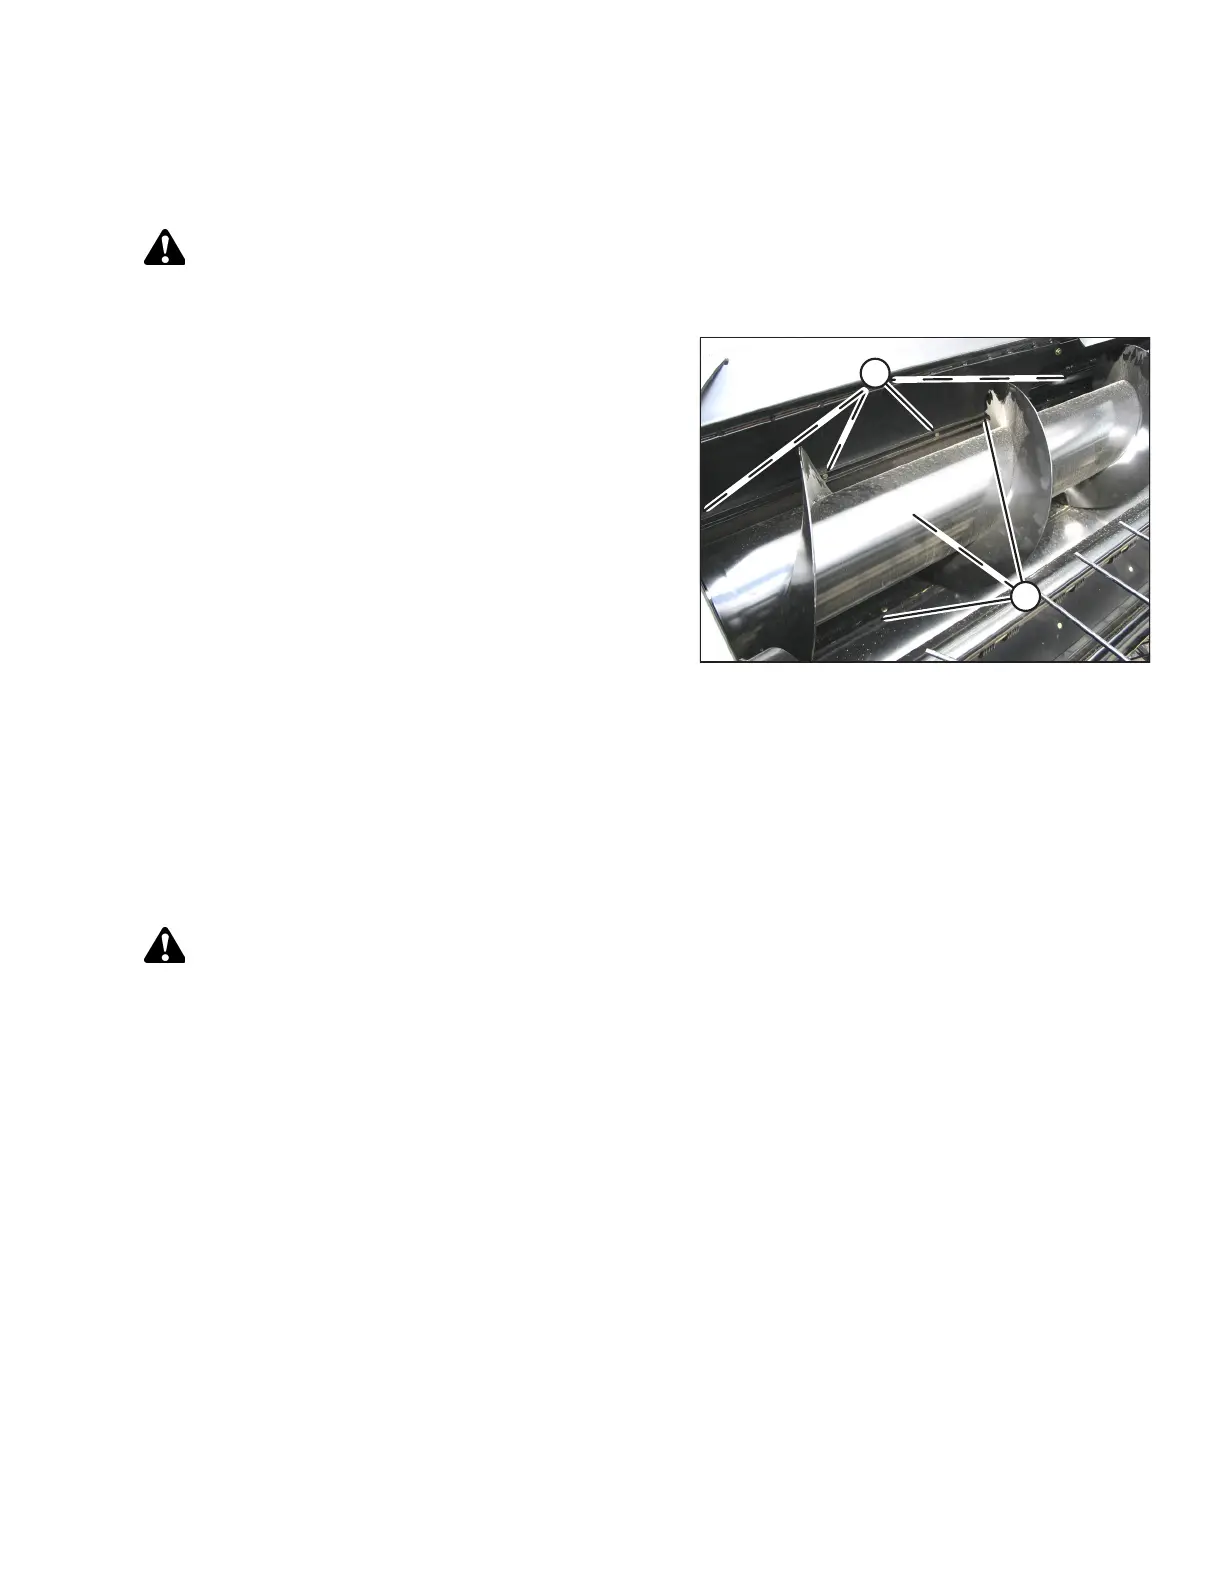
Figure 4.125: Stripper Bars
1. Remove four nuts and bolts (A) that secure each stripper
bar (B) (both left and right side) to the pan, and remove the
bars. There are six bars in total.
2. Position new bars (B) on pan as shown, with the upper
flange on the front bar facing forward.
3. Install three bolts and nuts (A) in each bar, and torque the
hardware to 203 Nm (150 lbf·ft).
4. Check the clearance between the auger and the
stripper bars.
5. Loosen bolts (A), and add shims between the stripper bars
and pan at bolt locations, as required to obtain clearance
as shown.
6. Retighten the bolts to the specified torque.
4.13.3 Installing Front Stripper Bar Extensions
Extensions for the front stripper bar are provided for installation (if required for certain crop conditions), especially in tall
crops that cause material to bunch up at the ends of the conditioner rolls.
Stripper bar extensions will allow the auger to carry the crop more towards the center, rather than prematurely feeding it
to the conditioner.
DANGER
To avoid bodily injury or death from the unexpected start-up or fall of a raised machine, shut down the engine, remove
the key, and engage the safety props before going under the machine.
To install the front stripper bar extensions, follow these steps:
1. Shut down the engine, and remove the key from the ignition.
MAINTENANCE AND SERVICING