262334 103 Revision A
Table 3.2 Conditioner Roll Tension Factory Settings
Left spring (A)
81–91 mm (3 3/16–3 9/16 in.)
Right spring (B)
41–51 mm (1 5/8–2 in.)
WARNING
To prevent accidental movement of windrower, return ground speed lever (GSL) to Park, center steering wheel to lock,
shut off engine, and remove key.
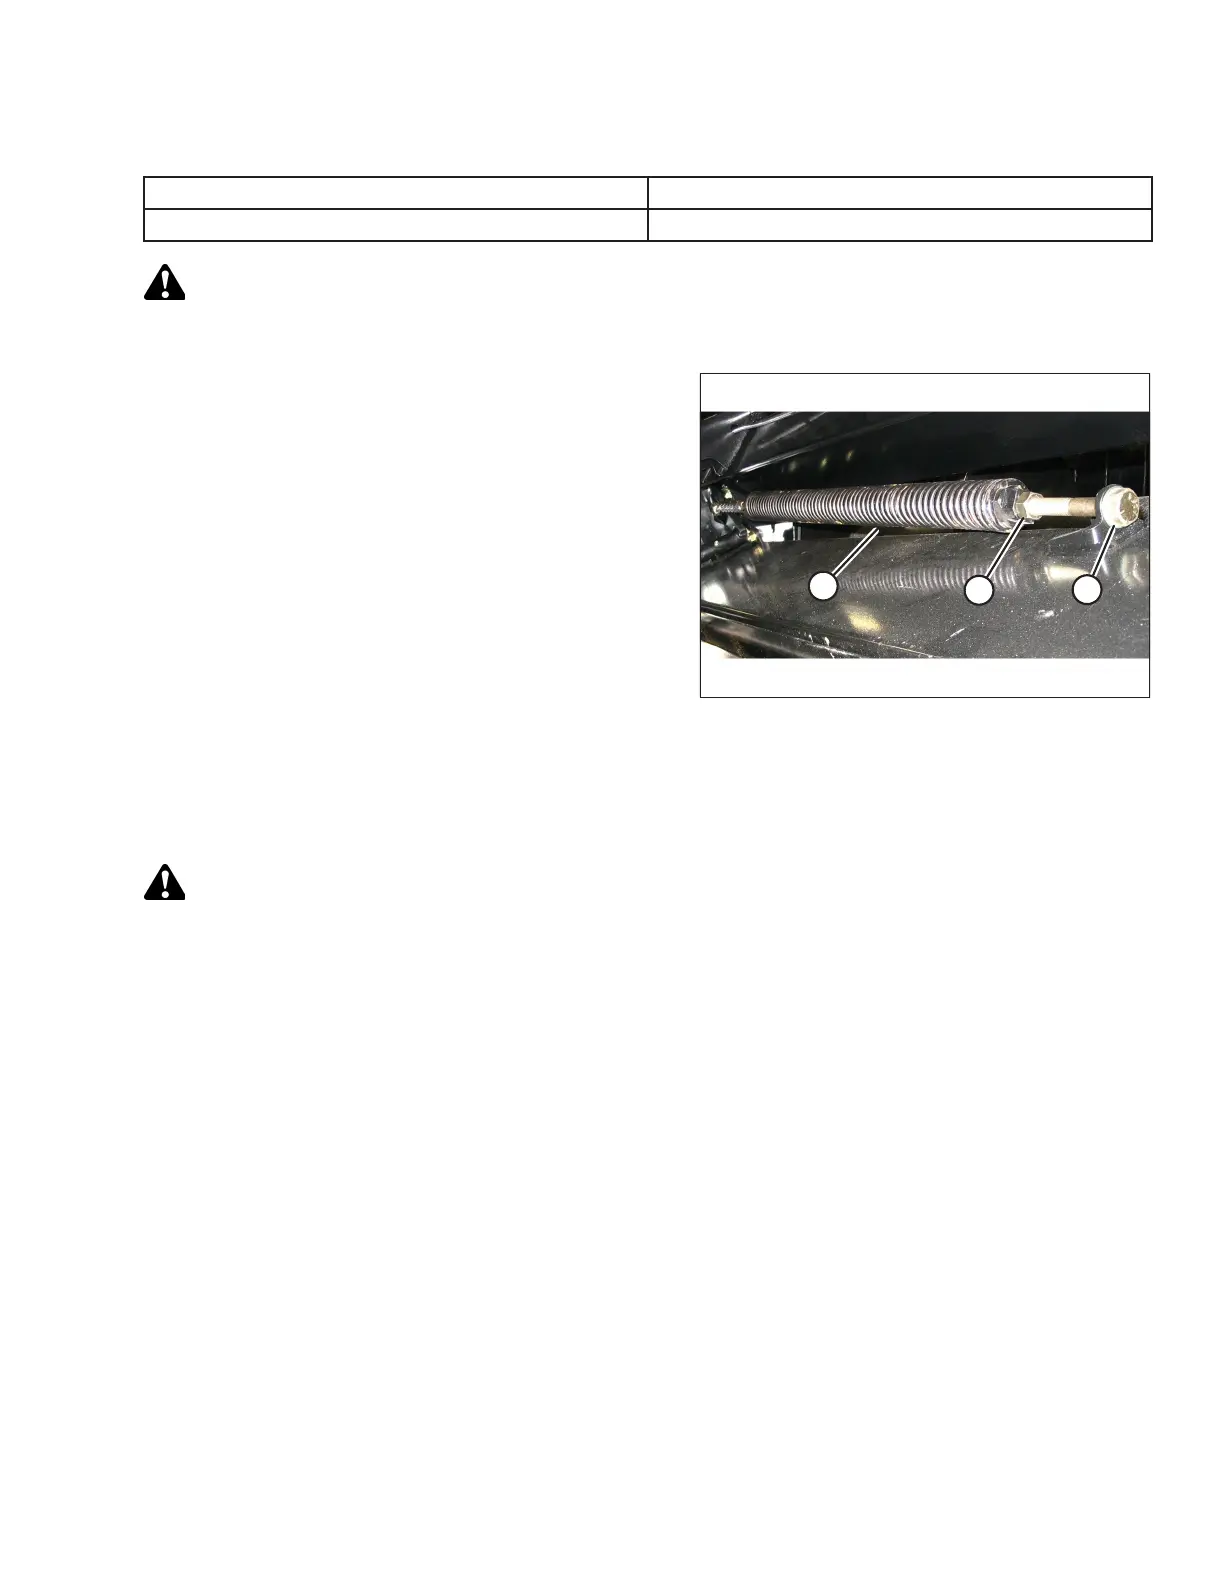
Figure 3.157: Roll Tension Spring
1. Lower the header fully.
2. Shut down the engine, and remove the key from
the ignition.
3. To increase the roll tension, loosen jam nut (B) at spring
insert, and turn spring drawbolt (C) clockwise to tighten the
spring. Tighten jam nut (B).
4. To decrease the roll tension, loosen jam nut (B) at spring
insert, and turn spring drawbolt (C) counterclockwise to
loosen the spring. Tighten jam nut (B).
3.8.15 Positioning Forming Shields
The position of the forming shields controls the width and placement of the windrow.
WARNING
Keep hands and feet away from discharge opening. Keep everyone several hundred feet away from your operation.
Never direct the discharge toward anyone. Stones or other foreign objects can be ejected with force.
The decision on forming shield position (settings between 915–2346 mm [36–92 in.]) should be made based on the
following factors:
• Weather conditions (rain, sun, humidity, wind)
• Type and yield of the crop
• Drying time available
• Method of processing (green feed, bales, silage)
A wider windrow will generally dry faster and more evenly, resulting in less protein loss. Fast drying is especially important
in areas where the weather allows only a few days to cut and bale. Refer to 3.14 Haying Tips, page 122 for more
information.
Where weather conditions permit or when drying is not critical, for example, when cutting for silage or green feed, a
narrower windrow may be preferred for ease of pick up.
OPERATION