262334 162 Revision A
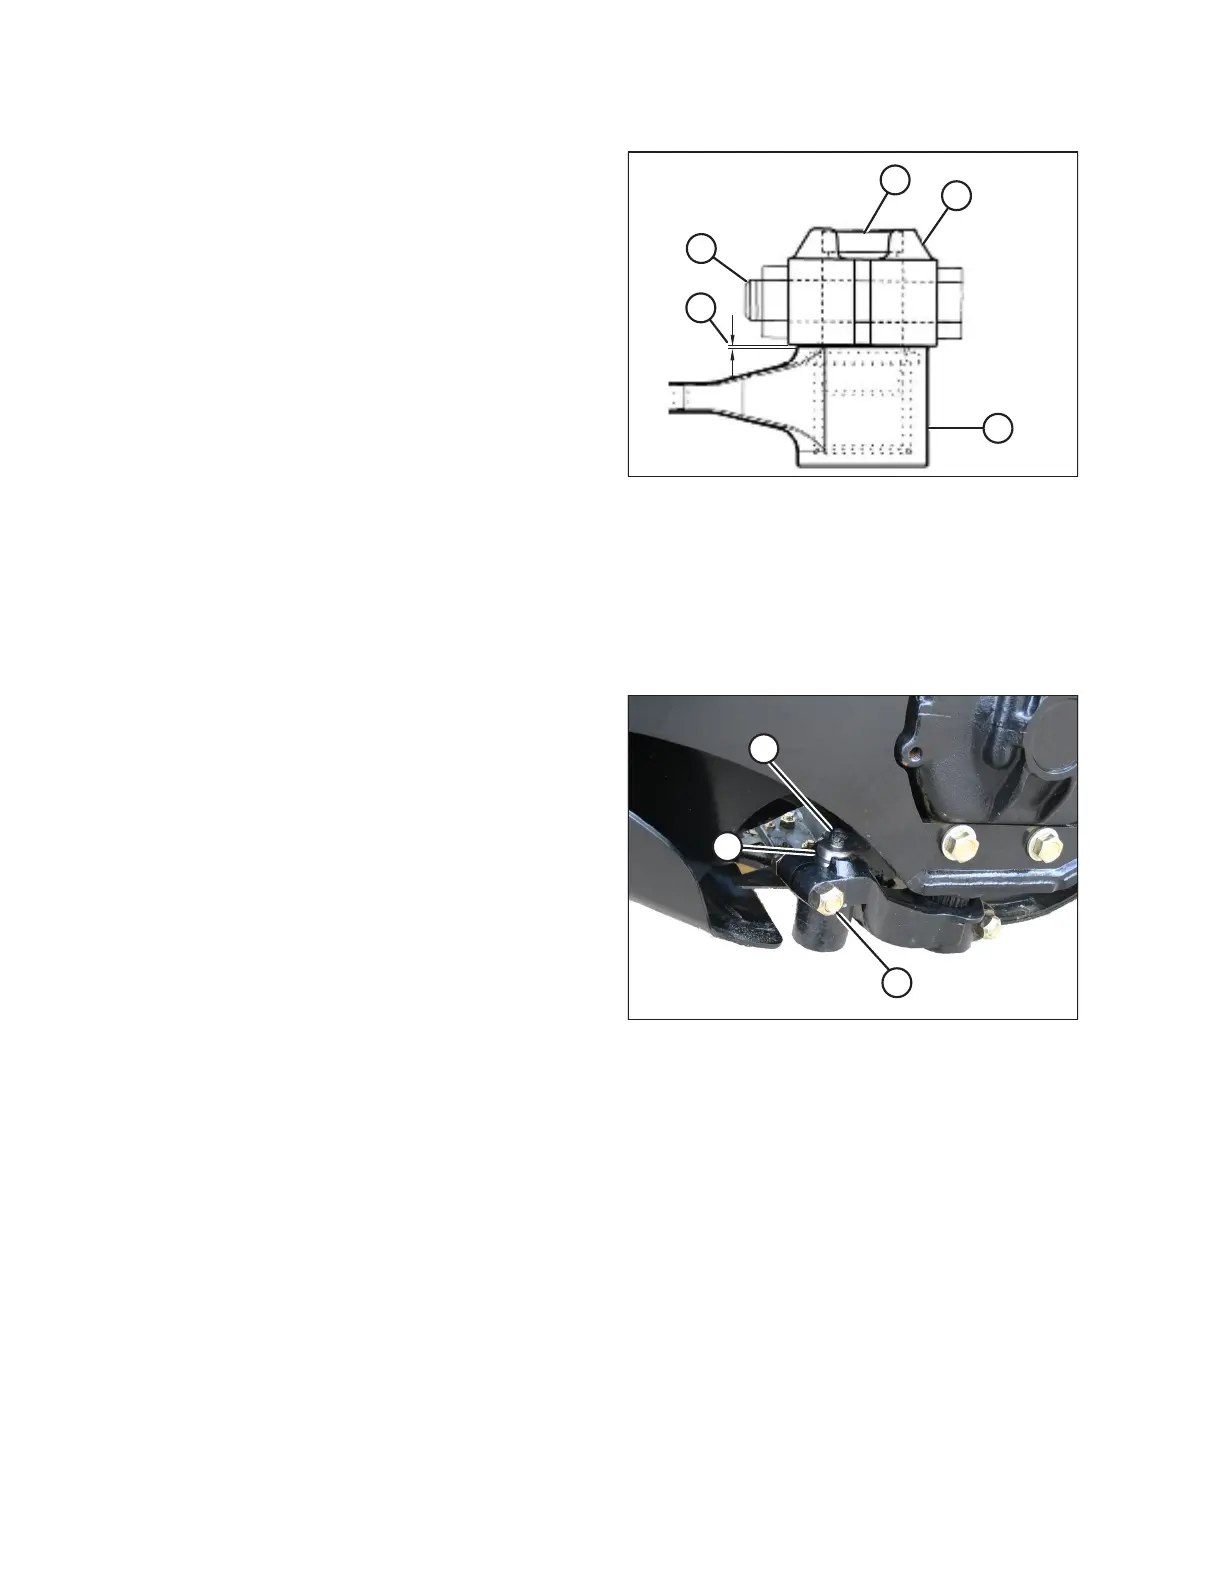
Figure 4.56: Knifehead
A - Knifehead Pin B - Knifehead C - Pitman Arm
D - Gap: 0.25 mm (0.010 in.) E - Bolt
6. Slide pitman arm (C) up or down on the shaft until it just
contacts knifehead (B) (0.25 mm [0.010 in.]) gap.
7. Install bolt (E) and nut, and torque the hardware to 217 Nm
(160 lbf·ft).
8. Align knifehead (B) with pitman arm (C).
9. Install knifehead pin (A) in pitman arm (C), and tap it down
into the knifehead, ensuring the pin is bottomed out in the
knifehead.
NOTE:
It may be necessary to temporarily remove the grease
fitting from the knifehead during installation of the
knifehead pin. This will allow any trapped air to escape and
knifehead pin will seat correctly.
10. Tap the underside of the knifehead until the pin is flush
with the upper face of the pitman arm (C).
11. Carefully adjust to achieve a 0.25 mm (0.010 in.) gap at (D)
with the knife laying flat on the first few guards.
Figure 4.57: Knifehead
12. Replace bolt (C) and nut.
13. Tighten the nut to 220 Nm (160 lbf·ft).
14. Replace knifehead pin (B).
15. Replace grease fitting (A) in the pin.
16. Install the drive belt onto the knife drive box pulley and
tighten it. Refer to the following sections:
• Checking and Adjusting Left Timing Belt Tension, page
169
• Checking/Adjusting V-Belt Tension on Left Side, page
167
• Checking and Adjusting Right Timing Belt Tension, page
172
MAINTENANCE AND SERVICING