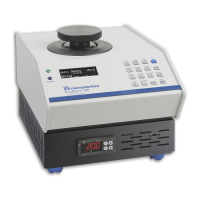
3 Operate the Smart VacPrep
10. Install the safety shield.
11. Press the Select button for the port to be degassed. Ablue LED is lit.
12. Press the Start button on the Smart VacPrep panel to start the degas process for all ports that
have a blue LED lit.
13. When degassing is complete and the sample has cooled, the sample can be transferred to an ana-
lysis port.
LOAD QUICKSTART DEGAS CONDITIONS INTO A SAMPLE FILE
QuickStart Degas Conditions can be copied into a sample file. Reference the Degas Conditions section
of the analyzer Operator Manual.
Field or Button Description
Close Closes the active window.
Copy QuickStart Degas
Conditions from the
Smart VacPrep Unit
Use to copy the degas conditions settings from the selected Smart
VacPrep unit and port.
Degas Conditions Use to browse for a .DEG file that contains degas condition parameters
to be used in the analysis.
Heating Phase This option is applicable when degassing with either a Smart VacPrep or
a SmartPrep.
Enter up to five stages of degas conditions.
l Temperature. Degas temperature.
l Temperature Ramp Rate. Rate at which the temperature is to
change.
l Time. Amount of time to heat the sample.
Use to modify the table contents.
l Insert. Inserts one row above the selected row.
l Delete. Deletes the selected row.
l Clear. Clears all table entries and displays only one default value.
l Append. Inserts one row at the end of the table.
Degas Conditions Fields and Buttons Table
3 - 4 Smart VacPrep Operator Manual
 Loading...
