Final Adjustments
3-28 Manual # 42-02-2P24
Analog Weigher Output Wiring
For analog weighers:
1. Connect the EMCO terminal labeled “Com” to the controller 1 bus.
2. Connect the 0 - 10V output to the I/O 16 / LW+ input of the UIO board shown in your
job prints.
Relay Closure Output Wiring
For relay closure outputs:
1. Refer to your job prints.
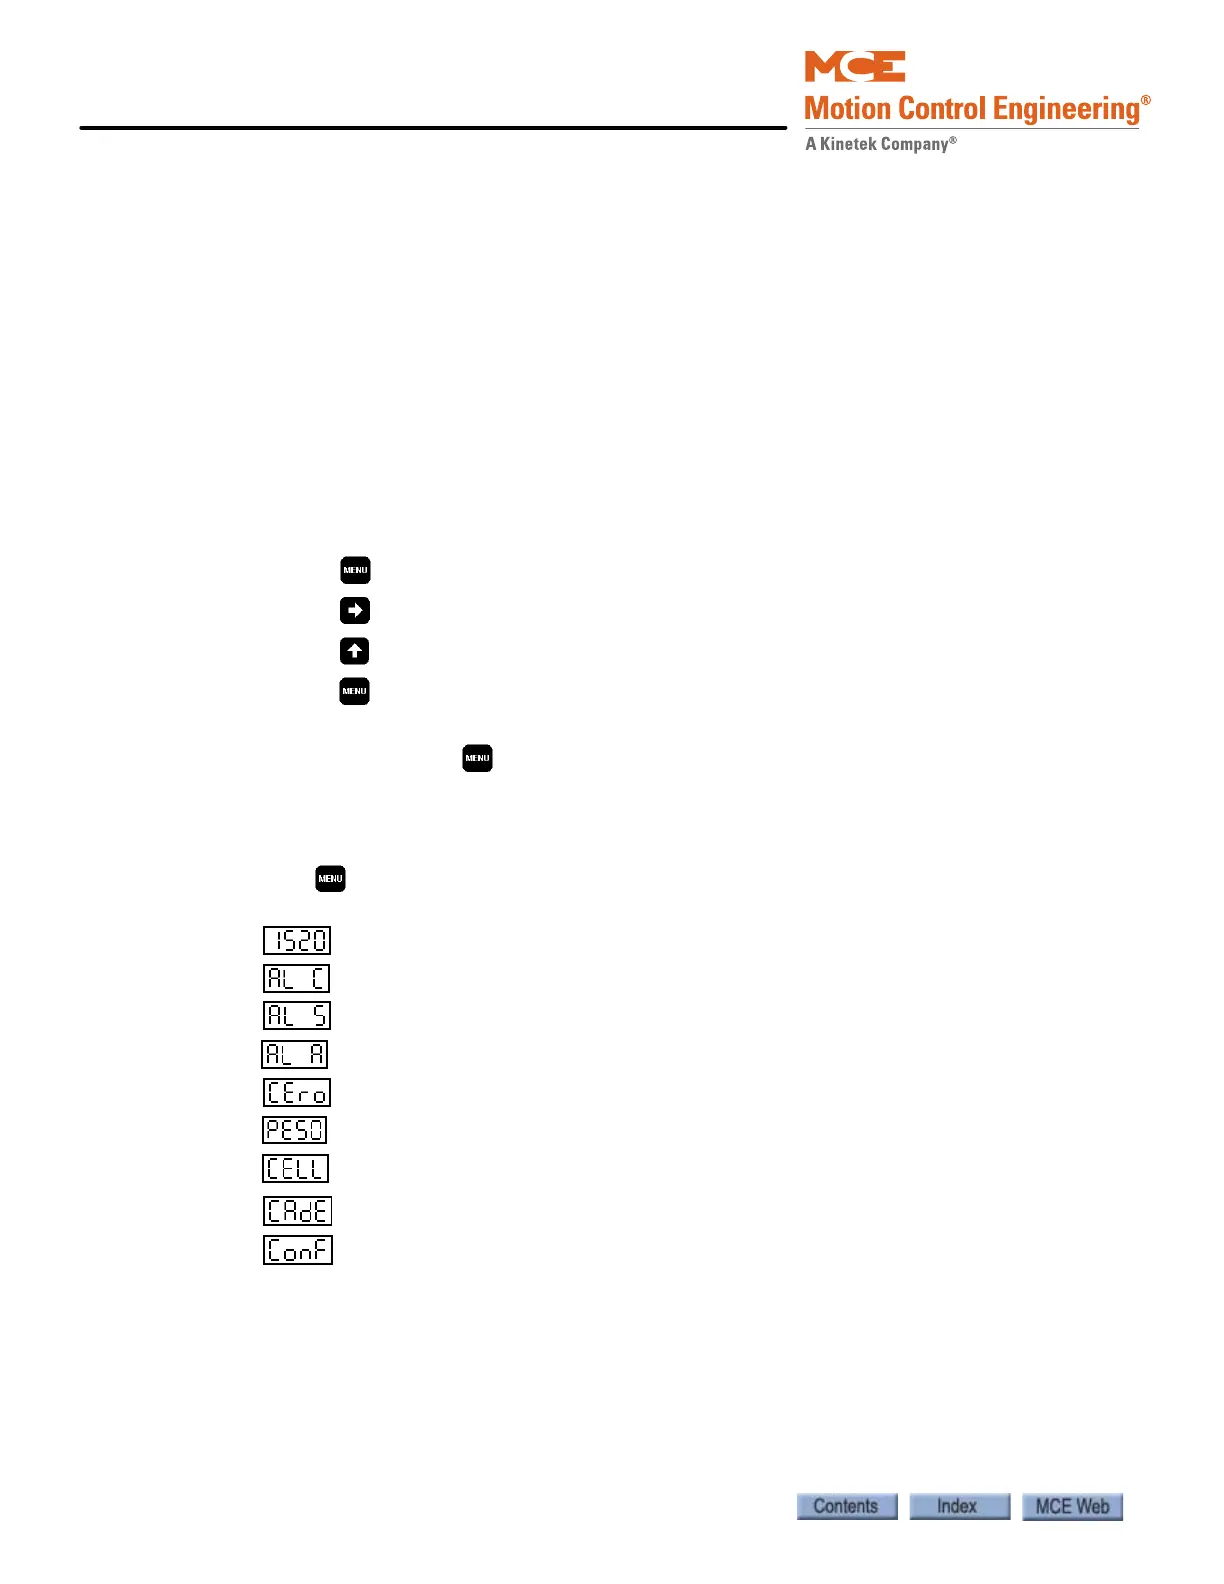
Controls Overview
Use control unit buttons to program the weigher:
• Press the menu button until the desired parameter is displayed.
• Press the button to select the digit to be modified (digit blinks when selected).
• Press the button to change the digit.
• Press the menu button twice to save the new value. Once a value is saved, the control
will display the next parameter.
• If you do not press the menu button twice, the changes will not be stored and the con-
trol display will continue to show the parameter you were previously modifying.
Menu Order
Pressing the menu button will scroll through the Installation Menu in the following order:
Measured weight in car (value displayed varies with load in car)
Relay C set point (also sets the analog output 10Vdc reference value)
Relay S set point
Relay A set point
Learn empty car weight (Zero weight)
Learn full load weight (Calibrate with Weights)
(not used)
Auto zero calibration (used as required)
Confirmation