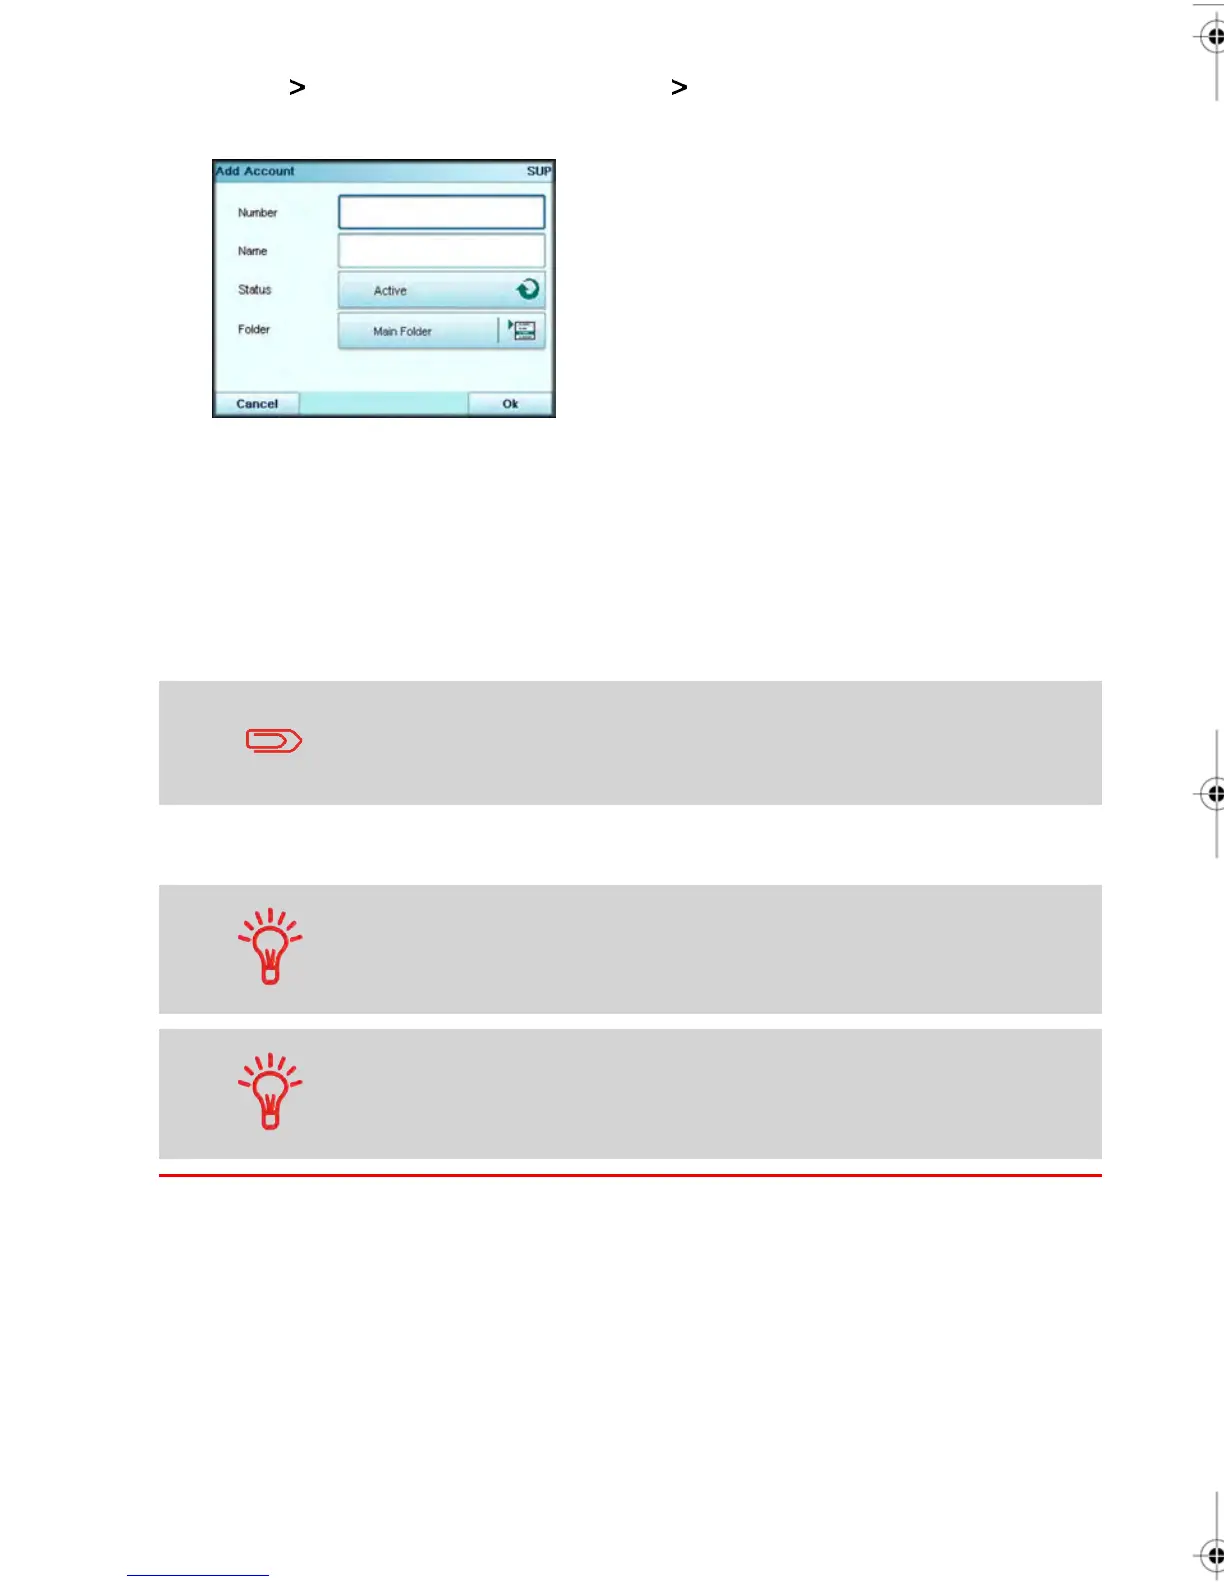
2. Select Add Acct/Group and then select Add account (or type 1 ).
The Add Account Screen appears.
3. Enter the Account Number and Name using the keypad and press [OK]. Select the
Account Status (the key displays the current status: active or inactive).
Press the Screen to change all fields as needed.
4. To move an Account into a Group other than the Root , select the Folder key, then
select a Group or Subgroup from the list and press[OK] .
5. Once the Add Account Screen appears, press [OK].
Adding Budget and Surcharge settings to your Accounts is only
available when the Advanced Reporting option is activated. See
Budget and Surcharge Preferences on page 135 for details.
6. Press [OK] to confirm the creation of the Account.
You can also import a list of Accounts. See Importing/Exporting
Account Lists on page 125.
Users can only use active accounts. If necessary, as long as your
accounting structure is not complete, you can create accounts
without activating them.
122
| Page 122 | | janv.-12-2012 11:42 |

 Loading...