Install a PCIe Riser Into PCIe Slot 1 or 2
2.
Retrieve the PCIe riser and any PCIe cards attached to it.
3.
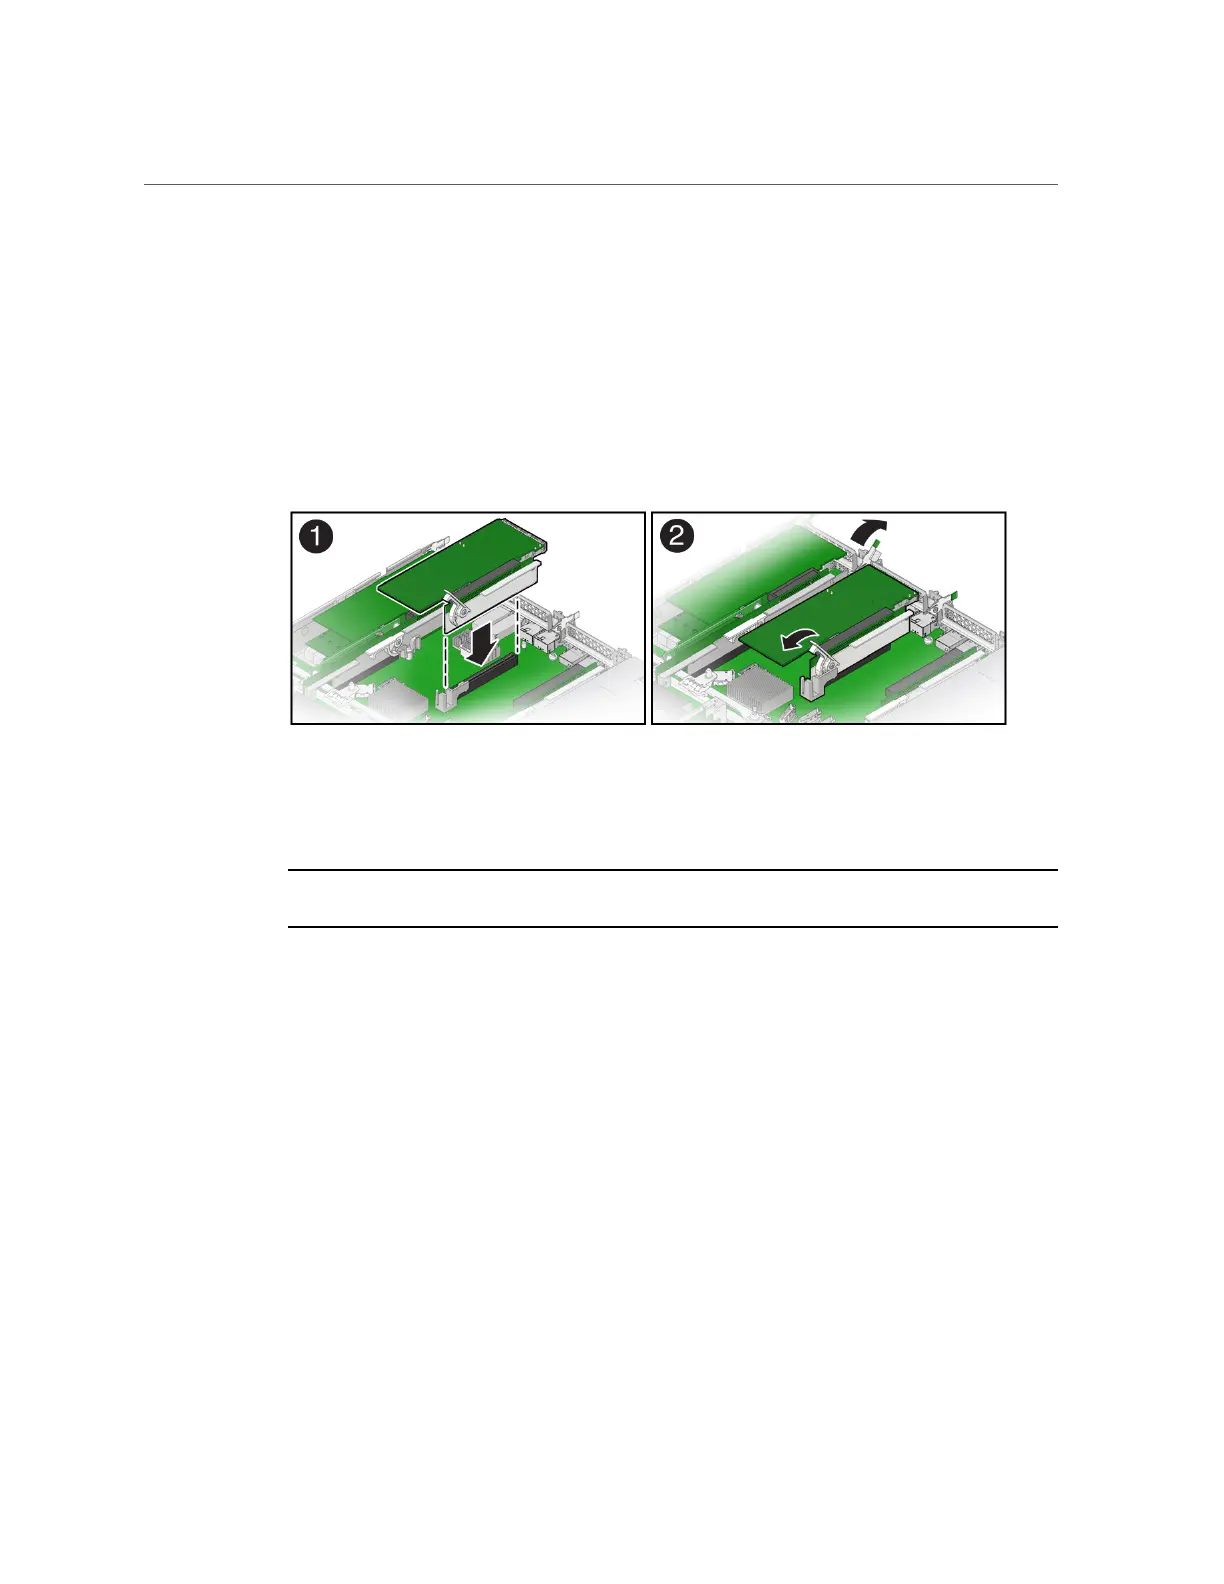
Raise the green-tabbed release lever on the PCIe riser to the open (up) position
[1].
4.
Gently press the riser into the motherboard connector until it is seated, and
then press the green-tabbed release lever on the PCIe riser to the closed (down)
position [1, 2].
5.
Close the green-tabbed latch on the rear of the server chassis next to the
applicable PCIe slot to secure the rear bracket on the PCIe card to the server
chassis [2].
Note - If the riser does not have a PCIe card installed, install a PCIe slot filler panel and close
the green-tabbed latch to secure the filler panel.
6.
If there were any external cables connected to the PCIe card, reconnect them.
7.
Return the server to operation.
a.
Install the server top cover.
See “Install the Server Top Cover” on page 210.
b.
Return the server to the normal rack position.
See “Return the Server to the Normal Rack Position” on page 212.
c.
Reconnect the power cords to the server power supplies and reconnect the
data cables.
See “Reconnect Data Cables and Power Cords” on page 214.
Servicing PCIe Risers (CRU) 115