Install the PCIe Riser Into PCIe Slots 3 and 4
9.
Place the riser on an antistatic mat.
Related Information
■
“Install the PCIe Riser Into PCIe Slots 3 and 4” on page 118
■
“Install a PCIe Card in PCIe Slot 3” on page 125
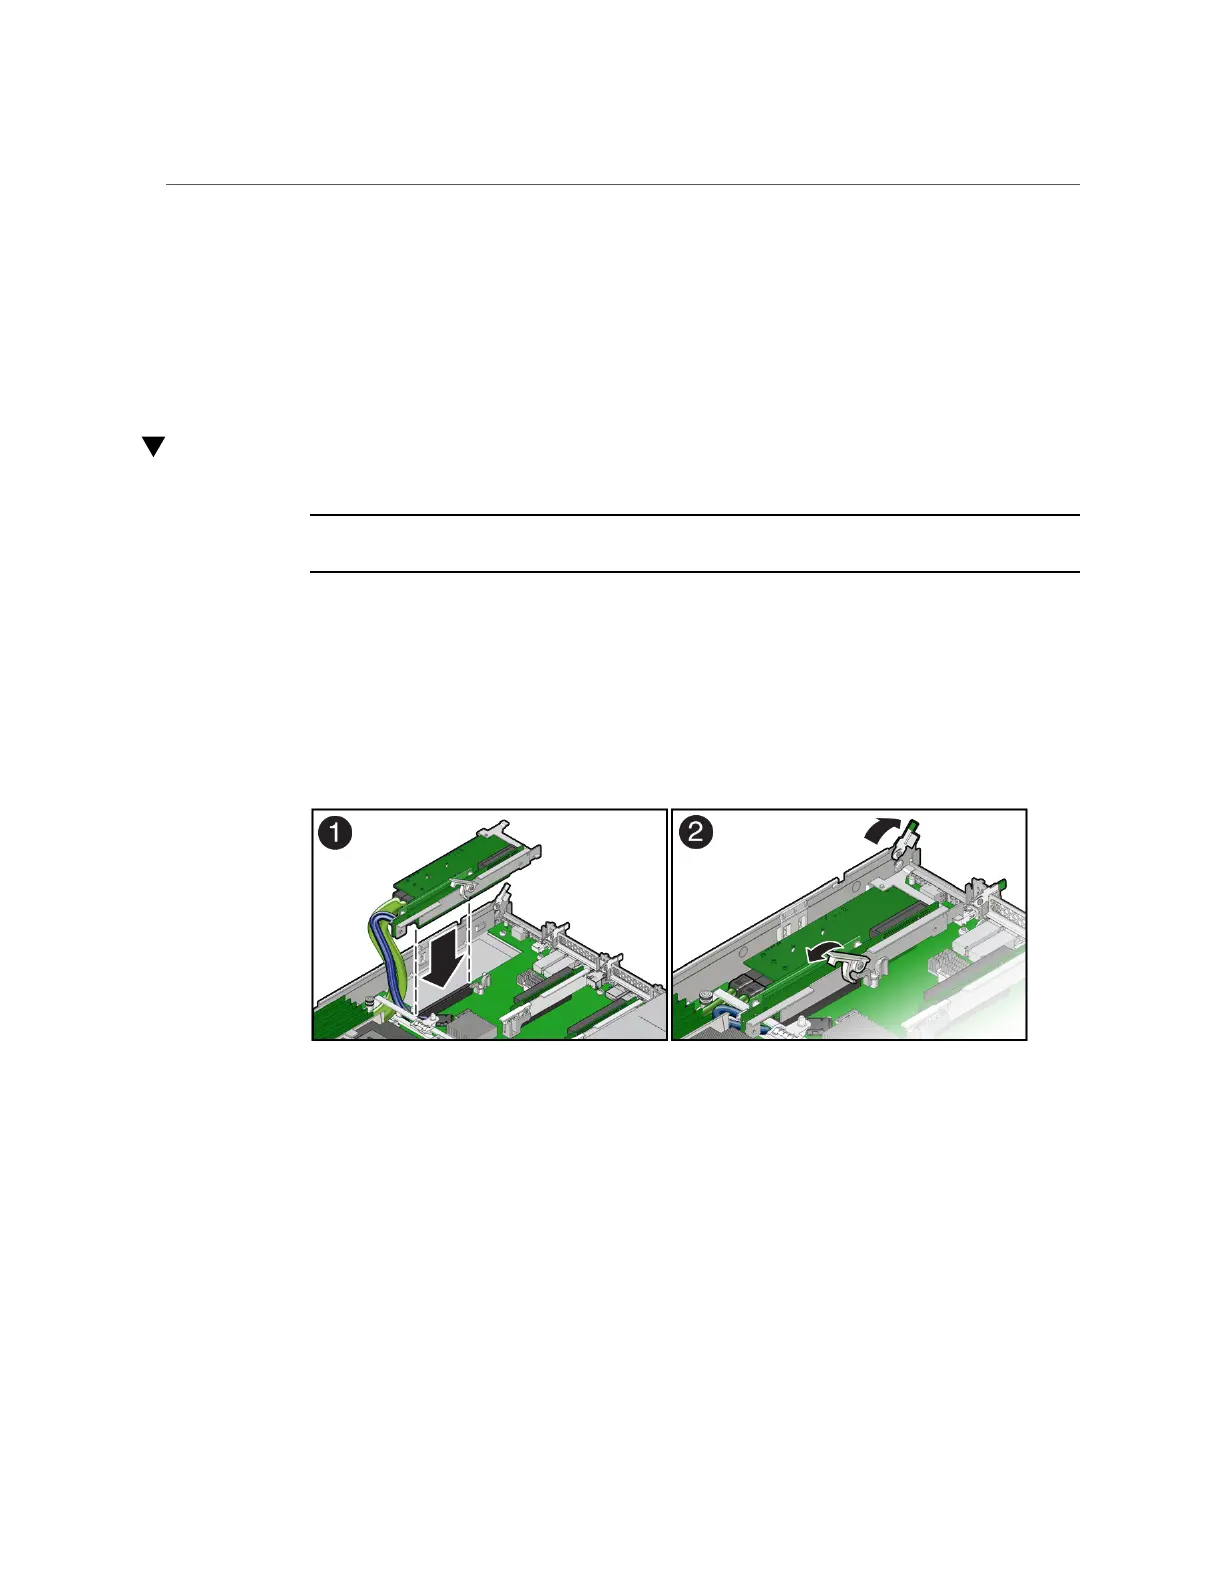
Install the PCIe Riser Into PCIe Slots 3 and 4
Note - The PCIe riser in slots 3 and 4 is different than the PCIe risers in slots 1 and 2. Do not
attempt to install a PCIe riser from slot 1 or 2 into PCIe slots 3 and 4 and vice versa.
1.
Retrieve the PCIe riser and any PCIe cards attached to it.
2.
Reconnect the SAS cables and the super capacitor cable to the internal HBA
card in slot 4.
To ensure SAS cables are properly connected to the internal HBA card, see “Install the Internal
HBA Cables” on page 182.
3.
Reconnect the M.2 SATA cable between the PCIe riser and the motherboard
SATA connector.
4.
Raise the green-tabbed release lever on the PCIe riser to the open (up) position,
and then gently press the riser into the motherboard connector until it is seated
[1].
5.
Ensure that the rear bracket on the internal HBA card in PCIe slot 4 is connected
to the slot in the server chassis side wall.
118 Oracle Server X7-2 Service Manual • October 2017