Install a PCIe Riser Into PCIe Slot 1 or 2
4.
Lift the green-tabbed latch on the rear of the server chassis next to the
applicable PCIe slot to release the rear bracket on the PCIe card [1].
Note - If the riser does not have a PCIe card installed, then lift the latch to release the PCIe slot
filler panel.
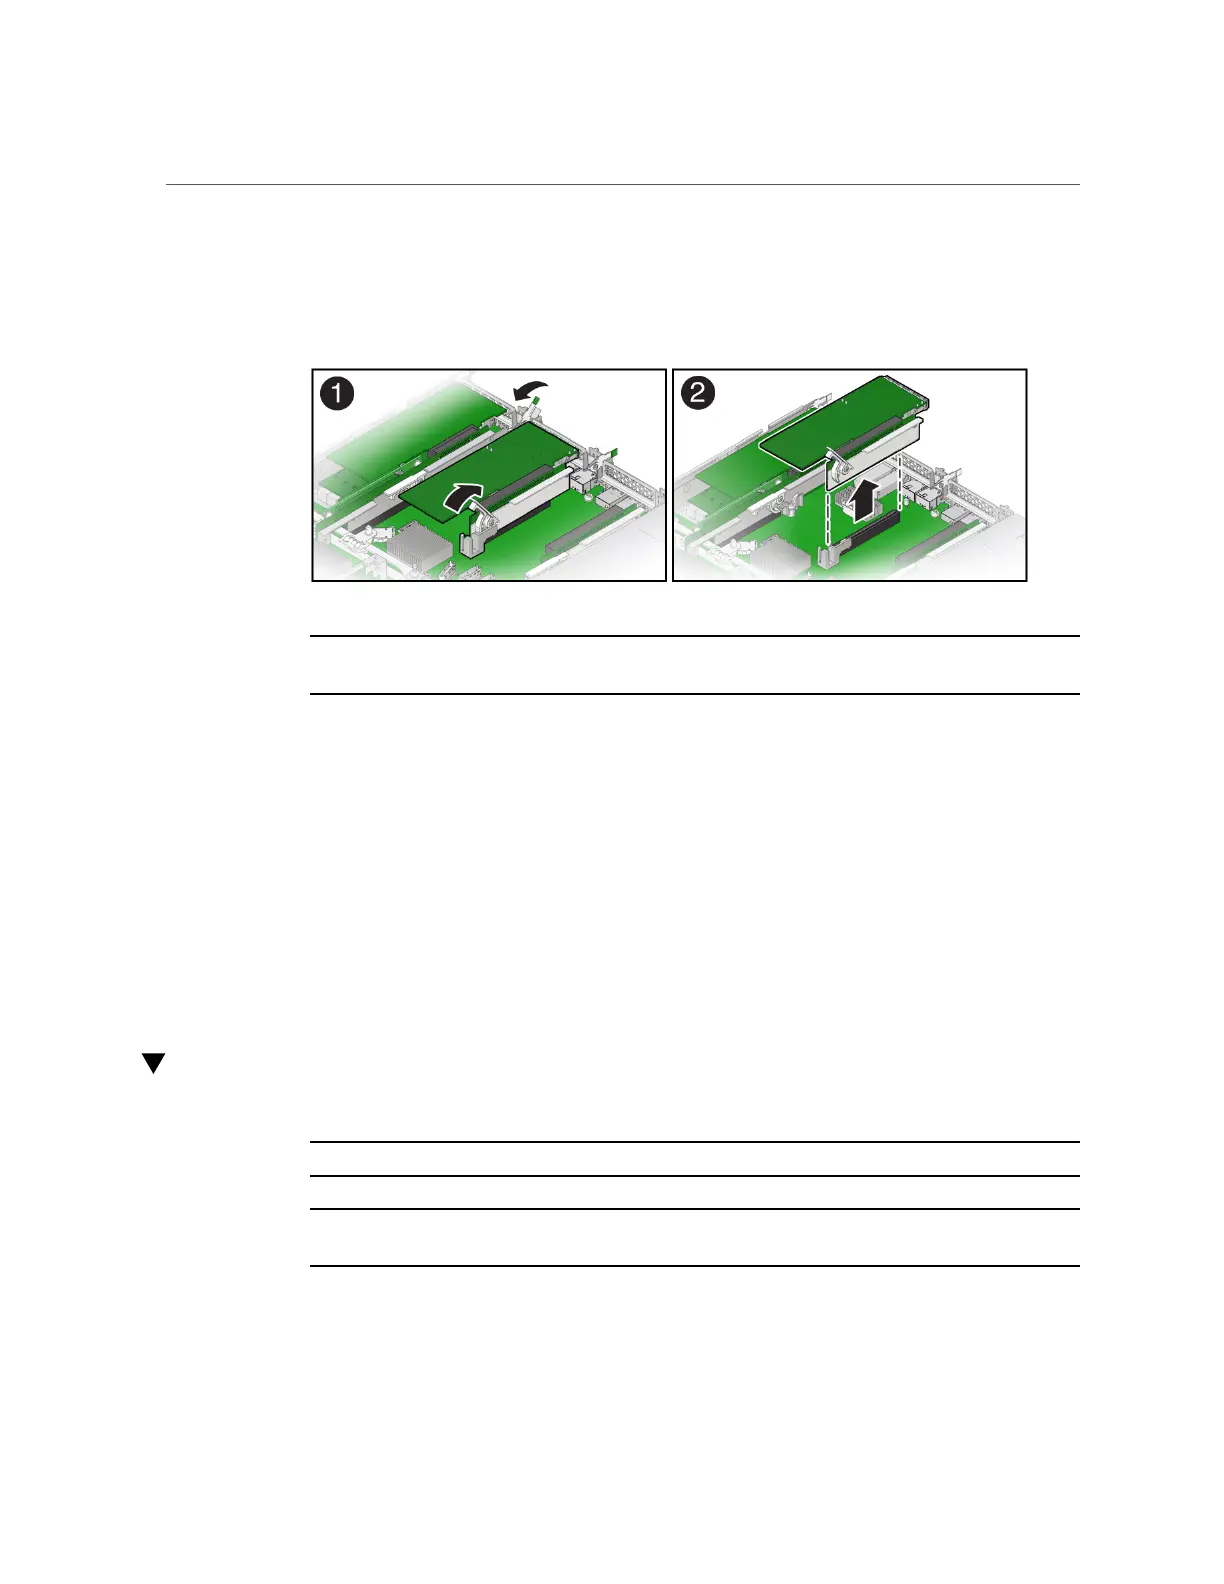
5.
Lift the green-tabbed riser release lever on the PCIe riser with one hand and use
your other hand to remove the riser from the motherboard connector [1, 2].
6.
If there is a PCIe card installed in the riser, place the riser on an antistatic mat
and note the slot in which the PCIe riser was originally installed; otherwise, set
the PCIe riser aside.
Related Information
■
“Install a PCIe Riser Into PCIe Slot 1 or 2” on page 114
■
“Install a PCIe Card in PCIe Slot 1 or 2” on page 123
Install a PCIe Riser Into PCIe Slot 1 or 2
Note - PCIe slot 1 is nonfunctional in single-processor systems.
Note - The PCIe riser in slots 3 and 4 is different than the PCIe risers in slots 1 and 2. Do not
attempt to install a PCIe riser from slot 1 or 2 into PCIe slots 3 and 4 and vice versa.
1.
Determine into which slot you will install the PCIe riser.
114 Oracle Server X7-2 Service Manual • October 2017