Return the Server to the Normal Rack Position
As you push the server into the rack, verify that the cable management arm (CMA) retracts
without binding.
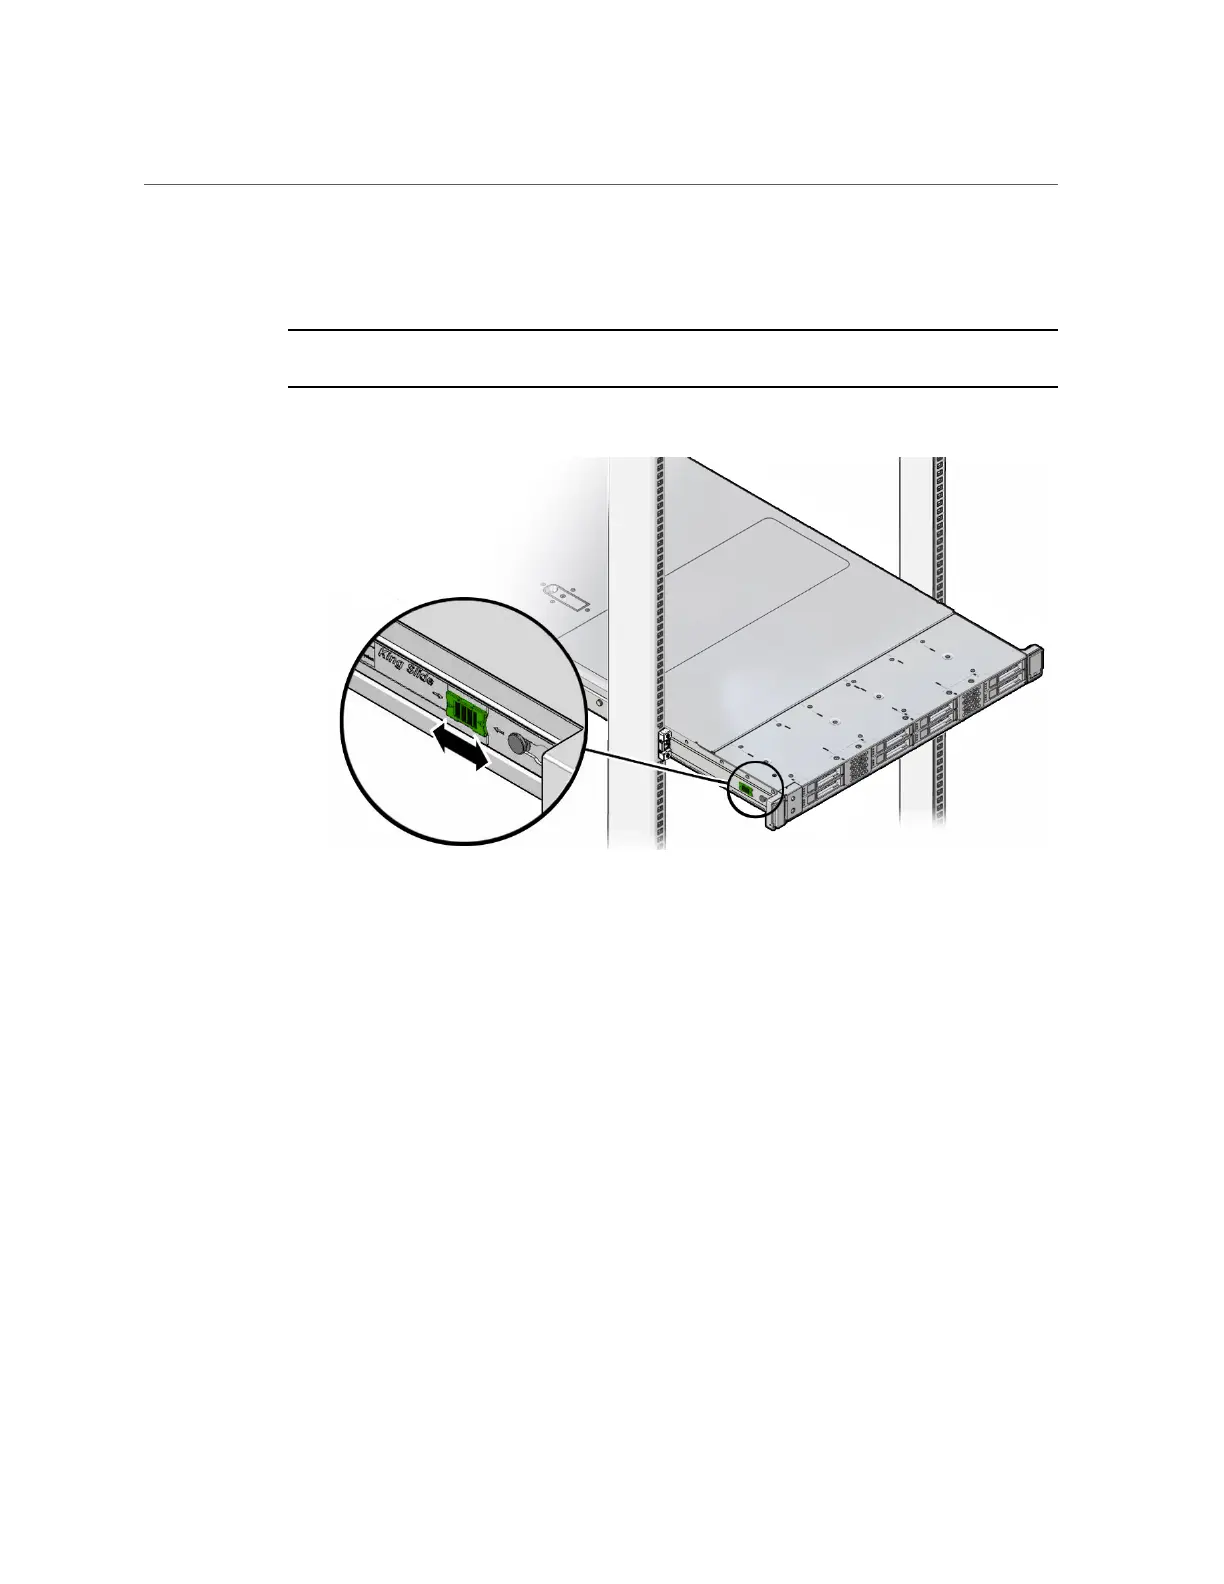
Note - To pull a green release tab, place your finger in the center of the tab, not on the end, and
apply pressure as you pull the tab toward the front of the server.
b.
Continue pushing the server into the rack until the slide-rail locks (on the
front of the server) engage the slide-rail assemblies.
You will hear an audible click when the server is in the normal rack position.
2.
If the CMA is not installed, that is, you removed it because you removed the
server completely out of the rack, install the CMA.
For installation instructions for the CMA, refer to “Install the Cable Management Arm
(Optional)” in Oracle Servers X7-2 and X7-2L Installation Guide.
3.
If the cables are disconnected from the back of the server, that is, you
disconnected the cables because you removed the server completely out of the
rack, reconnect the cables.
■
For instructions to reconnect cables to the back of the server, see “Reconnect Data Cables
and Power Cords” on page 214.
Returning the Server to Operation 213