Network eManager®
Network eManager Data Import/Export Features
2-52 Strata CIX Programming Vol.1 12/09
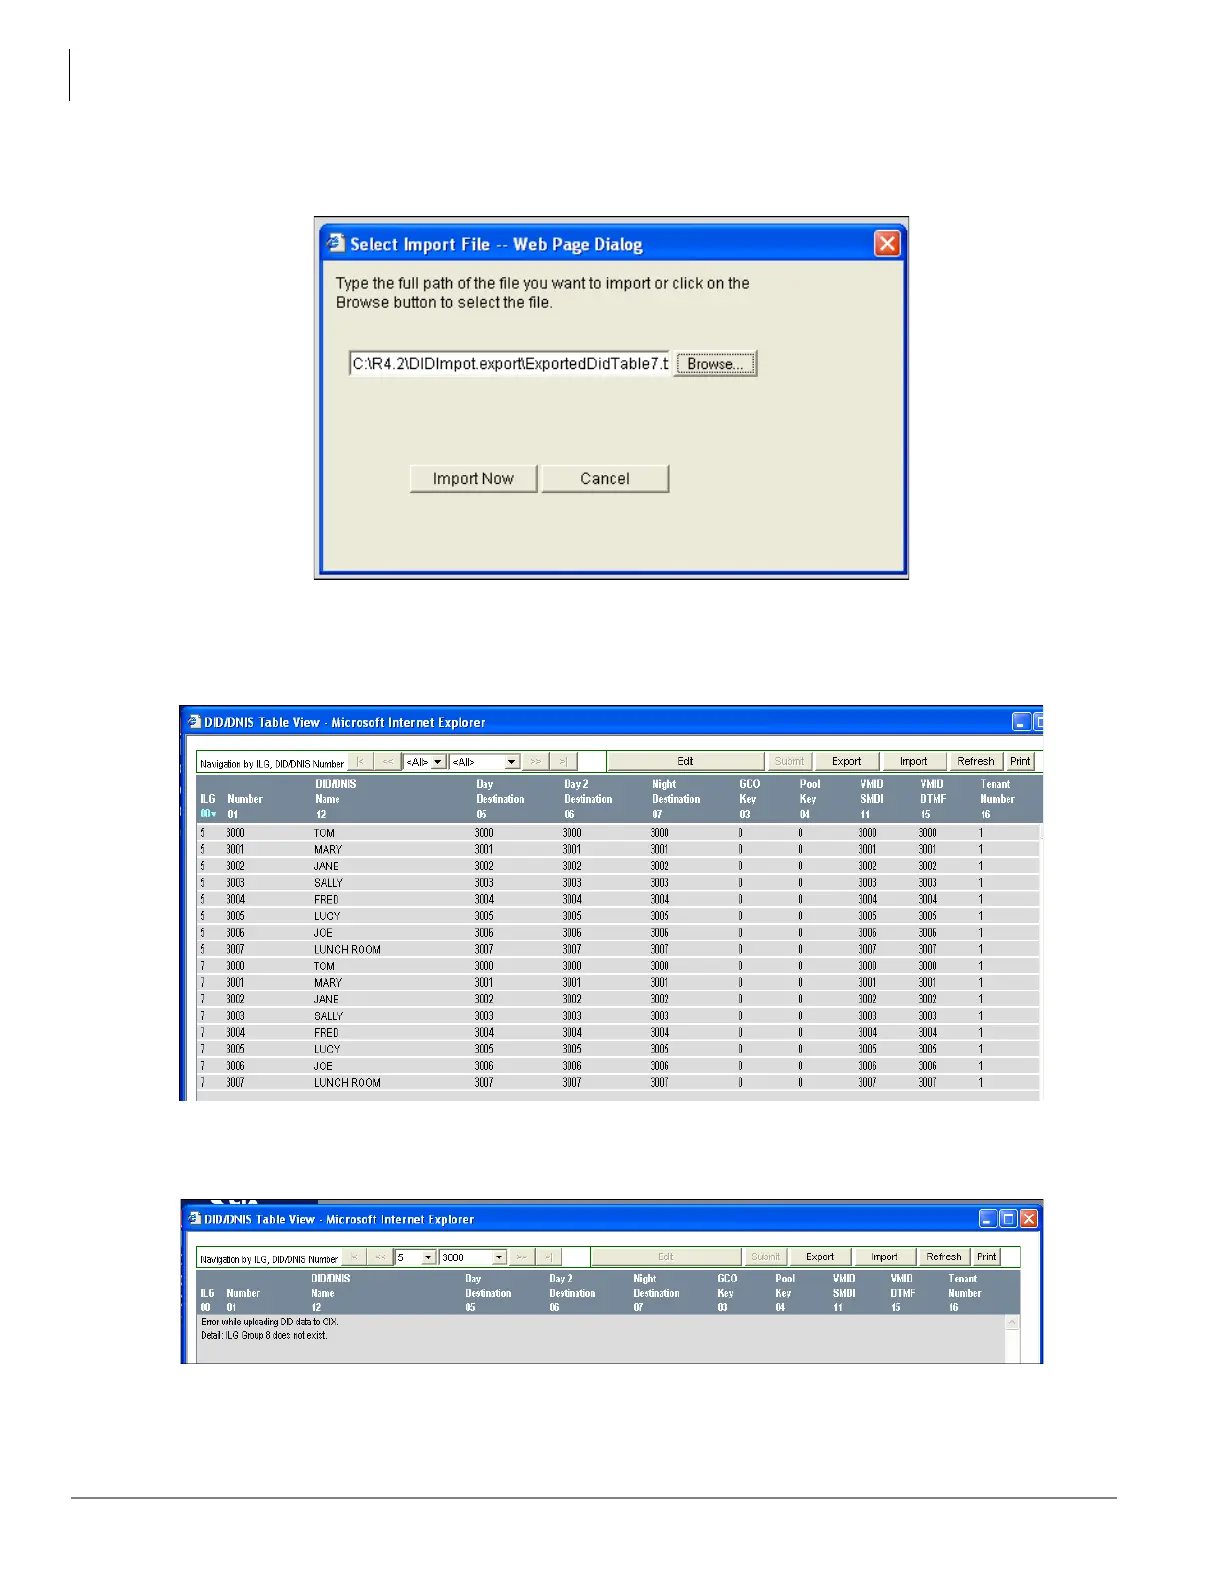
11. After selecting the ILG #7 file click on Open. The Network eManager Select Import File dialog box will
open. Click on Import Now. Network eManager will import and upload the ILG #7 data to the CIX.
12. In Network eManager, open the DID/DNIS Table View, select Trunk > DID/DNIS Table View and click
Refresh. All assignments for DID ILG Group 5 and 7 are displayed. This means that all of
ILG #5 DID assignments have been applied to ILG #7 in the CIX database.
13. If you failed to create ILG #7 in Step 5 with the correct number of DID digits in Program 309 -11 the
following error message will be presented on the Table View screen.