96
DISPLAYING TOMOGRAMS
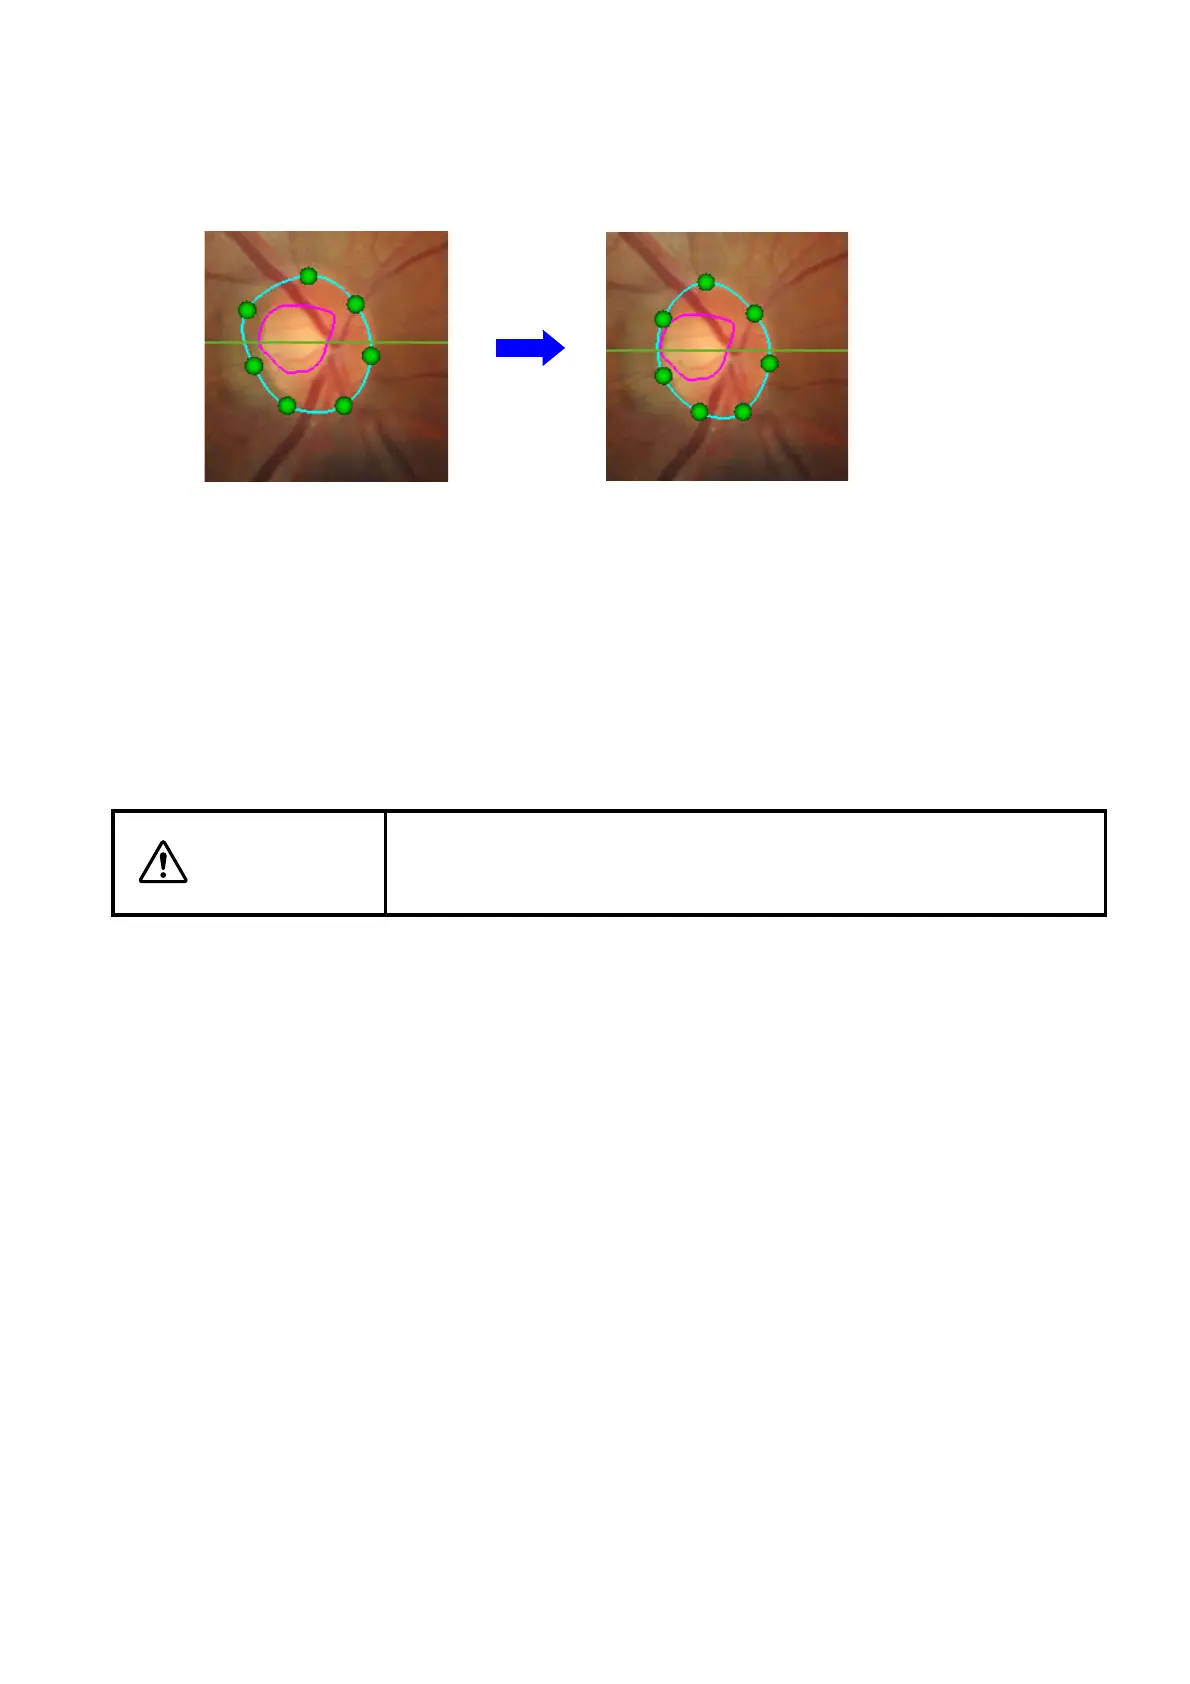
Using the mouse, drag the modification point to an optional position. The modification point cannot be
moved to the outside of the scan area. After dragging the modification point, the image is automatically
modified so that the "Disc" edge line can pass the modification point. (The following figures are the exam-
ple of "Modify (Point7)".
[Disc Modify]: You can select one of "Modify (Point7)" and "Modify (Point18)".
[Exit Modify]: Saves the modification and exits from the "Disc Modify" mode. After finishing, the recal-
culation result is displayed on "Fundus". When pressing the [Save] button, the result is
saved.
[Cancel]: Discards the modification and exits from the "Disc Modify" mode. The check message
is displayed. Press [OK]. The modification is not validated and the system returns to
the status before "Disc Modify" starts.
CAUTION
When you have reanalyzed the data modified manually, the data modi-
fied manually are erased and the "Disc" calculated automatically by the
analysis mode set in the "OCTSet Analysis" tab on P.219 is applied.
Drag an optional modification point. After moving and dragging,
modification is performed.