RemovingandInstallingtheAuxiliaryHydraulicValveManifold(continued)
9.Operatetheauxiliaryvalve.Checkforhydraulicleaksandcorrectif
necessary.
10.Checkthehydraulicuidlevelandadjustifnecessarybeforereturningthe
machinetoservice.
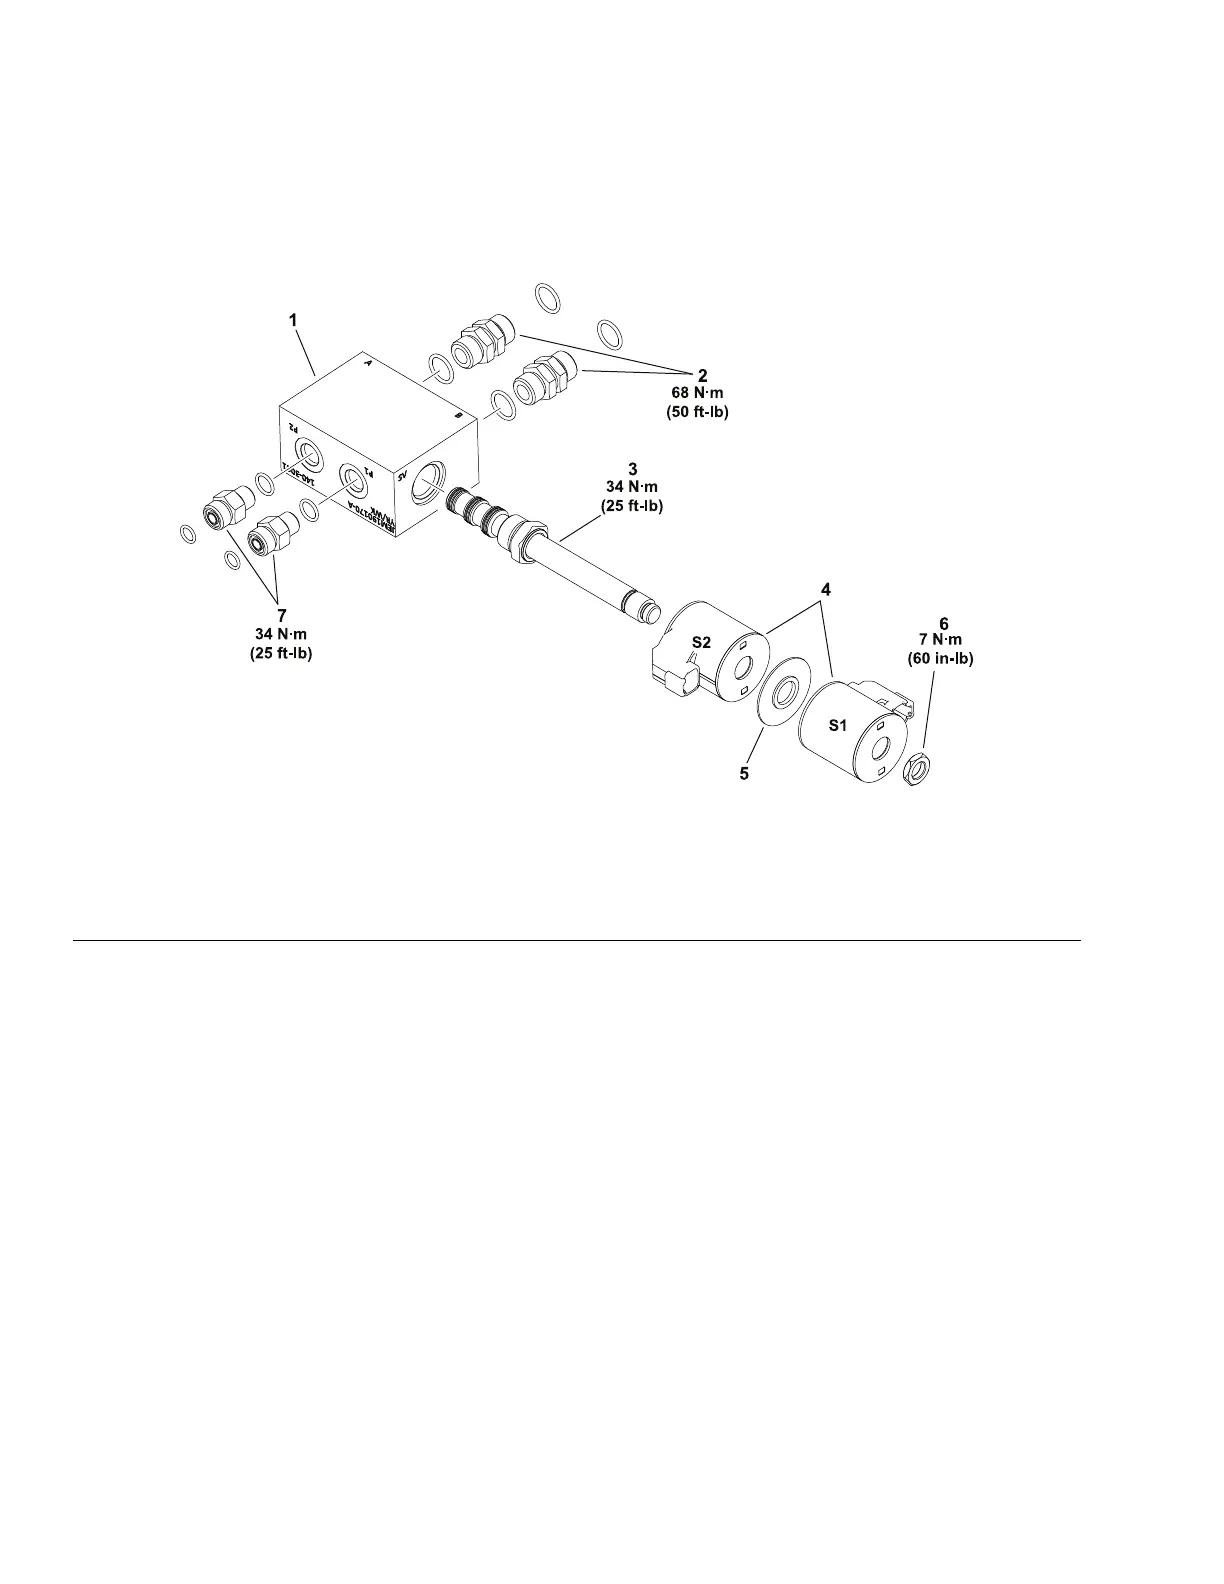
ServicingtheAuxiliaryHydraulicValveManifold
g303601
Figure73
1.Manifold4.Solenoidcoil(2each)7.Straighttting(2each)
2.Uniontting(2each)5.Coilspacer
3.Cartridgevalve6.Coilnut
Theportsonthemanifoldaremarkedforeasyidenticationofcomponents
andconnections;refertothehydraulicschematicinAppendixA(pageA–1)to
identifythefunctionofthecartridgevalveandhydrauliclinesateachport.
Forcartridgevalveserviceprocedures,refertoCartridgeValveService(page
5–93).
1.Markthettingorientationtoallowforcorrectassemblyandremovethe
quickdisconnectttings.
2.Removethemanifoldbracket.
3.Ifhydraulicttingsaretoberemovedfromthemanifold,markthetting
orientationtoallowforcorrectassembly.Removethettingsfromthe
manifoldanddiscardtheO−rings.
4.LubricatenewO-ringsandplacethemontothettings.Ifpreviouslyremoved,
installthettingsintothevalveports;refertoInstallingtheHydraulicFittings
(SAEStraightThreadO-RingFittings)(page5–9).
5.Installthemanifoldbracketandquickdisconnectttings.
HydraulicSystem:ServiceandRepairs
Page5–106
Groundsmaster
®
3200,3300and3310
19240SLRevA