RemovingtheSteeringColumn(continued)
6.Slidetherubberbellowsupthesteeringcolumntogetaccesstothefasteners
thatsecurethesteeringcolumntothemachine.
Note:Donotallowthesteeringcontrolvalvetohangfromthehydrauliclines.
7.Supportthesteeringcontrolvalveandremovethe4fastenerssecuringthe
steeringcontrolvalvetothesteeringcolumn.
8.Removethe4fastenerssecuringthesteeringcolumntothemachineframe
andslidethesteeringcolumnfromthesteeringcontrolvalve.
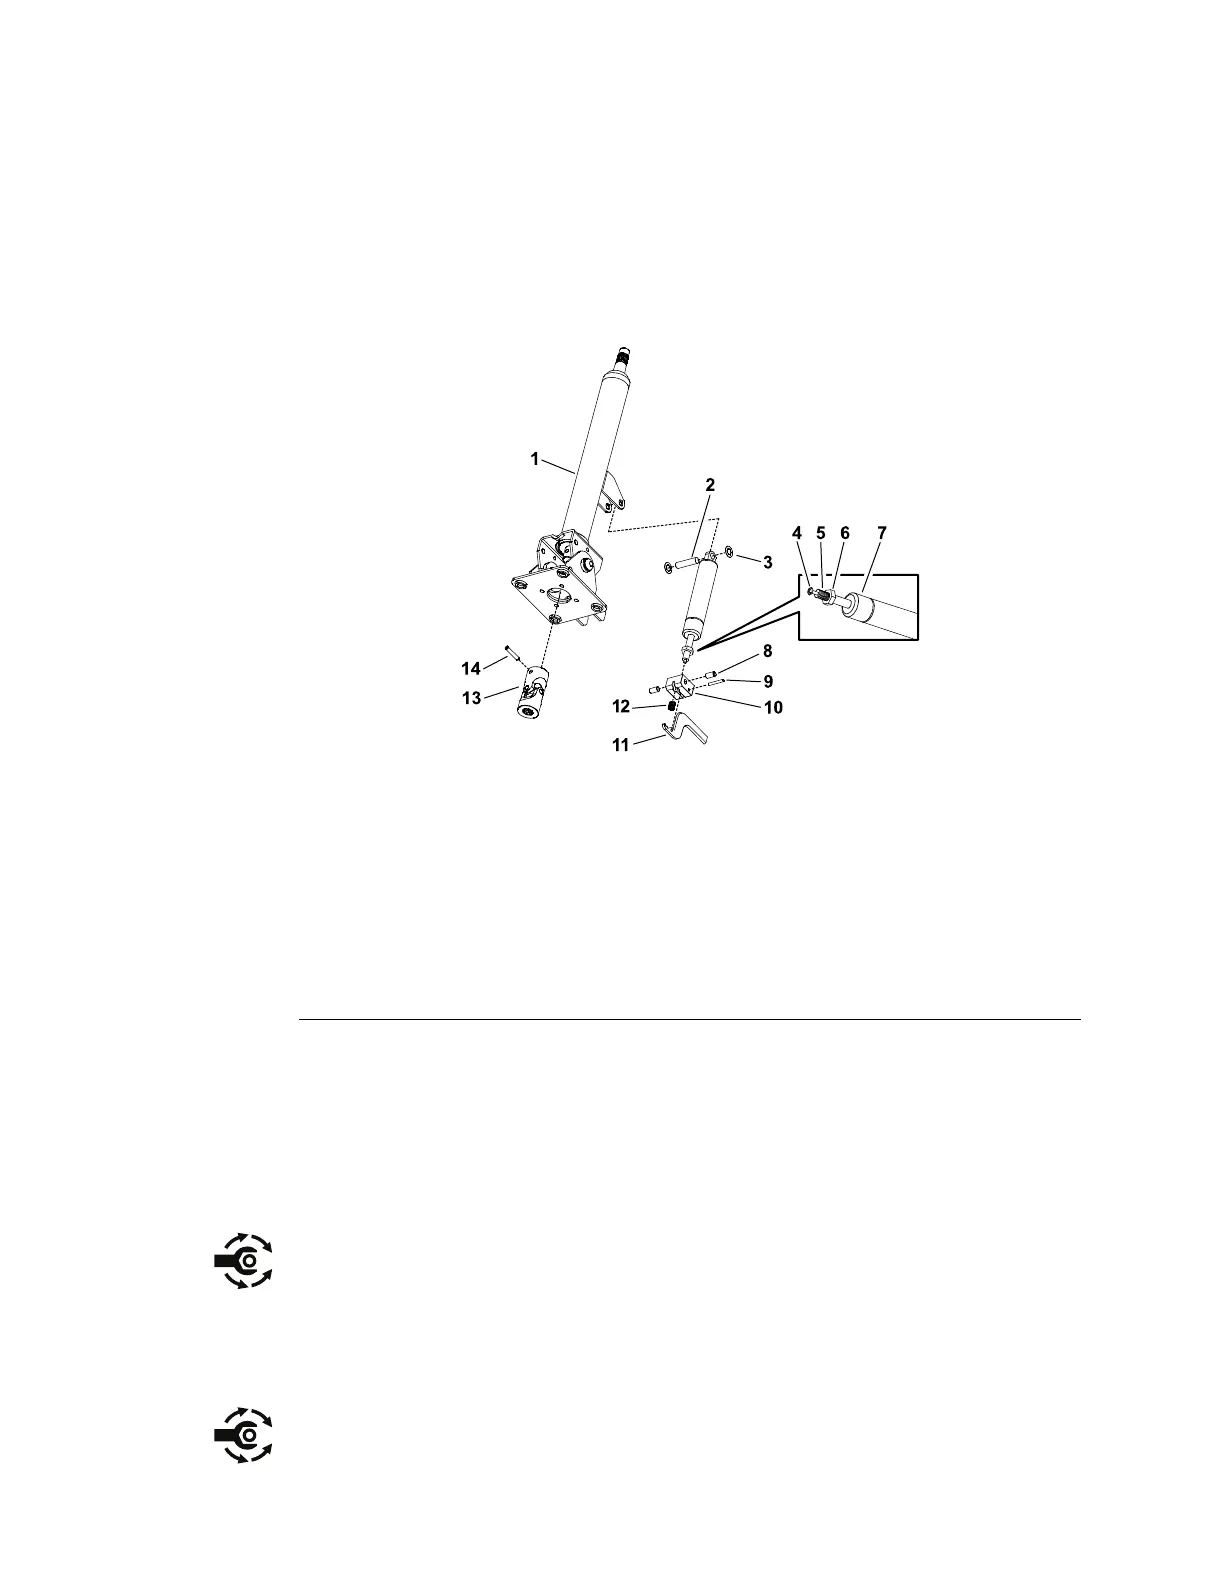
9.Disassemblethesteeringcolumnassemblyasnecessary;refertoFigure118.
g278374
Figure118
1.Steeringcolumn8.Bolt(2each)
2.Pin9.Pin
3.Lockwasher(2each)
10.Pedalblock
4.Releasepin11.Pedal
5.Cylindershaft12.Spring
6.Jamnut13.Universaljoint
7.Cylinder
14.Pin
InstallingtheSteeringColumn
1.Assemblethesteeringcolumn;refertoFigure118.
2.Afterassembly,ensurethatthereleasepinontheendofthecylindershaftis
positionedagainstthepedal.Thejamnutonthecylindershaftcanbeused
toadjustthelocationofthereleasepin.
3.InstallthesteeringtowerusingFigure117asaguide.
4.Tightenthefastenerssecuringthesteeringcontrolvalvetothesteering
columnfrom11to13N·m(96to120in-lb).
5.Installthesteeringcover.
6.Applyasmallamountofanti-seizelubricanttothesplinesofthesteering
columnandinstallthefoamcollarandthesteeringwheel.
Chassis:ServiceandRepairs
Page7–14
Groundsmaster
®
3200,3300and3310
19240SLRevA